The ultimate mountain bike tune up checklist: a comprehensive guide to ensuring peak performanceCategoriesBike

The Ultimate Mountain Bike Tune Up Checklist: A Comprehensive Guide to Ensuring Peak Performance

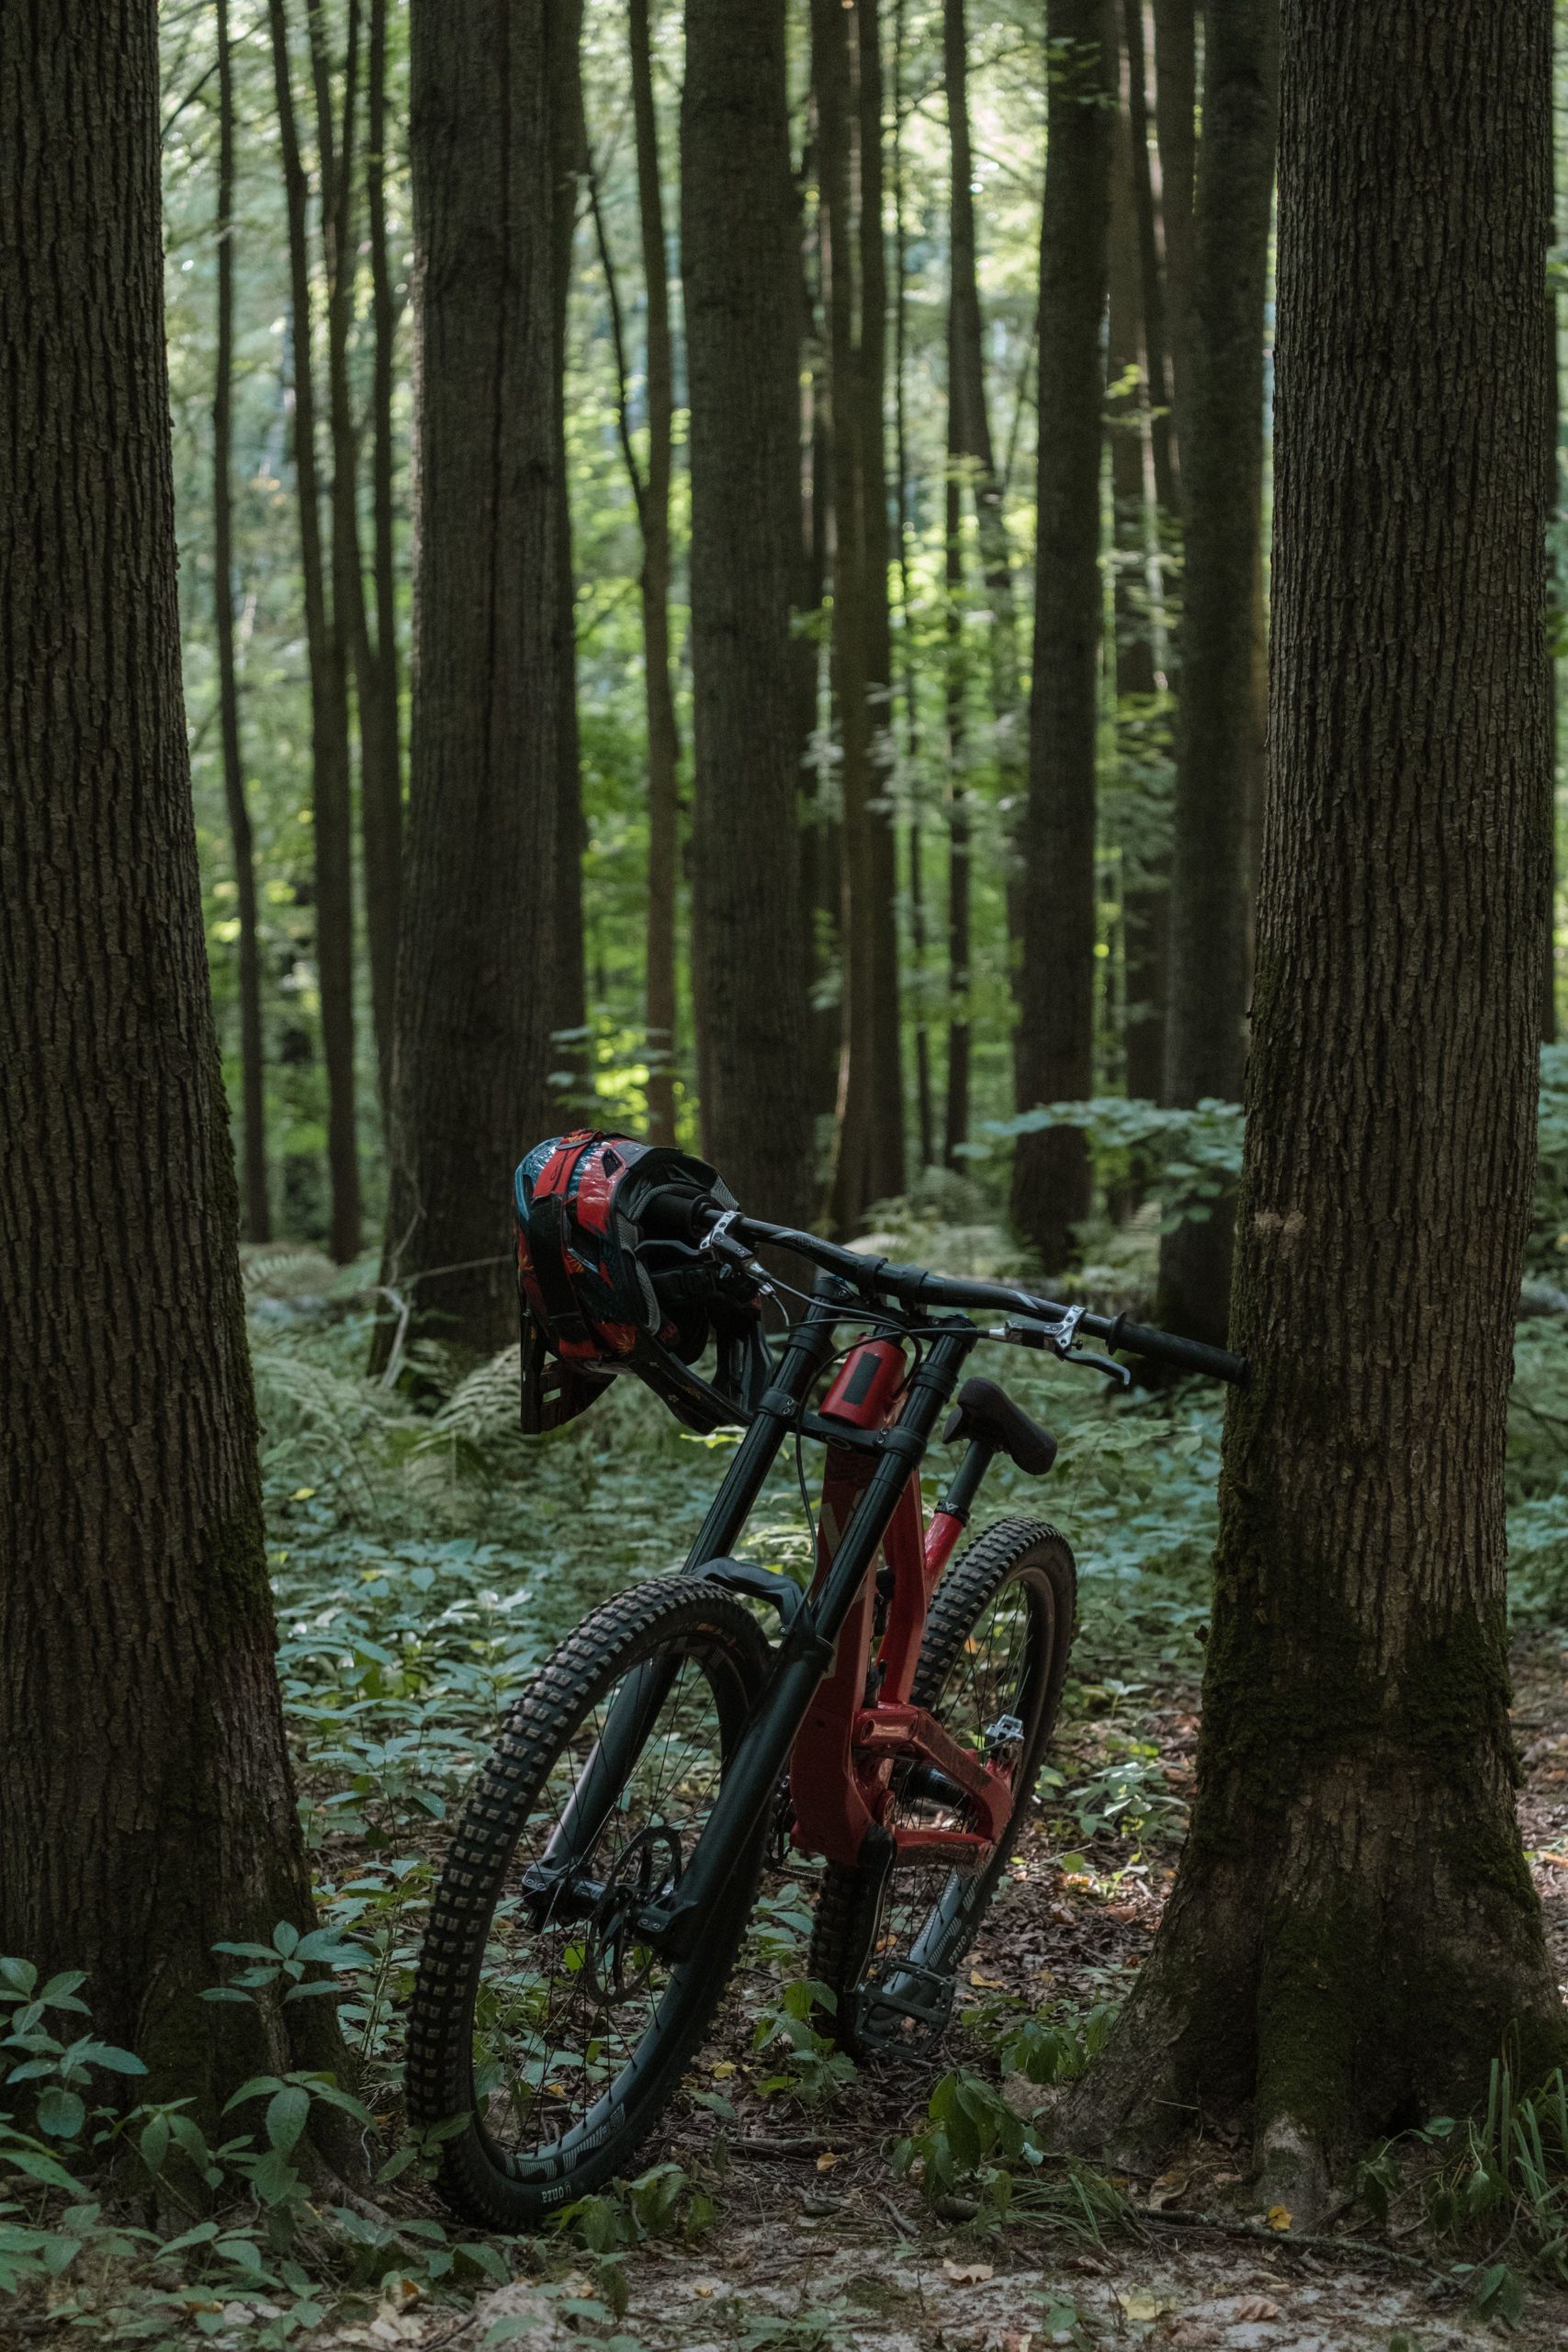
Mountain Bike Tune Up Checklist! Are you ready to take your mountain biking experience to new heights? The key to unlocking peak performance lies in a well-maintained and finely-tuned mountain bike. Whether you’re a beginner or a seasoned rider, our ultimate tune-up checklist is here to guide you through essential maintenance tasks and advanced tuning techniques. Get ready to elevate your ride and ensure that your mountain bike is in top condition for your next thrilling adventure.

Pre-Ride Inspection:

Before hitting the trails, start with a thorough pre-ride inspection. Check for any visible damage, loose bolts, or worn-out components. Inspect your tires, brakes, and suspension system. Addressing issues at this stage can prevent more significant problems down the line.

Clean and Lubricate:

A clean bike is a happy bike. Regularly clean your mountain bike to remove dirt, mud, and debris that can affect performance. After cleaning, make sure to lubricate the chain, derailleurs, and other moving parts. This not only improves efficiency but also extends the lifespan of your components.

Brake System Check:

 Your safety depends on the effectiveness of your brakes. Inspect brake pads for wear and replace them if needed. Check brake fluid levels in hydraulic systems and ensure proper brake lever responsiveness. A well-functioning brake system is crucial for navigating challenging terrains with confidence.

Gear Shifting and Drivetrain:

 Smooth gear shifting is essential for conquering various terrains. Inspect the drivetrain for any signs of wear, and adjust the gears accordingly. Lubricate the chain and ensure that the derailleurs are properly aligned. A well-tuned drivetrain enhances your bike’s overall performance.

Suspension Setup:

Fine-tune your suspension settings based on your riding style, weight, and the type of terrain you’ll be tackling. Adjust the sag, rebound, and compression to optimize comfort and control. If you’re unsure about the settings, consider consulting your bike’s manual or seeking professional advice.

Wheel Inspection and Truing:

Inspect your wheels for any loose spokes, dents, or damage. Check for proper tire inflation and ensure that your wheels spin true. Wheel truing may be necessary to correct any wobbles, contributing to a smoother and more efficient ride.

Check Bearing Systems:

Bearings play a crucial role in the smooth operation of various bike components. Check and grease headset, bottom bracket, and hub bearings. Replacing worn-out bearings prevents unnecessary friction, ensuring a smoother ride and prolonging the life of your bike.

Frame and Component Torque Check:

Ensure that all bolts and fasteners on your bike are tightened to the manufacturer’s specifications. A torque wrench can be handy for this task. Pay special attention to critical areas such as the handlebars, stem, seatpost, and pedals. Proper torque prevents unnecessary stress on components and ensures your safety during rides.

Raise your mountain biking experience by incorporating our ultimate tune-up checklist into your regular maintenance routine. Whether you’re a beginner or an experienced rider, taking the time to address these key areas will ensure that your mountain bike delivers peak performance on every trail. Don’t just ride—conquer the mountains with confidence, knowing that your bike is finely-tuned and ready for any adventure that comes your way. Happy trails!

The ultimate mountain bike tune up checklist: a comprehensive guide to ensuring peak performance

Introduction to Mountain Bike Tune-Up

Embarking on a mountain biking journey is not just about conquering challenging terrains; it’s a holistic experience that involves the rider and their trusty steed working seamlessly in tandem. Introducing the concept of a mountain bike tune-up is akin to investing in the longevity, performance, and safety of your two-wheeled companion. In this section, we delve into the importance of regular maintenance and explore the myriad benefits that a well-tuned bike can offer to riders of all skill levels.

Importance of Regular Maintenance

Imagine tackling steep descents, navigating rocky trails, or powering through muddy terrains with a bike that hasn’t received the attention it deserves. Regular maintenance is the foundation of a reliable and high-performance mountain bike. Beyond preventing breakdowns and ride interruptions, consistent care ensures that your bike operates at its full potential, enhancing your overall riding experience.

Preventing Costly Repairs

Neglecting maintenance can lead to minor issues snowballing into major repairs. Regular checks and tune-ups allow you to catch and address problems early, preventing them from evolving into costly fixes. A stitch in time indeed saves nine, and the same principle applies to bike maintenance.

Ensuring Safety on the Trails

 Mountain biking is an exhilarating sport, but it comes with inherent risks, especially when tackling challenging terrains. Regular maintenance ensures that your brakes, gears, and other critical components are in top condition, contributing to a safer riding experience. A well-maintained bike responds predictably, allowing you to navigate obstacles with confidence.

Maximizing Performance

A finely-tuned mountain bike performs at its best. From smooth gear shifts to responsive brakes and efficient suspension, each component plays a role in elevating your riding experience. Regular maintenance optimizes these elements, ensuring that your bike is ready to tackle any trail you choose.

Benefits of a Well-Tuned Bike

Investing time and effort into tuning up your mountain bike pays dividends in terms of performance, durability, and overall enjoyment. Let’s explore the tangible benefits that riders can experience when their bikes are finely-tuned.

Enhanced Efficiency

A well-maintained drivetrain, properly inflated tires, and smooth gear shifts contribute to a more efficient ride. Every pedal stroke translates into forward momentum, allowing you to cover more ground with less effort. Efficiency is key, especially when conquering long climbs or challenging terrains.

Improved Handling and Control

Precision matters when navigating technical trails. A well-tuned suspension system, balanced wheel alignment, and responsive brakes enhance your bike’s handling and control. This translates to better maneuverability, allowing you to confidently tackle descents, corners, and obstacles.

Extended Lifespan of Components

Regular maintenance and tune-ups contribute to the longevity of your bike’s components. By addressing wear and tear promptly, you reduce the risk of premature failure and extend the lifespan of crucial parts. This not only saves you money on replacements but also ensures that your bike remains a reliable companion for years to come.

Personalized Riding Experience

Each rider has a unique style and preference when it comes to tackling trails. Fine-tuning your bike allows you to personalize its performance to match your riding style. Adjusting suspension settings, optimizing gear ratios, and fine-tuning other elements create a bespoke riding experience tailored to your preferences.

In the world of mountain biking, a well-tuned bike is not just a luxury; it’s a necessity. Regular maintenance is the key to unlocking the full potential of your mountain bike, ensuring that it performs at its best on every trail. As we journey through the subsequent sections of our ultimate tune-up checklist, keep in mind the invaluable benefits that await those who invest time and effort into the care of their trusty steed. Happy trails and happy riding!

Importance of regular maintenance

Essential Tools for Mountain Bike Tune-Up

Taking on the journey of tuning up your mountain bike requires the right set of tools. Whether you’re a novice or a seasoned rider, having the basics on hand is essential for routine maintenance. Here’s a breakdown of the essential tools needed for a thorough mountain bike tune-up:

Multitool

A multitool is a compact, versatile tool that combines various functions into one handy device. It typically includes hex wrenches, screwdrivers, and a chain tool. This all-in-one tool is invaluable for making on-the-go adjustments and handling minor repairs during your rides.

Tire Levers

 Changing a flat tire is a skill every mountain biker should master. Tire levers make this task much easier by helping you pry the tire away from the rim. Invest in a durable set of tire levers to streamline the process of fixing flats on the trail.

Pump

Keeping your tires properly inflated is crucial for a smooth and efficient ride. A reliable pump, whether a floor pump for home use or a compact hand pump for on-the-go adjustments, is an essential tool to maintain optimal tire pressure.
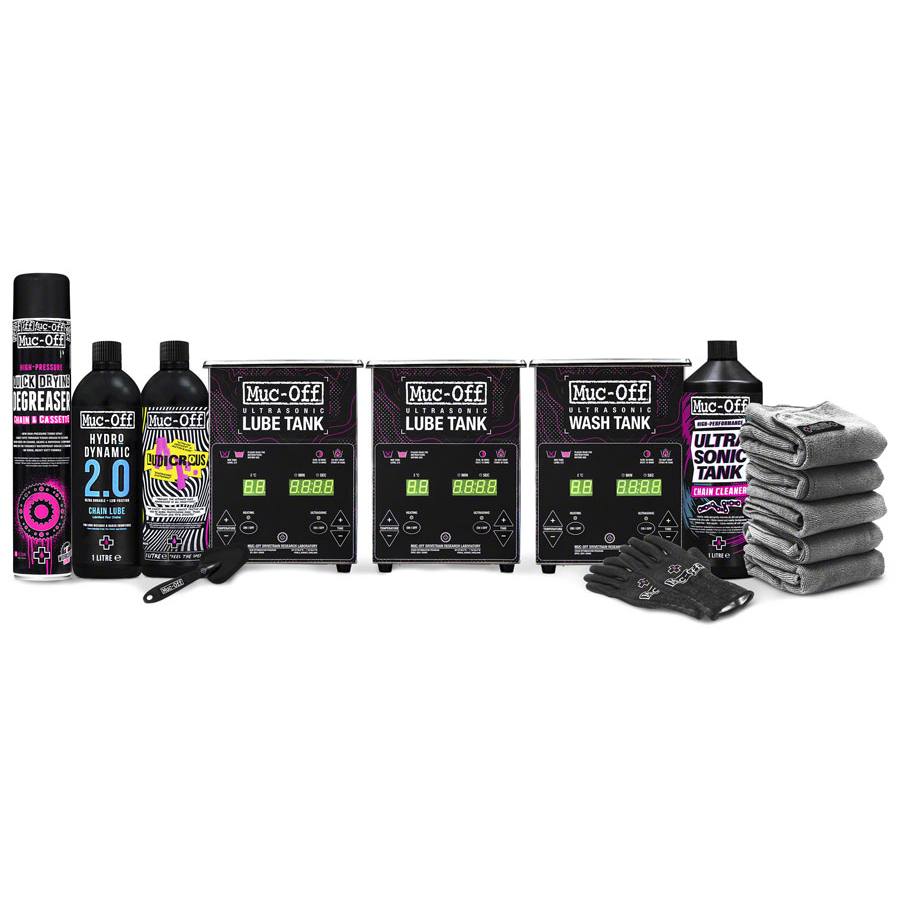
Chain Lubricant

 Lubricating your chain is a fundamental aspect of bike maintenance. A good-quality chain lubricant keeps your drivetrain running smoothly, reduces friction, and extends the lifespan of your chain and cassette.

Cleaning Brushes

 Dirt and grime can accumulate on your bike after every ride. A set of cleaning brushes, including a stiff brush for the drivetrain and softer brushes for other components, will help you keep your bike clean and ready for action.

Chain Checker

   Monitoring the wear on your chain is crucial for preventing premature wear on other drivetrain components. A chain checker tool allows you to gauge chain wear accurately and determine when it’s time to replace your chain.

Torque Wrench

 Precision is key when tightening bolts to manufacturer specifications. A torque wrench ensures that you apply the correct amount of force, preventing over-tightening or under-tightening, which can lead to component failure.

Essential tools for mountain bike tune up

Advanced Tools for Advanced Tuning Techniques

If you’re ready to take your mountain bike tuning to the next level, consider adding these advanced tools to your kit. These tools are particularly useful for riders who want to delve into more intricate adjustments and optimizations:

Suspension Pump

Fine-tuning your suspension requires a suspension pump. This specialized pump allows you to adjust the air pressure in your fork and rear shock to achieve the optimal balance between comfort and performance.

Cassette Lockring Tool

When it’s time to replace your cassette or make adjustments to your rear hub, a cassette lockring tool is indispensable. This tool allows you to remove the lockring securing the cassette to the freehub body.

Bottom Bracket Tool

   For servicing or replacing your bottom bracket, a bottom bracket tool is essential. Choose the tool that matches the specific type of bottom bracket on your bike, such as external or press-fit, to ensure a proper fit.

Wheel Truing Stand

 Achieving perfectly true wheels contributes to a smoother ride. A wheel truing stand provides a stable platform for assessing and adjusting the true alignment of your wheels, ensuring they spin without wobbles.

Derailleur Hanger Alignment Gauge

A misaligned derailleur hanger can cause shifting issues. An alignment gauge allows you to check and correct the alignment of your derailleur hanger, ensuring precise gear changes.

Bearing Press and Puller

 For more advanced maintenance tasks, such as replacing headset or bottom bracket bearings, a bearing press and puller set is invaluable. These tools help you remove and install bearings with precision.

As you progress in your mountain biking journey, acquiring and becoming proficient with these advanced tools will empower you to take on more intricate tuning techniques, ultimately enhancing the performance and longevity of your mountain bike. Remember, a well-maintained bike is a reliable bike, ready to tackle any trail with confidence. Happy tuning!

Advanced tools for advanced tuning techniques

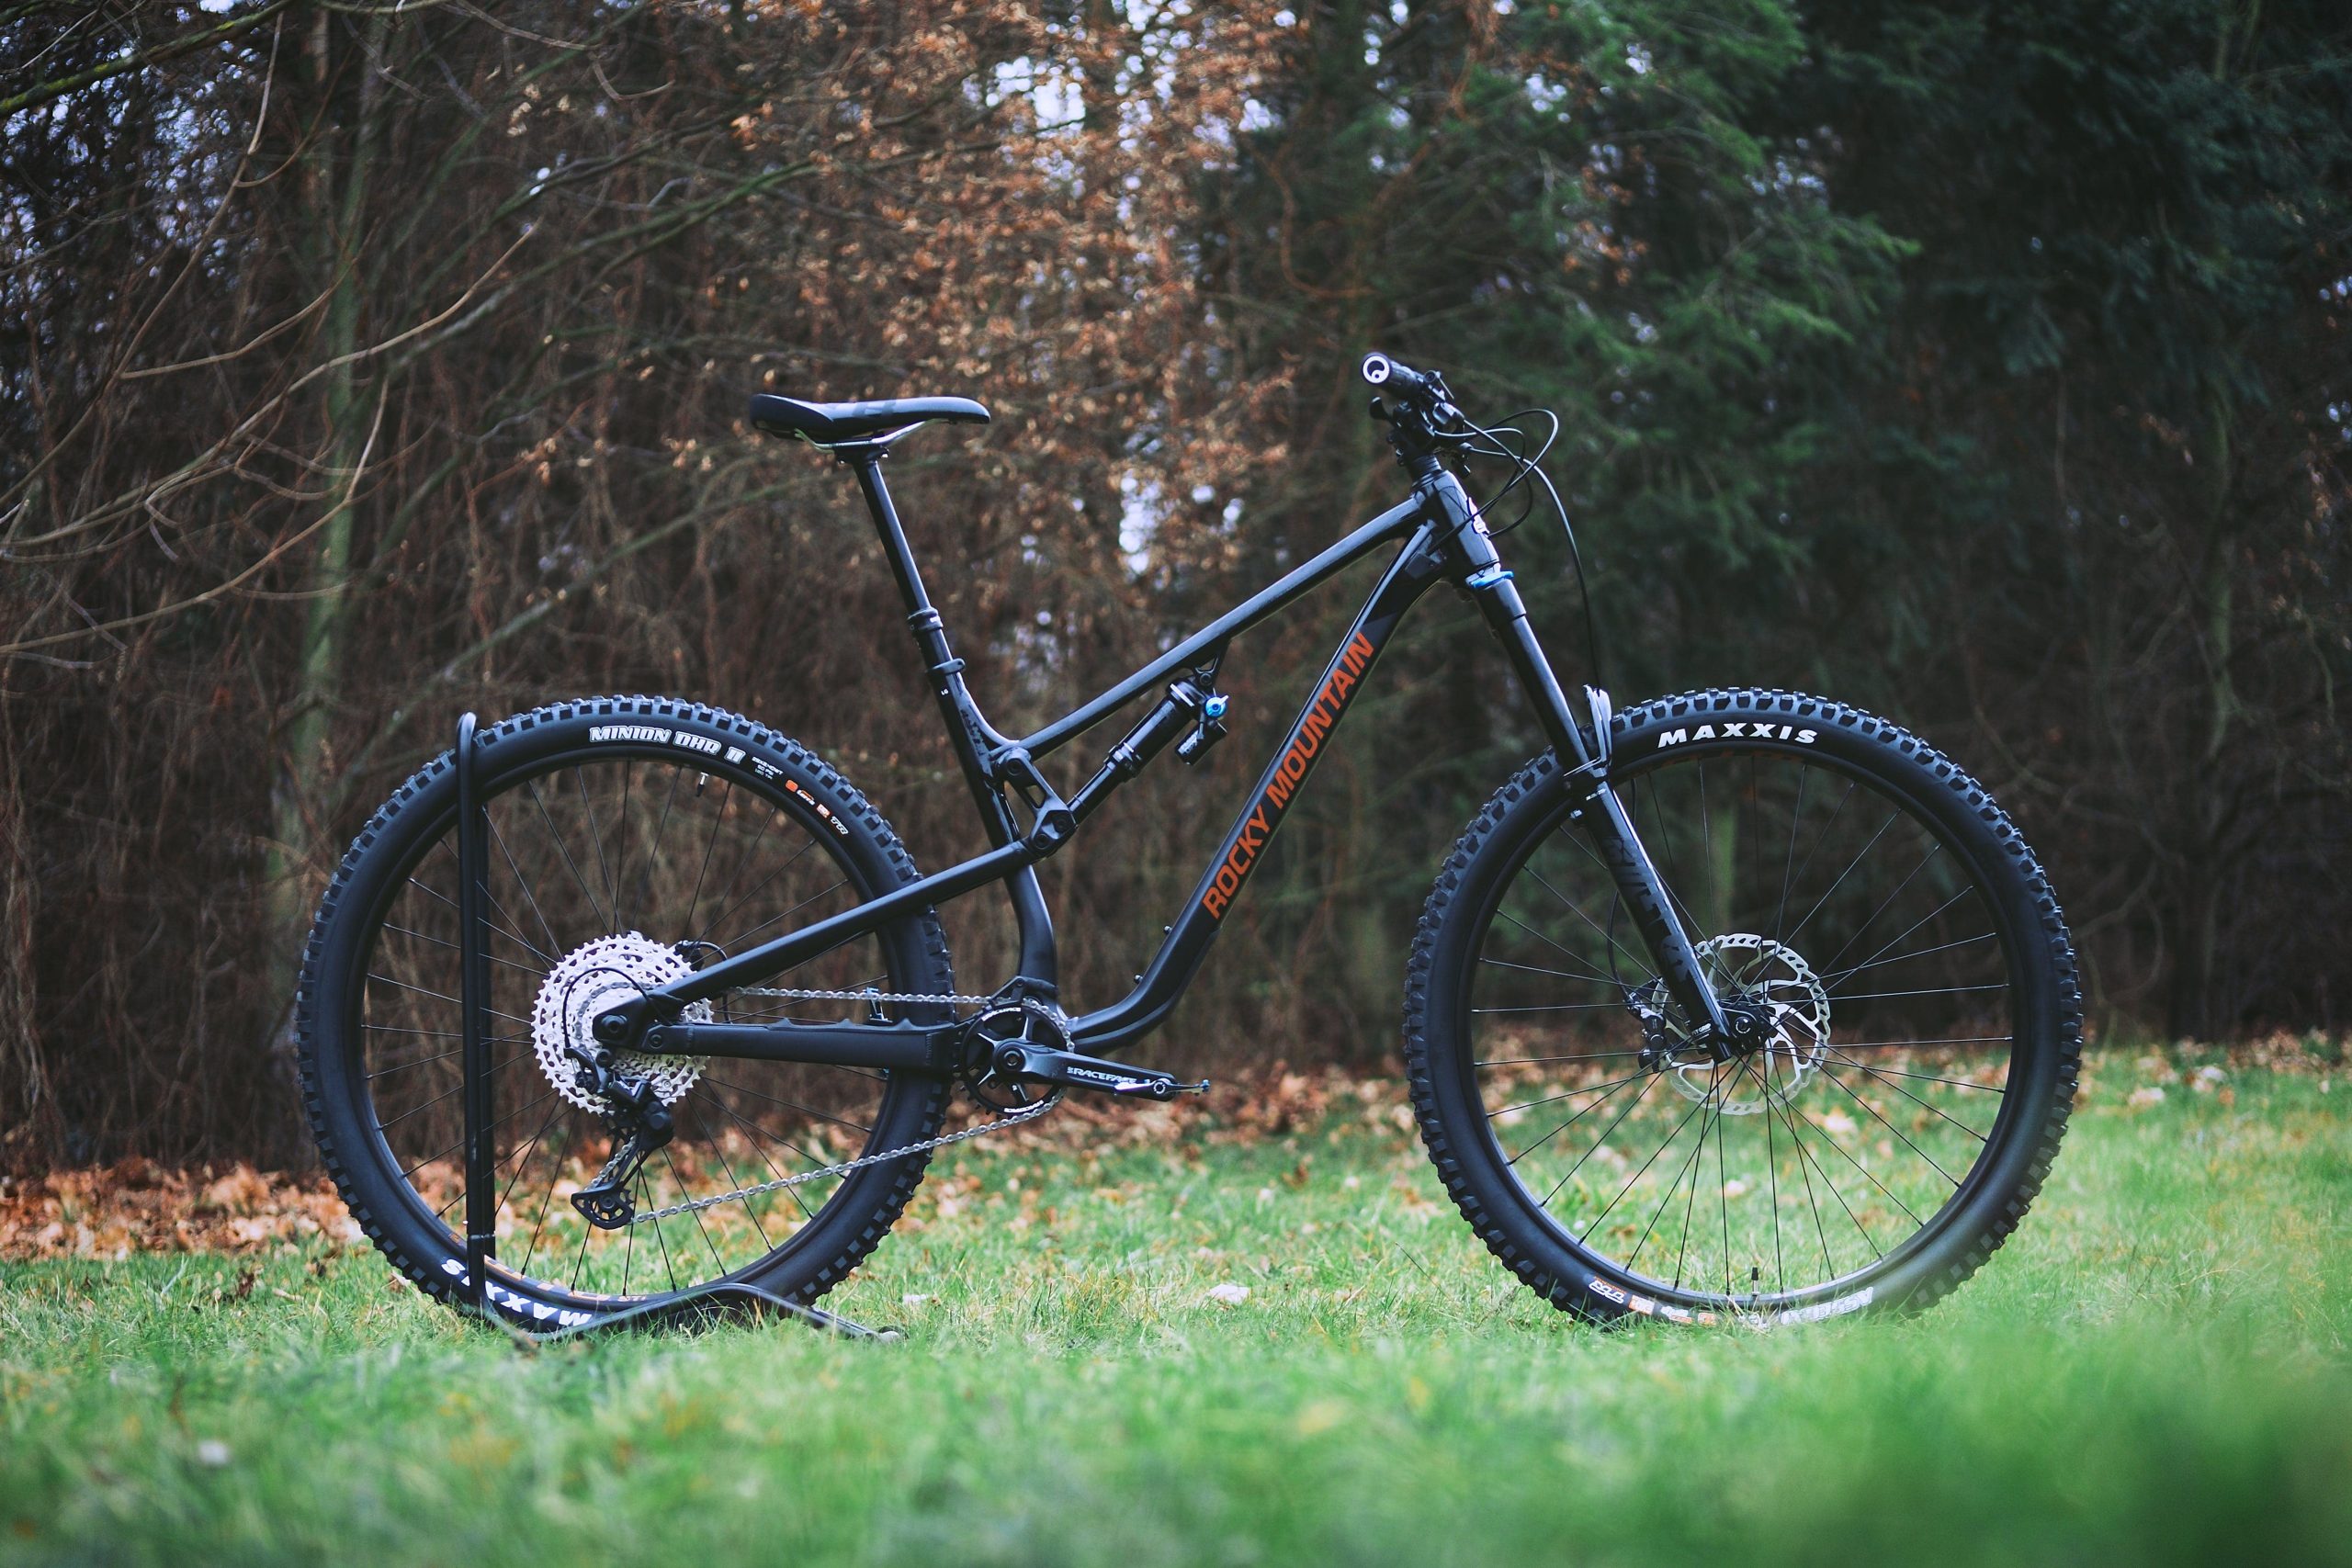
Pre-Ride Inspection Checklist

Your tires are the first point of contact with the trail, making them a critical element in your bike’s performance. Follow these steps to assess your tires:

Inflation: Use a reliable pump to check and adjust tire pressure according to the manufacturer’s recommendations. Optimal tire pressure provides the right balance between traction and efficiency.

Tread Condition: Inspect the tread for signs of wear, cuts, or punctures. Worn-out treads can compromise traction and increase the risk of flats. Replace tires that show significant wear.

Sidewall Inspection: Examine the sidewalls for any bulges, cuts, or damage. Damaged sidewalls may compromise the structural integrity of the tire and pose a safety risk.

Inspecting Brakes and Cables

A well-functioning brake system is paramount for your safety on the trails. Perform the following checks to ensure your brakes are in optimal condition:

Brake Pads: Inspect the brake pads for wear. Worn-out brake pads may reduce stopping power and increase braking distances. Replace pads that are excessively worn.

Brake Fluid (for Hydraulic Systems): Check the brake fluid level in hydraulic systems. Low fluid levels can affect brake performance. Top up the fluid if necessary, and inspect for any signs of leaks.

Cable Tension: For bikes with cable-actuated brakes, assess cable tension. Ensure there is no slack in the cables, and adjust as needed. Lubricate cables to ensure smooth operation.

Assessing the Drivetrain

A smooth and efficient drivetrain is essential for conquering various terrains. Follow these steps to assess and optimize your bike’s drivetrain:

Chain Lubrication: Apply a suitable chain lubricant to ensure a well-lubricated chain. Wipe off any excess lubricant to prevent attracting dirt and debris.

Gearing: Shift through all gears to ensure smooth and precise shifting. If you notice any hesitation or difficulty in shifting, make adjustments to the derailleur’s indexing.

Chain Wear: Use a chain checker tool to measure chain wear. If the chain is excessively worn, it can accelerate wear on other drivetrain components. Replace the chain if needed.

Crankset and Pedals: Check the crankset and pedals for tightness. Ensure that there is no play in the bottom bracket, and tighten any loose bolts.

By systematically going through this pre-ride inspection checklist, you set the foundation for a safe and enjoyable mountain biking experience. Regularly conducting these checks helps identify and address potential issues before they escalate, contributing to the overall reliability and performance of your mountain bike. Now that your bike has passed the pre-ride inspection, it’s time to hit the trails with confidence! Stay tuned for the next segments of our ultimate mountain bike tune-up guide as we delve into more advanced maintenance tasks and tuning techniques. Happy riding!

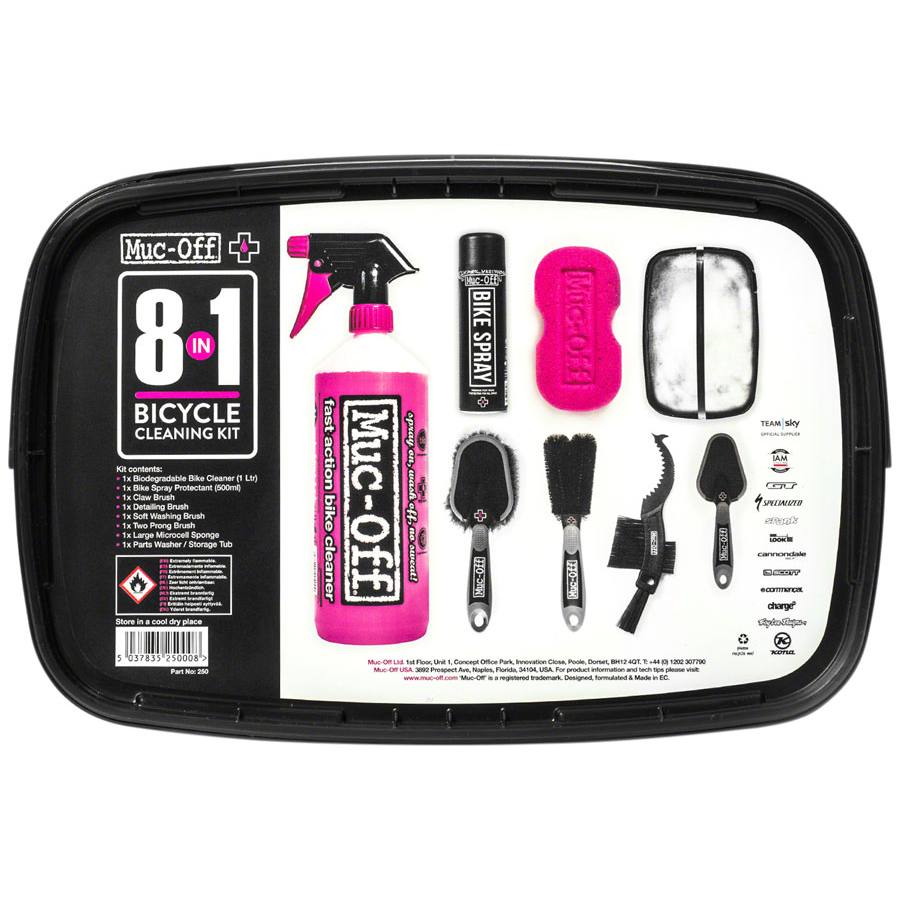
Cleaning and Lubrication: Elevating Your Mountain Bike’s Performance

Now that we’ve covered the essentials of the pre-ride inspection, let’s dive into the next crucial steps of mountain bike maintenance – cleaning and lubrication. These tasks may seem simple, but their impact on your bike’s performance and longevity is profound. Follow these guidelines to ensure your mountain bike stays in peak condition:

Proper Cleaning Techniques:

A clean bike not only looks great but also functions better. Dirt and grime can accelerate wear on components, hinder performance, and compromise the smooth operation of moving parts. Here’s a step-by-step guide to effective bike cleaning:

Gather Your Supplies: You’ll need a bucket of soapy water, a brush set (with soft and stiff brushes), a sponge, degreaser, and a hose for rinsing.

Remove Excess Dirt: Use a stiff brush to knock off loose dirt and mud from the frame, wheels, and components. Pay attention to hard-to-reach areas and the underside of the bike.

 Soapy Water Wash: Mix a bike-friendly soap or mild detergent with water in the bucket. Use a sponge to wash the entire bike, including the frame, fork, wheels, and drivetrain. Avoid using high-pressure water directly on sensitive areas like bearings.

Degrease the Drivetrain: Apply a degreaser to the chain, cassette, and derailleur pulleys. Use a brush to scrub away built-up grease and grime. Rinse thoroughly.

Clean the Braking Surfaces: Wipe down the braking surfaces with a clean, damp cloth. Ensure that no contaminants, such as oil or grease, are present on the brake pads or rotors.

Inspect and Dry: While cleaning, inspect the frame and components for any signs of damage or wear. Once the bike is clean, use a dry cloth or towel to wipe away excess water.

You can best cleaning tools for your mountain bike at THE LOCAL BIKE SHOP starting from $11.99

Lubricating Key Components

Lubrication is the lifeblood of your bike. It reduces friction, prevents corrosion, and ensures smooth operation. Here’s how to properly lubricate key components:

Chain Lubrication: Apply a suitable chain lubricant to the chain, ensuring that each link is adequately coated. Wipe off excess lubricant with a clean cloth to prevent attracting dirt.

Derailleurs and Pivot Points: Use a light lubricant to coat the pivot points of derailleurs, brake levers, and other moving components. This reduces friction and enhances responsiveness.

 Cables and Housing: Apply a small amount of lubricant to the exposed sections of cables. Work the lubricant into the housing by shifting through the gears and braking. This ensures smooth cable movement.

Pedal and Cleat Interface: Lubricate the pedal spindle and cleat interface to prevent creaking and ensure smooth engagement and disengagement.

Importance of Regular Cleaning and Lubrication

Regular cleaning and lubrication are not just cosmetic rituals – they are fundamental to the health and performance of your mountain bike. Here’s why these tasks should be integrated into your maintenance routine:

Prolongs Component Life: Dirt and grime act as abrasives, accelerating wear on critical components. Regular cleaning removes these contaminants, prolonging the lifespan of your bike’s parts.

 Enhances Performance: A well-lubricated drivetrain and moving parts result in smoother operation. This, in turn, contributes to better shifting, braking, and overall bike performance.

Prevents Corrosion: Moisture and dirt can lead to corrosion, particularly on metal components. Lubrication creates a protective barrier, guarding against rust and corrosion and preserving the integrity of your bike.

Maintains Consistency: Consistency is key in mountain biking. Regular cleaning and lubrication ensure that your bike consistently performs at its best, allowing you to predict its behavior on the trail.

By incorporating proper cleaning techniques and timely lubrication into your mountain bike maintenance routine, you invest in the longevity and reliability of your trusted two-wheeled companion. Stay tuned for the next segment of our ultimate mountain bike tune-up guide, where we’ll explore the intricacies of the brake system and gearing. Happy trails and happy maintenance!

Importance of regular cleaning and lubrication

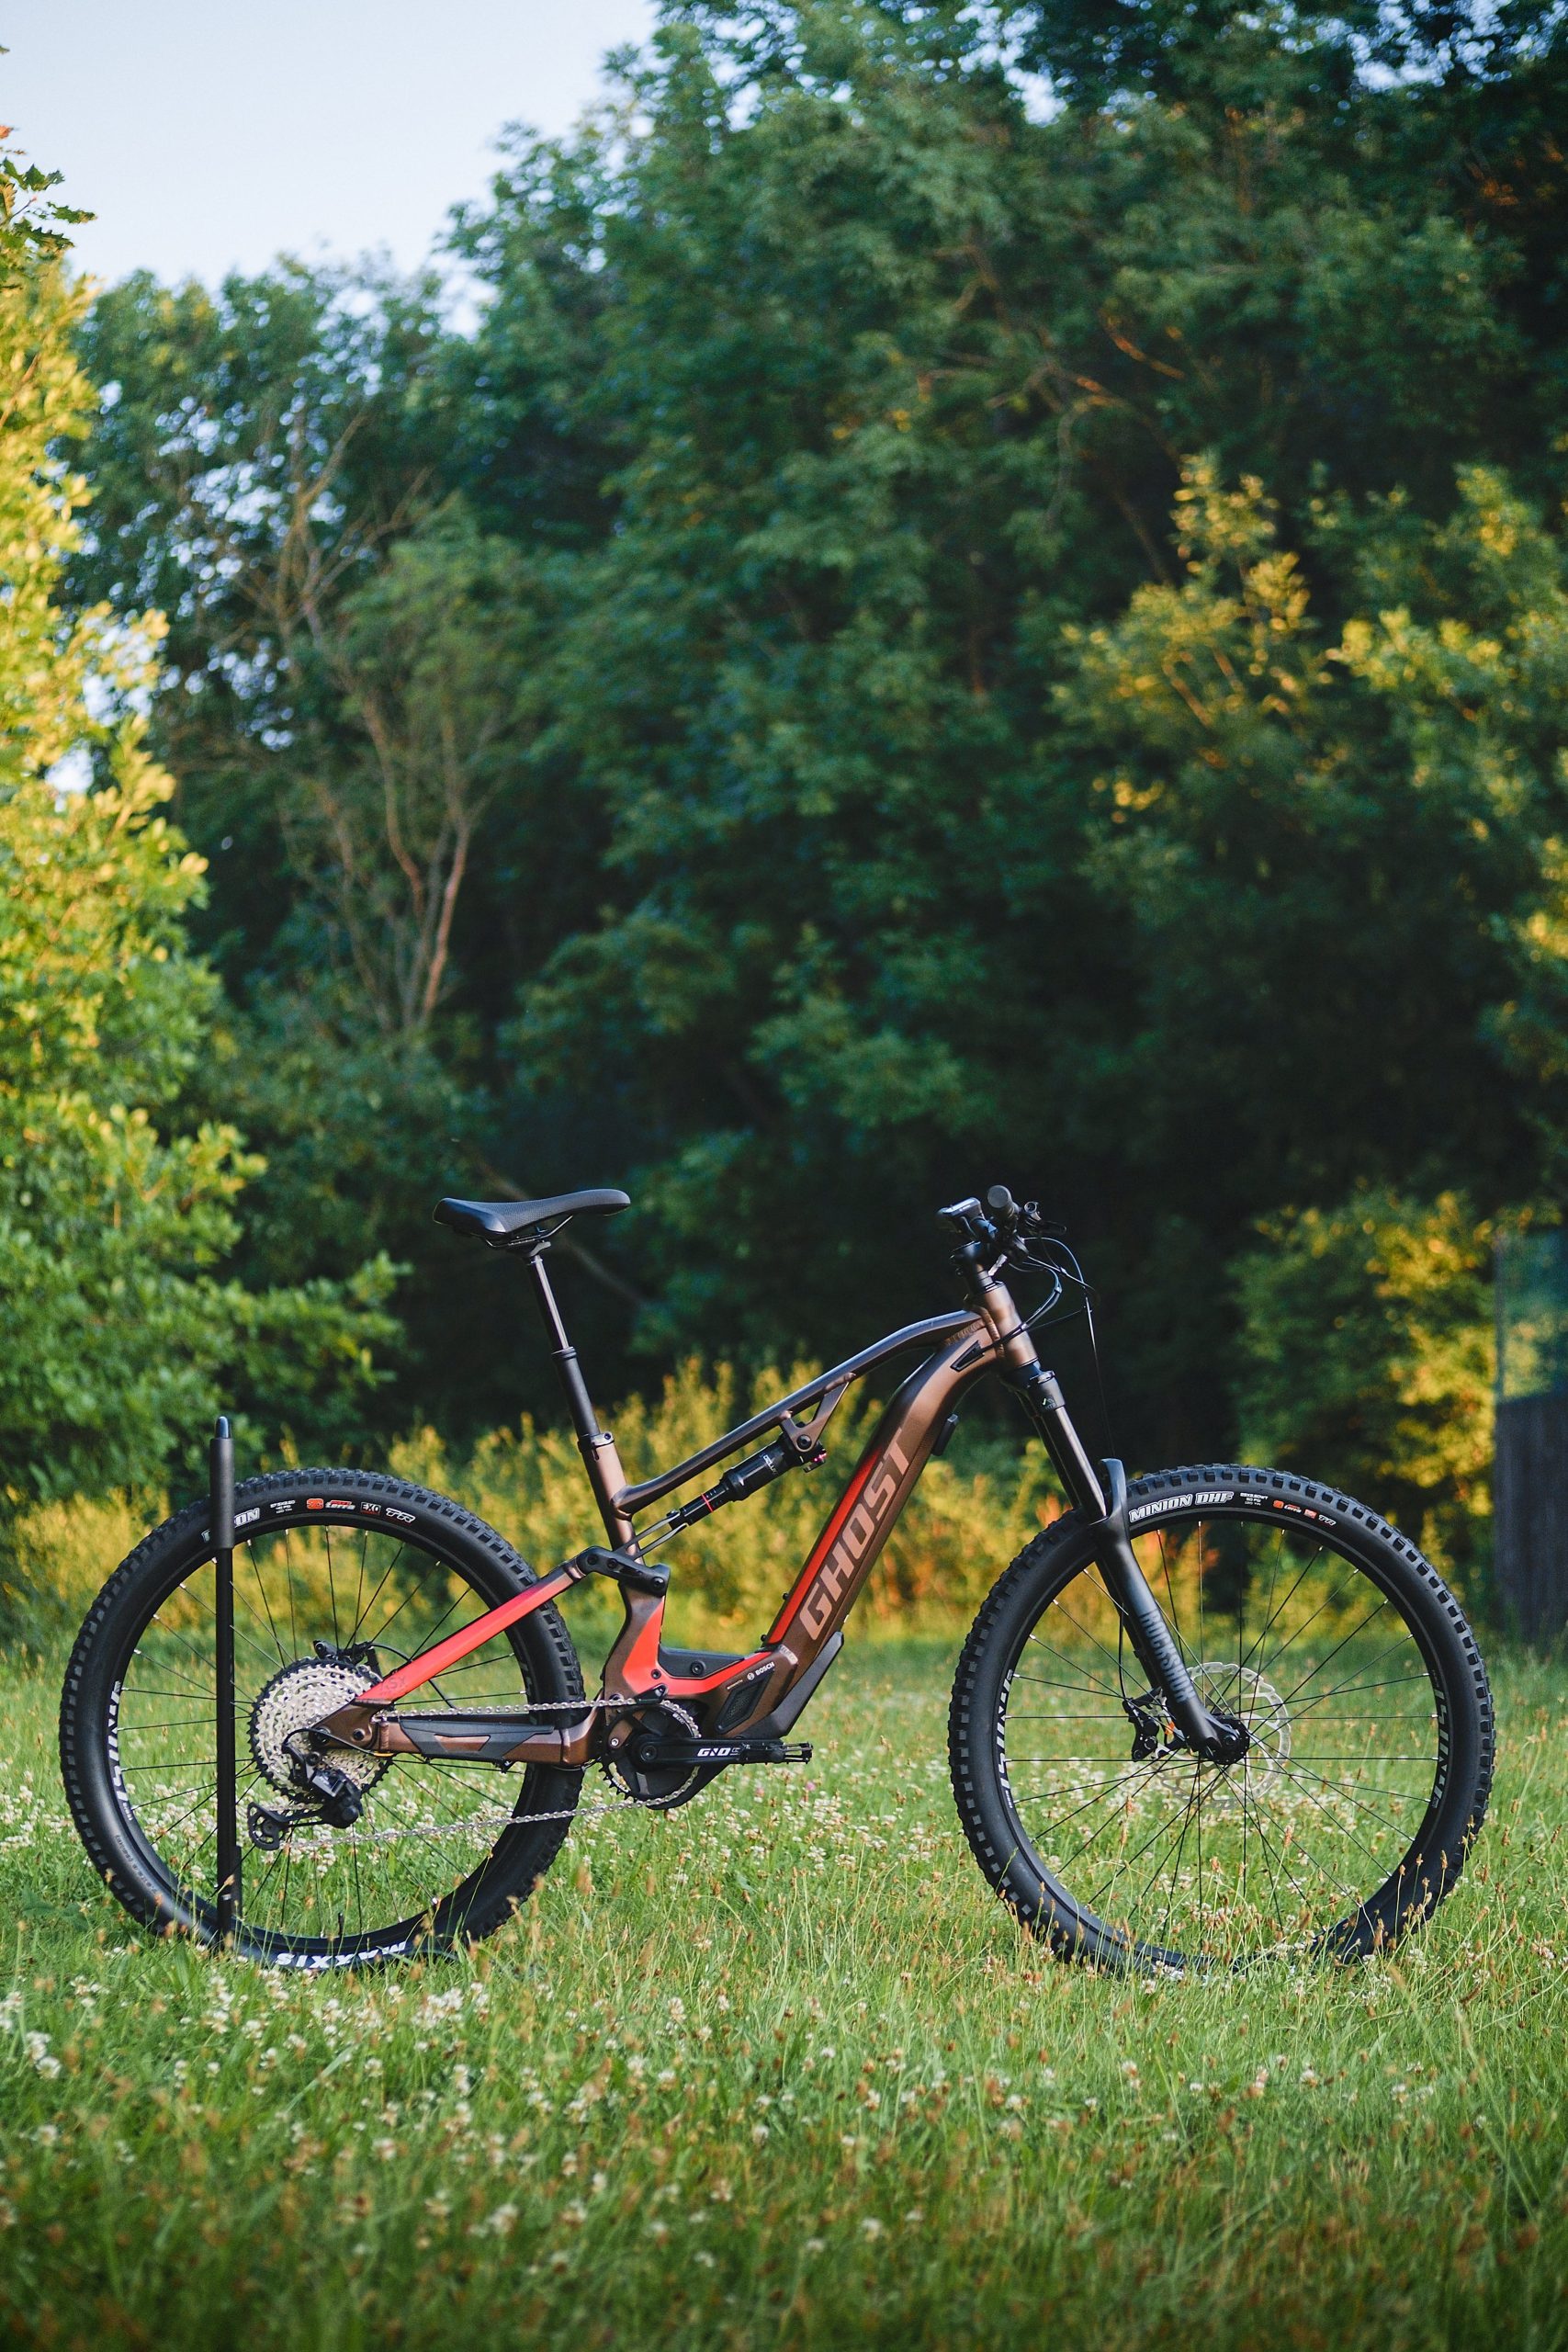
Adjusting and Tuning Components: Fine-Tuning Your Ride

Now that your mountain bike is clean and well-lubricated, it’s time to delve into the heart of the tuning process – adjusting and fine-tuning key components. Ensuring that your gears shift smoothly, your suspension is dialed in, and your brakes provide optimal performance is essential for an enjoyable and efficient ride. Let’s explore these adjustments in detail:

Fine-Tuning the Gears and Shifters

Smooth and precise gear shifts are crucial for conquering diverse terrains. Follow these steps to fine-tune your gears and shifters.

Check Derailleur Alignment: Ensure that the derailleur hanger is straight. Misalignment can lead to poor shifting performance. If necessary, use a derailleur hanger alignment tool to straighten it.

Adjust Cable Tension: Fine-tune the tension of your gear cables. Shift through all gears and make adjustments to the barrel adjusters as needed. A well-adjusted cable tension ensures crisp and reliable shifts.

Indexing Gears: If your gears are not shifting smoothly, indexing may be required. Use the barrel adjusters to align the jockey wheel with each gear. The goal is to achieve precise alignment for smooth shifting.

Limit Screw Adjustments: Ensure that the limit screws on the front and rear derailleurs are set correctly. These screws determine how far the chain can move, preventing over-shifting or dropping the chain.

Adjusting the Suspension

Fine-tuning your suspension settings enhances comfort, control, and performance on the trail. Here’s how to adjust your suspension:

Set Sag: Adjust the air pressure or preload on your suspension to achieve the recommended sag. This is the amount the suspension compresses under your weight when you’re on the bike. Refer to your bike’s manual for the appropriate sag settings.

Rebound Damping: Adjust the rebound damping to control how quickly your suspension returns after compressing. A slower rebound is ideal for technical descents, while a faster rebound suits smoother terrain.

Compression Damping: Some suspension systems offer adjustable compression damping. Experiment with these settings based on the type of terrain you’ll be riding. Increase compression for smoother trails and decrease for rougher terrains.

Aligning the Brakes for Optimal Performance

Brakes are your primary means of control, and ensuring they operate at their best is paramount. Here’s how to align and optimize your brakes:

Check Brake Pad Alignment: Ensure that the brake pads are evenly aligned with the braking surface on the rotor. Adjust the caliper position if necessary to achieve optimal alignment.

Inspect and Align Rotors: Examine the rotors for any warping or damage. If the rotors are bent, use a rotor truing tool to straighten them. Properly aligned rotors prevent brake squeal and improve braking performance.

Brake Lever Adjustment: Adjust the brake lever to your preference. A comfortable lever reach ensures that you can easily modulate braking force with your fingers.

Wrapping Up Your Tune-Up

With your gears, suspension, and brakes finely tuned, it’s time to wrap up your mountain bike tune-up with a final inspection and a test ride:

Final Inspection and Test Ride

Inspect Bolts and Fasteners: Double-check that all bolts and fasteners are tightened to the manufacturer’s specifications. Pay special attention to critical areas such as the handlebars, stem, seatpost, and pedals.

Check for Any Unusual Noises: Spin the wheels, bounce the suspension, and compress the brakes. Listen for any unusual noises that might indicate loose components or potential issues.

 Test Shifting and Braking: Take your bike for a short test ride to ensure that the gears shift smoothly, the suspension performs as expected, and the brakes provide reliable stopping power. Address any issues that arise during the test ride.

Tips for Ongoing Maintenance

Maintaining your mountain bike’s performance is an ongoing process. Consider these tips for regular upkeep:

Clean and Lubricate Regularly: Schedule routine cleaning and lubrication sessions to keep your bike in top condition. This prevents the accumulation of dirt and ensures smooth operation.

Inspect and Replace Wearable Parts: Regularly inspect components such as brake pads, chain, cassette, and tires for signs of wear. Replace these parts promptly to prevent further damage and maintain optimal performance.

Keep an Eye on Suspension Settings: Adjust your suspension settings based on the type of terrain you’ll be riding. Experiment with different settings to find what works best for your riding style.

Benefits of a Well-Tuned Bike for Performance and Longevity

Maintaining a well-tuned mountain bike offers numerous benefits, including:

Optimal Performance: A well-tuned bike performs at its best, providing smooth shifting, responsive braking, and efficient power transfer.

Longer Component Lifespan: Regular maintenance prevents premature wear and extends the lifespan of crucial components such as chains, cassettes, and brake pads.

Consistent and Predictable Riding Experience: A bike that is consistently well-tuned allows you to predict its behavior on the trail, enhancing your confidence and control.

Reduced Risk of Breakdowns: Addressing potential issues during regular tune-ups reduces the risk of unexpected breakdowns on the trail, ensuring a safer riding experience.

Congratulations! You’ve completed the ultimate mountain bike tune-up. By following these steps and incorporating regular maintenance into your routine, you’re not only enhancing your bike’s performance but also prolonging its lifespan. Get ready to hit the trails with confidence, knowing that your mountain bike is finely tuned and ready for any adventure that comes your way. Happy riding!

Mountain-bike-disc-brakes-the-local-bike-shopCategoriesBike

The Ultimate Guide to Buying Mountain Bikes with Disc Brakes: Everything You Need to Know for a Safe and Thrilling Ride

Remember  the first time you saw a mountain biker whisking down a trail, their wheels gripping the terrain with an almost magical hold, even in the most challenging conditions? How did that happen? Didn’t it appear like a magic? That magic, my reader’s It’s in the disc brakes. If you’ve ever felt lost or overwhelmed at the idea of purchasing aa mountain bike with disc brake’s, you’re not alone. Many have been in your shoes, including me. That’s why I’ve put together this simple guide for you all. From understanding their unique advantages to knowing how they perform across varying terrains and weathers, we’ve got you covered. Whether you’re just starting your biking journey or have countless trails under your belt, this guide is your key to a safer and more exhilarating ride. Let’s rediscover that magic together!

Mountain bike buying guide

Introduction: The Magic Behind Disc Brakes: The Ultimate Game-Changer for Mountain Bikers

Mountain biking is not just a sport; for many, it’s a passion, a way to reconnect with nature and test one’s limits. And at the heart of this exhilarating experience lies the importance of safety and control. Enter disc brakes – the unsung heroes that make your adventurous rides smoother and safer.

Benefits of Mountain Bikes with Disc Brakes

1. Consistent Performance in All Conditions: Unlike traditional rim brakes, which can lose effectiveness in wet or muddy conditions, disc brakes offer consistent stopping power. Come rain, mud, or snow, they’ve got your back.

2. Better Heat Dissipation: During intense downhill rides, brakes can get hot, affecting their performance. Disc brakes dissipate heat more effectively, ensuring they remain functional even during the most demanding descents.

3. Greater Stopping Power: Due to their design and mechanism, disc brakes provide better leverage, translating to powerful and efficient stopping even at higher speeds.

4. Less Maintenance: They are less prone to wear and tear, meaning fewer replacements and adjustments compared to traditional brakes.

A Brief Stroll Down Memory Lane: The Evolution of Disc Brakes in Mountain Biking

The introduction of disc brakes to the world of mountain biking was a revolutionary step. In the early 1990s, as mountain biking grew in popularity, it became evident that the traditional rim brakes had limitations, especially in adverse conditions. Enter disc brakes, initially used in automobiles and motorcycles. The mountain biking community quickly adopted them, recognizing their superior performance. Since then, they’ve become the gold standard for mountain bikes, offering reliability, consistency, and unparalleled control.

Why Picking the Right Mountain Bike with Disc Brakes Matters

Choosing a mountain bike is like choosing a travel partner. The right one makes the journey enjoyable, while the wrong one can turn it into an ordeal. The same goes for disc brakes. There are various types – hydraulic, mechanical, and more – each with its own set of pros and cons.

Understanding your riding style, terrain preferences, and budget can make a huge difference in your choice. A weekend trail rider might have different requirements compared to a downhill racer. Thus, making an informed decision based on your needs ensures not only a thrilling ride but also optimum safety.

The introduction of disc brakes to mountain bikes was more than just an upgrade; it was a transformation. They have played a pivotal role in ensuring riders have both fun and safety while conquering challenging terrains. So, as you embark on your journey to find the perfect mountain bike, remember the magic of disc brakes and let them guide you to an unparalleled riding experience.

Types of Disc Brakes: Mechanical vs. Hydraulic

Mountain biking has come a long way, and so have the technologies that power our rides. Disc brakes, as we’ve discussed, are integral to this evolution. But did you know there are different types of disc brakes? Let’s dive deep into the world of Mechanical and Hydraulic disc brakes, understanding their workings, advantages, disadvantages, and ideal scenarios to use them.

Mechanical Disc Brakes

How They Work: 

Mechanical disc brakes, also known as cable-actuated disc brakes, operate with a cable that runs from the brake lever to the caliper. When the lever is squeezed, the cable tightens, causing the brake pads to clamp down on the disc rotor, which in turn slows down or stops the bike.

Pros: 

1. Simplicity: Easier to install and adjust.

2. Maintenance: Can be maintained with basic tools and doesn’t require specialized knowledge.

3. Cost: Generally more affordable than their hydraulic counterparts.

Cons: 

1. Modulation: Less smooth braking as compared to hydraulic brakes.

2. Effort: Requires more hand strength to achieve the same braking force.

3. Performance Decline: The cables can stretch over time, affecting performance.

Best Use Cases: 

Mechanical disc brakes are ideal for casual riders, those on a budget, or individuals who prefer easy maintenance. They’re great for city rides, light trail riding, or for any biker who values simplicity and affordability.

Mountain bike brakes

Hydraulic Disc Brakes

How They Work?

Hydraulic disc brakes use a sealed system filled with brake fluid. When the brake lever is squeezed, it pushes the fluid through the system, which then activates the brake pads to clamp onto the rotor.

Pros: 

1. Smooth Braking: Offers excellent modulation, allowing for smoother and more controlled braking.

2. Power: Less hand force required for strong braking.

3. Reliability: No cables to stretch or wear out, ensuring consistent performance.

Cons: 

1. Maintenance: Requires specialized knowledge and tools to repair and maintain.

2. Cost: Typically more expensive than mechanical brakes.

3. Potential for Leaks: Though rare, hydraulic systems can develop leaks which may affect performance.

Best Use Cases: 

Hydraulic disc brakes are best for serious mountain bikers who frequently tackle challenging terrains, downhill riders seeking superior stopping power, or anyone who desires optimal braking performance and modulation.

To summarize, the choice between mechanical and hydraulic disc brakes is largely a matter of personal preference, riding style, and budget. Both have their strengths and shortcomings. The key is understanding your riding needs and matching them with the right braking system to ensure every ride is both thrilling and safe.

Mountain bike maintenance guide

Factors to Consider When Buying a Mountain Bike with Disc Brakes

The beauty of mountain biking is that it’s as varied as the riders themselves. From serene trail rides to adrenaline-pumping downhill races, there’s a style, terrain, and weather condition for everyone. But how do you ensure that your bike, especially its disc brakes, aligns with your unique biking profile? Let’s explore the key factors to consider.

Riding Style

Riding Style & Disc Brake Choice!

Your riding style dictates a lot, from the type of bike frame you need to the kind of disc brakes that would best serve you. For instance, someone frequently engaging in aggressive downhill rides would prioritize stronger and more responsive brakes over someone who enjoys casual weekend rides.

Best Mountain Bike with Disc Brakes for Different Riding Styles: 

1. Trail Riding: For general trail riding, both mechanical and hydraulic brakes can suffice. However, hydraulic brakes offer smoother modulation which can be beneficial for varied trails.

2. Downhill & Enduro: For high-speed descents and challenging tracks, hydraulic disc brakes are a must due to their superior stopping power and modulation.

3. Cross-Country: Weight becomes a crucial factor here. Lighter hydraulic systems or efficient mechanical brakes can be considered, based on personal preference and trail specifics.

Terrain

Terrain & Disc Brake Choice?

The type of terrain you frequent plays a vital role in determining brake choice. Rougher terrains require brakes that offer consistent performance and can handle the wear and tear of debris.

Best Mountain Bike with Disc Brakes for Different Terrains: 

1. Flat Terrains: Mechanical brakes are often sufficient, offering adequate stopping power for less demanding terrains.

2. Mountainous and Rocky Terrains: Hydraulic brakes, with their superior modulation and power, are ideal for these challenging terrains where sudden stops might be necessary.

3. Mixed Terrains: For riders who tackle a bit of everything, hydraulic brakes are recommended due to their versatility and consistent performance.

Weather Conditions

Weather & Disc Brake Choice?

Weather can affect the performance of disc brakes. Wet and muddy conditions can challenge the efficiency of rim brakes, making disc brakes the preferred choice.

Best Mountain Bike with Disc Brakes for Different Weather Conditions: 

1. Dry Conditions: Both mechanical and hydraulic disc brakes perform efficiently.

2. Wet & Muddy Conditions: Hydraulic disc brakes shine here due to their sealed system and consistent performance, regardless of external conditions.

3. Snowy or Icy Conditions: Hydraulic brakes, with their precise modulation, offer better control in slippery situations.

In conclusion, the world of mountain biking is vast and diverse. Choosing the right bike equipped with the perfect disc brakes ensures not only a safer ride but also a more enjoyable one. Take time to evaluate your riding style, the terrains you tackle, and the weather conditions you often ride in. By aligning these factors with your bike and brake choice, you’re setting yourself up for countless memorable adventures on the trails. Happy riding!

Maintenance and Care for Mountain Bikes with Disc Brakes

Like any high-performance machine, a mountain bike, especially one equipped with disc brakes, requires regular maintenance to ensure optimal performance. Proper care not only prolongs the life of your bike and its components but also ensures a safer and more efficient ride.

Cleaning and Lubrication

How to Clean and Lubricate Mountain Bikes with Disc Brakes?

1. Cleaning: Begin by using a soft brush to remove loose dirt and debris from the brakes and rotor. Use a bike-specific cleaner or a mild soapy solution to clean the rotor, ensuring to avoid any oil or lubricants on the braking surface. Rinse with clean water and dry using a soft cloth.

2. Lubrication: While the braking surface should be kept free from oils and lubricants, the moving parts of the brake caliper can benefit from periodic lubrication. Use a bike-specific lubricant and apply sparingly to these parts.

Best Practices: 

1. Always ensure the braking surface remains free from oils and contaminants.

2. Regularly check for any signs of wear or damage, especially after intense rides.

3. If your brakes start making unusual noises, a thorough cleaning might be needed.

Mountain bike disc brake cleaning kits

Brake Pad Replacement

When and How to Replace Brake Pads?

1. When: The thickness of the brake pad material is a good indicator. If the pad wears down to a thickness of about 1mm or less, it’s time for a replacement. Also, if braking becomes less efficient or produces a squealing sound, check your pads.

2. How: With the bike steady, remove the wheel. Using appropriate tools, extract the retaining pin or clip from the brake pad. Slide out the worn pads and replace them with new ones. Ensure the pads are seated properly and replace the retaining pin or clip.

Best Practices: 

1. Always refer to the manufacturer’s guidelines for specific brake models.

2. Periodically inspect the pads for uneven wear.

3. After replacement, do some gentle braking to bed in the new pads. This helps in achieving optimal performance.

Conclusion

Mountain bikes with disc brakes are undeniably a game-changer. Their consistent performance, adaptability to diverse terrains and weather conditions, and the sheer power they provide can significantly elevate the biking experience. However, as with any piece of advanced equipment, understanding its nuances and ensuring proper maintenance is key.

As you consider diving into the world of mountain biking or perhaps upgrading your existing bike, always weigh in your riding style, preferred terrains, and often-encountered weather conditions. The right bike with the perfect disc brakes tailored to your needs will not only promise thrilling escapades but also ensure that safety never takes a backseat.

Remember, the journey of mountain biking, filled with challenges, breathtaking views, and personal achievements, becomes even more rewarding when you’re equipped with the right knowledge and gear. Here’s to many safe and exhilarating rides ahead!

Frequently Asked Questions (FAQ)

1) Do mountain bikes benefit from the use of disc brakes?

Yes, mountain bikes often benefit from the use of disc brakes. Disc brakes provide superior stopping power, especially in wet and muddy conditions, making them a popular choice for off-road riding. They offer better modulation and control, helping riders maintain stability and confidence on challenging trails. Additionally, disc brakes require less maintenance compared to traditional rim brakes, making them a practical choice for many mountain biking enthusiasts.

2) Are disc brakes or drum brakes superior for bicycles?

Disc brakes are generally considered superior to drum brakes for bicycles. Disc brakes offer several advantages, including better stopping power, improved modulation, and more efficient heat dissipation. They are particularly well-suited for high-performance and off-road biking, providing consistent and reliable braking even in adverse conditions.

Drum brakes, on the other hand, are less common on modern bicycles and are often found on older or utility-style bikes. While they are more enclosed and less susceptible to external elements, they tend to offer less stopping power and modulation compared to disc brakes. Ultimately, the choice between the two depends on your specific biking needs and preferences.

3) Do bikes with disc brakes have reduced speed?

Bikes with disc brakes do not inherently result in reduced speed. The choice of brake type (disc or rim) is primarily about braking performance and modulation, with disc brakes often offering advantages in adverse conditions. A bike’s speed depends on various factors, including the rider’s fitness, terrain, tire choice, and overall bike design, rather than the brake type.

4) Do disc brakes on bicycles produce noise?

Bike disc brakes can sometimes produce noise, especially in wet or muddy conditions. This noise is often described as a squealing or squeaking sound, which can be caused by contamination, pad glazing, or other factors. However, proper maintenance and adjustment can minimize or eliminate disc brake noise, ensuring quieter and more efficient braking performance.

5) What is the process for cleaning disc brakes on a bike?

To clean your bike’s disc brakes, start by removing the wheels to access the rotors. Wipe the rotor surfaces with isopropyl alcohol to remove any contaminants, and check the brake pads for debris. Reassemble the wheels, ensuring they are properly secured, and test the brakes to ensure they are functioning correctly. This routine maintenance helps keep your disc brakes in good working condition and enhances your bike’s braking performance.

6) How should I select a mountain bike based on my height?

Choosing the right mountain bike based on your height is essential for a comfortable and efficient ride. Refer to the manufacturer’s size chart for frame size recommendations corresponding to your height, ensuring adequate standover clearance and a comfortable reach to the handlebars. Test ride different bikes to find the most comfortable one, and remember that sizing can vary between brands and models, so expert advice from your local bike shop can be helpful.

7) What are the indicators of a high-quality bike?

To evaluate a bike’s quality, consider factors such as frame material (preferably aluminum, carbon fiber, or steel), reputable components from Hope Tech have well-executed welding and finishing, a comfortable ride feel, and the manufacturer’s reputation. While price matters, it’s not the sole indicator. This combination of factors will help you make an informed decision when selecting a high-quality bike.

Mountainbike-seatpost-local-bike-shopCategoriesBike BMX Bike Mountain Bike

9 Dropper Mountain Bike Seatpost You Must Own!

Dropper Mountain Bike Seatpost you should own as a rider!

Picture this: The wind in your hair, the open road ahead, and the exhilarating freedom of cycling under the open sky. As riders, we understand that the thrill of the ride is more than just pedaling—it’s about pushing boundaries, conquering terrains, and embracing the journey. Your bike is your trusted companion, and you’re constantly seeking ways to elevate your cycling experience.

For passionate mountain bikers, the term “dropper seatpost” is more than just jargon; it’s a game-changer. If you’re new to the world of mountain biking or seeking to upgrade your ride, it’s crucial to grasp the fundamentals of this revolutionary component. The dropper seatpost, also known as an adjustable seatpost or dropper post, is your gateway to improved control, comfort, and agility on the trails. 

In this exploration, we’ll dive into the essential concepts of dropper seatposts, demystifying the terminology and parts that make them an indispensable asset for off-road adventures. Whether you’re tackling steep descents or navigating technical terrain, understanding the workings of a dropper seatpost will empower you to take your mountain biking to the next level. So, let’s embark on this journey of discovery and enhance your biking experience!

The ultimate guide to dropper mountain bike seatpost

Key Components of a Dropper Mountain Bike Seatpost & Its Function

In the realm of mountain biking, a dropper seatpost is the unsung hero that can transform your riding experience. Its ability to swiftly and seamlessly adjust saddle height on the fly provides riders with unmatched control, comfort, and confidence while navigating varying terrains. To truly appreciate the magic of a dropper seatpost, it’s essential to understand the key components that make it tick.

Dropper Lever: Controlling the Movement

At the heart of every dropper seatpost is the dropper lever. This lever, typically mounted on your handlebars within easy reach of your thumbs, serves as your command center. Pressing or actuating the lever triggers the seatpost’s movement, allowing you to seamlessly raise or lower your saddle as you ride. The lever’s placement and design are crucial for quick and intuitive adjustments, ensuring you maintain control over your bike at all times.

Dropper Post: The Main Body

The dropper post itself is the central component responsible for moving your saddle up and down. This sturdy, yet lightweight, body is equipped with an adjustable mechanism, allowing you to fine-tune your saddle’s height to match the terrain. It’s often constructed from durable materials to withstand the rigors of off-road riding. The smooth and precise movement of the dropper post is what sets it apart from traditional rigid seatposts, making it a game-changer for mountain bikers.

Internal Cable/Hose: Connection is Key  

 While it may be hidden from view, the internal cable or hose is a critical part of the dropper seatpost setup. It’s responsible for transmitting your lever’s input to the dropper post, enabling the height adjustment. This cable or hose is neatly routed within the frame of your bike, maintaining a clean and uncluttered appearance. Proper cable tension and routing are essential for the reliable operation of your dropper seatpost.

 Saddle Clamp: Securing Your Saddle

 The saddle clamp, found at the top of the dropper post, plays a vital role in keeping your saddle securely in place. It’s designed to grip your saddle rails tightly, preventing any unwanted movement or play. The saddle clamp comes in various designs, with single or dual-bolt configurations, and ensures that your saddle stays where you want it, no matter how rough the trail.

Air Cartridge or Hydraulic System: Smooth Adjustment Mechanism  

 At the core of the dropper seatpost’s smooth and controlled movement is the air cartridge or hydraulic system. This component provides the mechanism for adjusting the seatpost’s height. Air cartridges are more common in lighter-weight dropper posts, offering adjustable air pressure for customization. Hydraulic systems, on the other hand, use a fluid-filled chamber to control the movement. Both systems ensure that raising and lowering your saddle is a hassle-free and precise operation.

Understanding these key components and their functions is the first step to mastering the art of the dropper seatpost. With this knowledge, you can make informed choices when selecting, installing, and maintaining your dropper seatpost, enhancing your riding experience and conquering the trails with confidence.

Stay tuned for our next installment, where we’ll delve deeper into the benefits of using a dropper seatpost and how it can elevate your mountain biking adventures.

Seatpost mountain bike on sale the local bike shop scaled

The Benefits of Using a Dropper Seatpost: Elevating Your Mountain Biking Adventures

Now that we’ve covered the basic components of a dropper seatpost, it’s time to explore the advantages this ingenious piece of mountain biking technology brings to your two-wheeled adventures. From increased control and improved maneuverability to enhanced comfort and safety, a dropper seatpost is a game-changer on the trail.

Enhanced Control and Maneuverability

One of the most significant advantages of a dropper seatpost is the increased control it offers. When descending steep or technical sections of the trail, lowering your saddle allows you to shift your weight back, maintaining a lower center of gravity. This not only improves balance but also enhances your bike’s handling and maneuverability. You can take on challenging descents with more confidence and ease.

Improved Comfort on Varied Terrain

Mountain biking is all about adapting to different terrains, from uphill climbs to steep descents. With a dropper seatpost, you can quickly adjust your saddle height to match the terrain. Climb comfortably with a higher saddle position, and then drop it down effortlessly for descending. This adaptability minimizes fatigue and discomfort during long rides, allowing you to stay in the saddle longer.

Boosted Confidence and Safety

As a rider, your confidence on the trail directly affects your safety. Being able to instantly lower your saddle when approaching technical sections, drop-offs, or obstacles provides a safety net. You can react more dynamically to challenging situations, giving you the upper hand in avoiding accidents or spills. It’s a game-changer for riders looking to push their boundaries while staying safe.

Seat post the local bike shop min

Faster Transitions

Transitioning between uphill and downhill sections becomes seamless with a dropper seatpost. No more dismounting and manually adjusting your saddle height. A quick flick of the lever allows for swift transitions, saving time and keeping you in the flow of your ride.

Versatile Riding Styles

 A dropper seatpost makes your bike versatile for different riding styles. Whether you’re into cross-country, trail riding, or enduro, a dropper seatpost adapts to your needs. It’s a versatile upgrade that can enhance any type of mountain biking experience.

Optimized Pedaling Efficiency

While you may think that lowering your saddle for descents sacrifices pedaling efficiency, modern dropper seatposts are designed to minimize the impact on your pedaling motion. Many offer a “middle” position, allowing for efficient pedaling without the saddle being fully extended.

Fun Factor

Ultimately, mountain biking is about having fun and embracing the thrill of the trail. A dropper seatpost adds an element of playfulness to your rides. It encourages you to explore, experiment, and take on challenges with a smile on your face.

With these benefits in mind, it’s clear that a dropper seatpost is more than just a fancy accessory; it’s a valuable tool that can take your mountain biking adventures to new heights. So, if you haven’t already, consider making the leap and experiencing the transformation a dropper seatpost can bring to your cycling journey. Your saddle will thank you, and your rides will never be the same again.

Types of Seatpost Products Available

At LBS, we’re passionate about cycling and dedicated to providing you with a wide range of high-quality products to elevate your biking experience. Our online store is your gateway to a world of top-notch cycling components, accessories, and gear.

We understand that finding the right products for your cycling needs is crucial. To make your shopping experience a breeze, here’s how you can easily navigate our online store and discover the perfect items for your biking adventures:

Product 1: Hope Tech MTB All Road DH Carbon Seat Post

The “Hope Tech MTB All Road DH Carbon Seat Post” is a high-quality carbon seatpost designed for mountain bikes, all-road cycling, and downhill riding. This carbon seatpost offers exceptional strength and durability while being lightweight. Its sleek black finish adds a touch of elegance to your bike’s aesthetics. It’s a reliable choice for riders seeking improved performance and comfort during their cycling adventures. The Hope Tech brand is well-known for its commitment to producing top-notch cycling components, and this carbon seatpost is no exception.

Product 2: Seat Post Spare – Seatpost Clamp Kit

The “Seat Post Spare – Seatpost Clamp Kit” is a versatile and essential accessory for any cyclist. This clamp kit is designed to secure your seatpost in place, ensuring stability and comfort during your rides. It’s an ideal replacement or spare part for your bike, allowing you to maintain the integrity of your seatpost assembly. This kit includes a reliable black seatpost clamp, designed to keep your seatpost securely in its proper position.

Product 3: Light and Motion Vya Seatpost Mount

The “Light and Motion Vya Seatpost Mount” is a convenient accessory for mounting your bike lights on the seatpost. This mount is compatible with Light and Motion Vya lights, providing a secure and easily adjustable attachment point for enhanced visibility during nighttime rides. It’s an excellent addition to your bike for improved safety and visibility on the road.

Seat post spare min

Product 4: Supernova E3 2 Tail Light Seatpost Mount

The “Supernova E3 2 Tail Light Seatpost Mount” is a versatile mounting solution for your taillight. Designed to fit on your seatpost, this mount is compatible with Supernova E3 2 tail lights, providing a secure and adjustable attachment point. Its black finish complements the aesthetics of your bike, and the DC Current ensures reliable illumination. Enhance your visibility and safety on the road with this seatpost taillight mount.

Product 5: Exposure Aero Seatpost Tail Light Bracket

The “Exposure Aero Seatpost Tail Light Bracket” is a dedicated bracket designed to securely attach your tail light to the seatpost of your bike. This bracket provides a stable mounting solution for Exposure Aero tail lights, allowing you to enjoy enhanced visibility during your rides. Its simple design ensures easy installation and reliability, ensuring you can ride with confidence, especially in low-light conditions.

Product 6: Supernova Airstream 2 Seatpost Tail Light for Airstream Headlight

The “Supernova Airstream 2 Seatpost Taillight” is a complement to the Airstream Headlight. This taillight is designed to attach to your seatpost and works in tandem with the Airstream Headlight to provide visibility from both the front and rear. With a black finish and DC Current, this taillight not only enhances safety but also adds a sleek look to your bike. Ride with confidence, knowing you’re well-equipped for all lighting conditions.

Product 7: Lezyne KTV Drive Pro Smart Taillight

The “Lezyne KTV Drive Pro Smart Taillight” is a smart and versatile taillight designed to be mounted on your bike’s seatpost. This taillight offers various lighting modes, including smart features that can help increase your visibility and safety on the road. With its black finish and compact design, the KTV Drive Pro Smart Taillight is a great addition to your bike, ensuring you’re seen by others during your rides.

Product 8: Lezyne KTV Drive Taillight

The Lezyne KTV Drive Taillight ” is a compact and efficient tail light that mounts on your bike’s seatpost. Designed with visibility and safety in mind, this taillight offers multiple lighting modes to suit your preferences and conditions. Its compact size and black finish make it a discreet yet powerful addition to your bike, ensuring you stay visible to others, especially in low-light situations.

Product 9: Lezyne Stick Drive Taillight

The “Lezyne Stick Drive Taillight” is a practical and compact taillight designed to attach to your bike’s seatpost. This taillight provides reliable illumination and visibility during your rides. Its compact design and easy installation make it a convenient addition to your bike. The Stick Drive Tail Light ensures you remain visible to others, promoting safer cycling experiences.

Please note that specific product details and compatibility may vary, so it’s advisable to refer to the product listings for more information and fitment options.

Maintenance Tips for Keeping Your Dropper Seatpost in Top Shape

Your dropper seatpost is a vital component of your mountain bike, enhancing your control and comfort on the trails. To ensure it performs at its best, here are some essential maintenance tips:

1. Cleaning and Lubrication: Regularly clean and lubricate all moving parts of your dropper seatpost. This includes the stanchion, seals, and any exposed mechanical components. Keeping these parts clean and well-lubricated ensures smooth operation and prevents dirt and debris from causing damage.

2. Cable/Hose Inspection: Check the internal cable or hose for signs of wear, fraying, or damage. Ensure it’s properly routed and tensioned to prevent issues with actuation. Any damage to the cable or hose can lead to malfunction, so early detection is key.

3. Air Cartridge or Hydraulic System Servicing: Depending on your seatpost’s design, it may utilize an air cartridge or a hydraulic system for height adjustment. Follow the manufacturer’s recommendations for periodic servicing, which may include bleeding air or hydraulic systems. Proper maintenance of these components is crucial for consistent performance.

By following these maintenance tips, you’ll extend the lifespan of your dropper seatpost, ensuring it remains a reliable and essential part of your mountain biking adventures. Regular care will keep you in control on the trails and help prevent unexpected issues.

CategoriesBike

Elevate Mountain Biking Experience with These 6 Essential Tips for Upgrading Your Disc Brake Rotor

Disc Brake Rotor when you need to check and fix it!

When mountain biking down a treacherous slope or navigating through a bustling city, the one thing every cyclist depends on – often subconsciously – is their disc brake rotor. But how often do we pause to reflect on its significance, and the need for its proper maintenance? Let’s dive in.

Disc brake rotor when you need to check and fix.

The Heart of Stopping Power: The Mountain Bike Disc Brake Rotor

Every time you squeeze your mountain bike’s brake lever, it’s the disc brake rotor that ensures you stop safely and effectively. Like the heart pumps blood throughout the body, the disc brake rotor is at the center of the bike’s braking system, regulating the stop-and-go rhythm of your ride.

Why is the Disc Brake Rotor so Important?

Immediate Response: On unpredictable terrains, especially while mountain biking, immediate braking response can mean the difference between a successful ride and a fall. The disc brake rotor provides this instant response.

Heat Dissipation: Braking produces heat. The disc brake rotor is designed to dissipate this heat effectively, ensuring that the brake system doesn’t overheat and lose its efficiency.

Durable in Wet Conditions: Traditional rim brakes lose their potency in wet conditions. The disc brake rotor, however, maintains its grip, ensuring that come rain or shine, your bike stops when you want it to.

Maintaining the Disc Brake Rotor: Not a Choice, but a Necessity

With the significance of the disc brake rotor established, maintaining it isn’t just about ensuring longevity, but more importantly, about safety.

Regular Inspection: At regular intervals, inspect the rotor for any signs of wear, warping, or damage. Over time, even the toughest rotors can wear out, and it’s better to spot the signs early.

 Cleanliness is Key: After muddy rides, ensure that the rotor is free from grime and debris. A clean rotor ensures optimum performance.

 Check for Even Wear: If one side of the rotor wears out faster than the other, it indicates an alignment issue, which needs immediate attention.

 Responsive Braking: Always be attentive to the responsiveness of your brakes. If you feel any lag, or if the brakes feel “spongy,” it might be time for a rotor check.

Literally! The next time you’re out on your bike, remember that each squeeze of your brake lever is a testament to the reliability of your disc brake rotor. Just like any other critical piece of equipment, give it the attention and care it deserves. After all, when you’re barreling down a mountainside or avoiding obstacles in urban settings, it’s that disc brake rotor that has got your back!

Maximum stopping power: the mountain bike disc brake rotor

You can buy this Hope Moto V2-6 Bolt Standard Disc for $57 here!

Excessive Wear and Thickness Reduction

The connection between a cyclist and their bike is both physical and spiritual. Yet, beneath the surface, certain parts of the bike, like the disc brake rotor, silently do their job with little attention—until, of course, they start to falter. One of the subtle but serious issues that these rotors face is excessive wear and thickness reduction. Understanding this, monitoring it, and addressing it in time is crucial for every rider.

Understanding Excessive Wear and Thickness Reduction

Every turn, stop, or sudden brake exerts force on the disc brake rotor. Over time, these repeated actions can result in excessive wear, reducing the rotor’s thickness. This might sound trivial, but this thinning can significantly compromise the rotor’s performance and, in turn, the safety of the rider.

Signs of a Worn-Out Disc Brake Rotor

Visual Scratches and Grooves: One of the most apparent signs is visible deep scratches, grooves, or “scores” on the rotor’s surface. These are indicators of uneven wear.

Noisy Braking: If your bike squeals or produces a grinding noise when you brake, it’s likely because of an excessively worn rotor.

Reduced Brake Responsiveness: If the rotor has thinned significantly, you might feel a delay or reduced effectiveness when braking.

Vibration: A worn-out disc brake rotor can cause an unsettling vibration in the brake lever or through the bike’s frame when applied.

Measures to Check Wear and Thickness Reduction

Regular Visual Inspection: Make it a habit to visually inspect your rotors after rides. Look for any uneven wear or visible deep grooves that might be emerging.

Use a Micrometer: A micrometer is a tool that measures small distances with precision. By using one, you can measure the thickness of your rotor and compare it to the manufacturer’s specifications to determine if it’s time for a replacement.

Listen to Your Bike: Your bike often communicates its health through sounds. Pay attention to any unusual noises during braking.

Feel the Brake Lever: If the lever feels “spongy” or if you need to squeeze harder than usual, it’s a sign that the rotor might be wearing thin.

The Path Forward

Recognizing wear and thickness reduction is just the first step. Once identified, it’s vital to address the issue, which might involve resurfacing the rotor or, in more severe cases, complete replacement.

Riding, for many, is not just about mobility but also about freedom and connection with the environment. Ensuring that each component of your bike, especially something as critical as the disc brake rotor, is in top condition means that you’re not only guaranteeing your safety but also ensuring that your rides remain smooth, enjoyable, and free from unexpected interruptions. Always remember: A little attention today can prevent a significant mishap tomorrow. Safe riding!

Precision performance: upgrading your disc brake rotor

You can buy Hope V4 Vented 6 Bolt Floating Disc fro $164.37 here!

Deep Scoring or Grooving on the Rotor Surface

While the streamlined design of a mountain bike appears simple to the untrained eye, each component tells a tale of intricate engineering and thoughtful construction. The disc brake rotor, often taken for granted, is no exception. One of the most common, yet potentially dangerous, ailments it can suffer from is deep scoring or grooving. Recognizing this early can be the difference between a thrilling ride and a disastrous fall.

Demystifying Scoring and Grooving

The continuous friction between brake pads and the rotor can lead to more than just wear and tear; it can result in deep lines or grooves—often referred to as ‘scoring. Think of it as the battle scars of a warrior; only, in this context, these scars can hinder performance and compromise safety.

The Implications of Scoring on a Disc Brake Rotor

Reduced Braking Efficiency: Scoring can diminish the rotor’s surface area in contact with the brake pads, leading to reduced braking power. 

Accelerated Wear of Brake Pads: Deep grooves can cause uneven and faster wear of the brake pads, demanding more frequent replacements.

Potential for Rotor Crack: In extreme cases, these scores can become stress points, increasing the risk of the rotor cracking during intense braking situations.

Spotting Grooves on Your Mountain Bike Rotor

Visual Examination: The most straightforward method. Look for any lines or depressions that are deeper than usual wear marks on the rotor’s surface. Shine a light from the side to highlight any inconsistencies in the surface.

Feel the Surface: Run your finger (carefully) over the rotor. If you can feel significant indentations or ridges, it might be a sign of deep scoring.

Listen for Noises: Scoring can often produce a rhythmic scraping sound when braking, especially at higher speeds.

Vibration or Pulsation: Deep grooves can result in a juddering sensation through the brake lever or pedals during braking.

Addressing Deep Scoring and Grooving

 Rotor Resurfacing: For mild to moderate scoring, resurfacing the rotor might be an option. However, this should only be done if the rotor’s thickness remains within the manufacturer’s specified limits after resurfacing.

 Rotor Replacement: If the scoring is too deep or if resurfacing would make the rotor too thin, a replacement is the safest bet.

 Inspect Brake Pads: Alongside the rotor check, ensure that the brake pads aren’t causing the scoring. Damaged or contaminated pads can be a primary culprit.

A smooth rotor surface might seem like a minor detail in the grand scheme of mountain biking. However, deep scoring and grooving can quickly turn an adrenaline-filled adventure into a precarious situation. By routinely inspecting and addressing issues with your bike’s disc brake rotor, you’re not only preserving the longevity of your ride but also ensuring the safety of your journey. Mountain biking is all about embracing challenges with preparedness, and that includes the challenges your bike might face!

Heat Damage and Discoloration

The exhilarating descent on a mountain trail is one of the most adrenaline-pumping experiences a biker can have. But with every descent and sharp bend, your brakes work tirelessly, generating heat. While disc brake rotors are engineered to handle high temperatures, they are not invincible. Excessive heat can lead to significant damage and discoloration, and understanding these signs can be crucial to ensure a safe ride.

The Underlying Science: Why Do Rotors Heat Up?

When you apply the brakes, kinetic energy (motion) is converted into thermal energy (heat) due to friction between the brake pads and the rotor. This is a natural process, but when brakes are overused, especially during long descents or sudden stops, it can lead to excessive heat generation.

Consequences of Overheated Disc Brake Rotors

Reduced Braking Efficiency: Overheated rotors can lose their flat shape, leading to a phenomenon called “brake fade,” where braking power is significantly reduced. 

Compromised Structural Integrity: Excessive heat can weaken the metal, making the rotor more susceptible to cracks and fractures.

Aesthetic Damage: While not as critical as the functional implications, heat can cause unsightly discoloration on the rotor, indicating potential underlying issues.

Spotting the Signs of Heat Damage and Discoloration

 Visual Inspection for Discoloration: A typical sign of overheating is a change in the rotor’s color. A bluish or purplish tint often indicates areas of extreme heat exposure.

 Warped Rotors: Overheating can cause rotors to warp, leading to uneven braking. This can be felt as a pulsation when applying the brakes.

 Smell and Smoke: In extreme cases, excessive heating can produce a distinct burning smell or even visible smoke from the braking system.

 Decreased Braking Power: If the brakes feel less responsive than usual, it may be due to heat damage affecting the rotor’s structure and its interaction with the brake pads.

How to Mitigate and Address Heat Damage?

Adopt Progressive Braking: Instead of hard, sudden stops, apply brakes progressively. This method distributes the heat over a longer duration and area, preventing localized overheating.

 Allow Brakes to Cool: During long descents, take periodic breaks to let the braking system cool down.

 Rotor Replacement: In cases of severe warping or visible discoloration that affects braking performance, consider replacing the rotor for safety.

 Upgrade to Ventilated Rotors: If you frequently bike in conditions that stress your brakes, consider upgrading to ventilated rotors, designed to dissipate heat more efficiently.

Mountain biking often pushes both the rider and the bike to their limits. As you navigate challenging terrains, remember that your disc brake rotor is silently bearing the brunt of the heat. By being vigilant and understanding the signs of heat damage, you ensure that your braking system remains efficient and reliable. After all, a successful mountain biking adventure is not just about speed and thrill—it’s also about safety and ensuring that your equipment is in top shape to tackle whatever lies ahead.

Warping or Bent Rotor

The balance between speed and control is a constant game played by mountain bikers as they tackle varied terrains. At the heart of this equilibrium lies the disc brake rotor, ensuring that you stop when you want to and as you intend. However, even this robust component has its vulnerabilities. One such issue, often overlooked but with pronounced effects, is rotor warping or bending.

The Curved Culprit: How Do Rotors Warp or Bend?

Rotors can become warped or bent due to various reasons:

Heat Stress: As discussed in previous sections, excessive heat can not only discolor the rotor but also change its shape. Rapid heating followed by sudden cooling (like splashing through a water puddle after a heated descent) can cause warping.

Physical Impact: A direct hit from a rock, fall, or even mishandling during transportation can lead to a bent rotor.

Improper Installation or Over-Tightening: Not adhering to torque specifications when installing can result in uneven pressure, leading to warping.

Challenges Posed by a Warped or Bent Rotor

Inconsistent Braking: A rotor that isn’t perfectly flat won’t have consistent contact with the brake pads. This can lead to “grabby” brakes or a pulsing sensation when braking.

Increased Wear: The uneven surface will cause faster and inconsistent wear on brake pads.

Noise: Warped rotors can produce a periodic scraping or squealing noise, especially noticeable at low speeds.

Diagnosing a Warped or Bent Rotor

Visual Inspection: With the bike lifted, spin the wheel and observe the rotor as it passes through the brake caliper. Any wobbling or side-to-side movement can indicate warping.

 Braking Test: At a moderate speed, apply the brakes gently. A warped rotor will produce a pulsing sensation through the brake lever.

 Listen for Sounds: As mentioned, a periodic scraping noise during wheel rotation is a telltale sign of a bent rotor.

Solutions and Preventions

Rotor Truing: Minor bends can be corrected using a rotor truing tool. This requires patience and a delicate touch to gently bend the rotor back to its original shape.

 Replacement: In cases where the warping is significant or if truing doesn’t resolve the issue, replacing the rotor is the safest option.

 Use Proper Techniques: When installing or removing rotors, always adhere to manufacturer guidelines and torque specifications to prevent inadvertent bending.

 Protect During Transit: If you’re transporting your bike, ensure the disc brake rotors are protected from potential impacts.

While the natural terrains and trails of mountain biking come with their unpredictability, your equipment’s performance should not be one of them. A warped or bent rotor can compromise the very essence of control during your rides. By staying informed, conducting regular checks, and addressing issues promptly, you maintain the harmony between speed and safety, ensuring that every twist and turn of your journey is a choice, not a surprise. Happy and safe biking!

Tackle any trail with confidence: explore disc brake rotor options

You can buy Muc-Off Ultrasonic Optimization Bundle for $1100 here!

Squealing or Grinding Noises during Braking: When Your Bike Cries Out for Attention

Mountain biking is often associated with the serene sounds of nature, the crunch of tires on trails, or the whoosh of wind against the helmet. Yet, there’s one sound no rider wants to hear: the dreaded squeal or grind during braking. Such noises are not just bothersome; they’re your bike’s distress call.

Why Do Brakes Squeal or Grind?

Contaminated Rotors or Pads: Dirt, oil, or other contaminants can get onto the brake pads or the rotor, causing a squealing noise when braking.

Worn-Out Brake Pads: As brake pads wear down, they may reach the “wear indicator,” producing a grinding sound as a warning.

Misaligned Calipers: If the brake caliper isn’t perfectly aligned with the rotor, it can lead to uneven contact and result in noises.

Vibrational Resonance: Sometimes, the frequency at which the brakes vibrate can produce a squealing noise, even if everything appears fine visually.

Troubleshooting Noises in Brakes

 Clean the Rotors and Pads: Using a dedicated brake cleaner, ensure that both the rotor and brake pads are free from contaminants.

 Check Brake Pad Thickness: Inspect the brake pads. If they’re worn out or nearing their end, consider replacing them.

 Realign the Caliper: Ensure the brake caliper is precisely aligned with the rotor for even contact.

 Anti-Squeal Compounds: Applying these compounds on the back of brake pads can dampen vibrations and reduce squealing.

Reduced Braking Performance: Don’t Let Your Safety Slide

The thrill of mountain biking often lies in the unexpected twists and turns, but your brakes’ performance should always be predictably excellent. If you find that you’re squeezing the lever harder for the same stopping power or if the brakes feel “off,” you might be facing deteriorating braking performance.

Signs of Diminished Stopping Power

Longer Stopping Distances: It takes more time and distance to come to a complete stop than usual.

Spongy Brake Lever: The brake lever feels soft or spongy when pressed.

Reduced Responsiveness: There’s a noticeable lag between applying the brakes and feeling the braking effect.

Visible Wear on the Rotor: Excessive grooves, scoring, or thinning of the rotor.

Tackling Deteriorating Braking Performance

 Inspect Brake Pads: Worn-out or contaminated brake pads are often the culprit. Regularly check and replace them as needed.

 Bleed the Brake System: Air bubbles in the brake fluid can lead to a spongy feel. Bleeding the brakes can help restore performance.

 Rotor Check: Ensure the rotor is in good condition, free from warping, excessive wear, or damage.

LBS, the Local Bike Store: Your Go-To for Every Biking Woe

Between all the DIY checks and fixes, remember that professional expertise is just around the corner at LBS, your Local Bike Store. With experienced staff, state-of-the-art tools, and a passion for biking, they ensuEvery creak, grind, or squeal from your bike is a message, a call to action.

As you traverse challenging terrains and test your limits, ensuring that your equipment, especially your braking system, is in top-notch condition is paramount. And whenever in doubt, remember, LBS, your Local Bike Store, is always ready to assist. Safe trails lead to thrilling tales. That every squeal, grind, or braking issue is promptly and effectively addressed.

Whether you’re looking for a routine check-up or a complex repair, trust LBS to get you back on the trails, safe and sound. And whenever in doubt, remember, LBS, your Local Bike Store, is always ready to assist. Safe trails lead to thrilling tales. Happy biking!

CategoriesBike

The 10 Best Mountain Bike Headsets Under $50: Budget-Friendly 

Budget-friendly-headset-mountain-bike-riders

Introduction: What to Look for When Shopping for a best mountain bike headsets for Less Than $50?

When it comes to mountain bike riding, having a smooth and enjoyable ride is essential, and one of the critical components contributing to this experience is the bike headset. The headset allows you to steer your bike with precision and stability, making it an essential part of your cycling setup. In this blog post will look at the ten best headsets under $50. 

Sunday Integrated Headset – 1-1/8″-15mm, Black, Conical – $21.99

The Sunday Integrated Headset is a popular choice for those looking for a simple and affordable headset. It can be used on most BMX bikes with a 1-1/8″ steerer tube. You’ll need to remove the old headset from your bike using a headset press tool to install the headset. Once the old headset is removed, slide the new headset into place and press it in using the same device. It’s essential to make sure the headset is properly aligned and tightened to ensure smooth operation.

You can buy your favorite headset here >> Sunday Integrated Headset !

Screenshot 2023 05 09 at 21. 16. 52

Salt Plus Echo Integrated Headset – $23.99 – $44.99

The Salt Plus Echo Integrated Headset is a high-quality headset that comes in two versions: steel bearings and ceramic bearings. It can be used on most BMX bikes with a 1-1/8″ steerer tube. To install the headset, you’ll need to remove the old headset using a headset press tool. Once the old headset is removed, simply slide the new headset into place.To avoid harming the bearings, special care must be used when installing the ceramic version of this headset.

You can get the budgeted headset >> Salt Plus Echo Integrated Headset here !

Salt plus echo integrated headset the local bike shop

Cult Original Headset with 2 Top Caps – Black – $24.99

The Cult Original Headset is a stylish option with two top caps, allowing riders to customize the look of their bike. It can be used on most BMX bikes with a 1-1/8″ steerer tube. To install the headset, you’ll need to remove the old headset using a headset press tool. Some riders have noted that the installation process can be complex, so having a professional mechanic install this headset may be helpful.

You can get the affordable headset >> Cult Original Headset here !

Cult original headset with 2 top caps

BSD High-Riser Sealed Headset – Black

The BSD High-riser Sealed Headset is a top-of-the-line headset designed for serious riders. It can be used on most BMX bikes with a 1-1/8″ steerer tube. To install the headset, you’ll need to remove the old headset using a headset press tool. Once the old headset is removed, simply slide the new headset into place and press it in using the same tool. The sealed design of this headset helps to keep dirt and debris out, ensuring smooth operation even in challenging conditions.

Cheap headset available >> BSD High-Riser Sealed Headset here !

Bsd highriser sealed headset

Ritchey Road Comp Drop In Integrated Headset – 1-1/8″, IS42/28.6, IS42/30, Black

The Ritchey Road Comp Drop-In Integrated Headset is designed for road bikes with a 1-1/8″ steerer tube. It features a drop-in design, which means that the bearings are pre-installed in the cups, making installation easier. To install the headset, simply remove the old headset using a headset press tool, then insert the new headset cups into the head tube of your bike. Once the cups are in place, insert the fork into the cups and tighten the top cap to secure the headset.

For the price of $29.95 you can get the >> Ritchey Road Comp Drop In Integrated Headset here !

Ritchey road comp drop the local bike shop

Promax PI-2 Steel Sealed Bearing-Headset Black

The Promax PI-2 Steel Sealed Bearing-Headset is a durable and reliable headset that can be used on most BMX bikes with a 1-1/8″ steerer tube. Once the old headset is removed, simply slide the new headset into place and press it in using the same tool. It’s important to make sure the headset is properly aligned and tightened to ensure smooth operation.

Elegant headset for the mountain bikers >> Promax PI -2 available for $29.99 here !

Headsets 4

Black Eclat Wave Integrated Headset – 16mm Top Cap and Two 3mm Spacers

The Eclat Wave Integrated Headset is a sleek and stylish option that comes with a 16mm top cap and two 3mm spacers. It can be used on most BMX bikes with a 1-1/8″ steerer tube. To install the headset, you’ll need to remove the old headset using a headset press tool. Once the old headset is removed, simply slide the new headset into place and press it in using the same tool. The included spacers allow for some customization of the headset height.

Durable headset for mountain bikers >> Black Eclat Wave Integrated Headset available for $ 30.99 !

Eclat wave integrated the local bikeshop

The People Compact Headset – With 2x 3mm Spacers Black

The We The People Compact Headset is a high-quality headset with two 3mm spacers. It can be used on most BMX bikes with a 1-1/8″ steerer tube. The included spacers allow for some customization of the headset height.

Buy the compact headset >> The People Compact Headset for $33.99 !

We the people compact headset the local bike shop

Ciari Otto Integrated Headset – 1″ Crown Race, IS42 Upper and Lower, Black

The Ciari Otto Integrated Headset is a durable and reliable headset designed for use on race BMX bikes. It features a 1″ crown race and IS42 upper and lower bearings. It is intended for race bikes and may not be compatible with all BMX bikes.

Get the best integrated headset >> Ciari Otto Integrated Headset for $39 !

Ciari otto integrated the local bike shop

Ciari Otto Integrated 1″ Headset – Silver

The Ciari Otto Integrated 1″ Headset is a high-quality headset designed for race BMX bikes. It features a 1″ crown race and IS42 upper and lower bearings. This headset is designed for race bikes and may not be compatible with all BMX bikes. The silver colour adds a stylish touch to your bike’s look.

If you want a silver addition of headset you can >> Buy Ciari Otto Integrated 1″ Headset for $39!

Ciari otto integrated 1 headset the local bike shop

Pros & Cons of the Best Mountain Bike Headsets Under $50

When it comes to having the best biking experience, the appropriate gear may make a huge difference and how you feel when out on the road. The bike headset is one of the key components that can impact your ride, providing you with stability, precision, and control.

In this blog post, we’ll take a closer look at the 10 best headsets under $50 comparing each headset to help you make an informed decision.

Sunday Integrated Headset – 1-1/8″-15mm, Black, Conical – $21.99

Pros:

For those seeking an affordable, dependable headset, the Sunday Integrated Headset is a wonderful option. It has a conical shape and a 15mm stack height, which makes it easy to install on most bikes. The black colour gives it a sleek and modern look, and it’s made with high-quality materials that can withstand regular wear and tear.

Cons : Some users have complained that the bearings on this headset wear out quickly, necessitating more frequent maintenance.

Salt Plus Echo Integrated Headset – $23.99 – $44.99

Pros:

The Salt Plus Echo Integrated Headset is a versatile option that can work with a wide range of bikes. It has a low-profile design that looks sleek and modern, and it comes in a range of colours to suit your style. The sealed bearings are smooth and reliable, and the headset is easy to install and maintain.

Cons:

This headset’s higher end of the price range may not be suitable for those on a tight budget.

Cult Original Headset with 2 Top Caps – Black – $24.99

Pros:

The Cult Original Headset is an excellent option for those who want a high-quality headset that won’t break the bank. It comes with two top caps so that you can customize the look of your bike, and the black colour gives it a sleek and modern look. The sealed bearings are smooth and reliable, and the headset is easy to install and maintain.

Cons:

Some users have reported that the headset can be difficult to install.

BSD High-riser Sealed Headset – Black

Pros:

The BSD High-riser Sealed Headset is a reliable and durable option for those who want a headset that can handle rough terrain. The black colour looks sleek and modern, and the sealed bearings provide a smooth and reliable ride. It’s easy to install and maintain and comes at an affordable price point.

Cons:

The design may only be suitable for some bike styles.

Ritchey Road Comp Drop In Integrated Headset – 1-1/8″, IS42/28.6, IS42/30, Black

Pros:

The Ritchey Road Comp Drop-In Integrated Headset is a high-quality option for those who want a reliable and durable headset. It has a sleek and modern look, and the black colour is versatile and can work with various bikes. The sealed bearings provide a smooth and reliable ride, and the headset is easy to install and maintain.

Cons:

The price point may need to be lowered for those on a tight budget.

Promax PI-2 Steel Sealed Bearing-Headset Black

Pros:

The Promax PI-2 Steel Sealed Bearing-Headset is a reliable and durable option with an affordable price point. It has a sleek and modern look, and the black colour can work with various bikes. The sealed bearings provide a smooth and reliable ride, and the headset is easy to install and maintain.

Cons:

According to some users, the headset may be heavier than other alternatives.

Eclat Wave Integrated Headset

Pros:

The Eclat Wave Integrated Headset is a versatile option with a 16mm top cap and two 3mm spacers, allowing riders to customize their riding position for a more comfortable and efficient ride. The sealed cartridge bearings ensure smooth rotation and durability, and the 45-degree angle and conical shape provide a secure fit for the fork steerer tube. It has a modern appearance complements most bikes thanks to the anodized black finish.

Cons:

Some riders have reported that the top cap can be difficult to remove, which may make it challenging to maintain the headset. The 16mm top cap may also be too tall for some riders, which could limit the amount of steerer tube that can be used with the stem.

Additionally, at around $40, it is one of the more expensive headsets on this list.

People Compact Headset

Pros:

For those looking for a basic and dependable headset that won’t break the budget, the We The People Compact Headset is a fantastic choice. It comes with two 3mm spacers, allowing riders to adjust their riding position for maximum comfort. The sealed bearings ensure smooth rotation and durability, and the 45-degree angle and conical shape provide a secure fit for the fork steerer tube. A sleek black anodized finish and a price of around $20 make it affordable for most bikes. 

Cons:

Some riders have reported that the top cap can be difficult to remove, which may make it challenging to maintain the headset. Additionally, the headset may not be as durable as some of the more expensive options on this list, which could be a concern for riders who engage in heavy or aggressive riding. Finally, the headset may only fit some bikes. Therefore check its compatibility before making a purchase.

Ciari Otto Integrated Headset – Black

Pros:

The Ciari Otto Integrated Headset in black offers durability and reliability for any riding. It has a 1″ crown race and IS42 upper and lower bearings, ensuring a secure fit for the fork steerer tube. The sealed cartridge bearings provide a smooth rotation and durability, and the 45-degree angle and conical shape provide a snug fit. With its black anodized finish, it has a sleek, understated look, and the price point of around $25 makes it an affordable option for those on a budget.

Cons:

Some riders have reported that the top cap can be difficult to remove, which may make it challenging to maintain the headset. Additionally, the black anodized finish may show scratches or wear more quickly than some of the more expensive options on this list. Finally, the headset may only fit some bikes. Therefore, check the compatibility before making a purchase.

Ciari Otto Integrated 1″ Headset in Silver

Pros:

The Ciari Otto Integrated 1″ Headset in silver is a great option for those who want a durable and stylish headset that can handle any type of riding. It comes with a 1″ crown race and IS42 upper and lower bearings, which ensures a secure fit for the fork steerer tube. The sealed cartridge bearings provide a smooth rotation and durability, and the 45-degree angle and conical shape provide a snug fit. The silver anodized finish gives it an eye-catching look that will make any bike stand out.

Cons:

Some riders have reported that the top cap can be difficult to remove, which may make it challenging to maintain the headset. Additionally, the silver anodized finish may show scratches or wear more quickly than some of the more expensive options on this list. Finally, the headset bikes, so checking the compatibility before purchasing is essential.

These top ten selections under $50 are unquestionably worth considering if you’re searching for a bike headset that is affordable yet provides good performance and durability. If you want a classy one, we also have Hope Tech Headset. From the Sunday Integrated Headset with its unique conical design to the sleek and stylish Ciari Otto Integrated Headset in silver, each of these headsets offers a range of pros and cons to suit different riders’ needs. While many other headsets are available on the market, these are among the best you can buy without breaking the bank. If you are interested in any of these headsets, you can find them on our website or at your Local Bike Shop.

Mountain bike gears: what to wear for the mountain bike ride?CategoriesBike

8 mountain biking gears you need to wear

A good bicycle kit will keep you comfy and you will probably have a good time out on the trails if you wear the right gear. In order to help you decide what to wear for mountain biking, here are a few key clothing items.


The biking accessories are less restrictive and streamlined than other mountain biking gear, such as time trial suits, cyclo cross, and lycra. In this case, there isn’t much room for variation or self-expression since the designs are nearly identical.


A tight skin suit can be worn for short-track cross-country racing, while mountain bike pants can be worn for downhill riding.
There are times when mountain bikers wear padded shorts and flannels. Any preference or style can be met with mountain bike kit. If you’re going to descend gnarly trails, ride through mud, or race in summer heat, mountain bike gear is much more than clothing alone.


When riding downhill, mountain bike pants can be worn, and when racing cross-country, a skin suit can be worn.


It is common for mountain bikers to wear shorts and flannels that are padded. Styles and preferences vary when it comes to mountain bike kits. A mountain biker needs more than just clothes to tackle gnarly trails, ride through mud, and compete in summer heat.

Top 8 mountain biking gears you should wear on every ride

Gloves

Full-finger gloves are usually worn by mountain bikers. Mountain bike gloves have grippy palms that keep hands planted on the handlebars. Thin palms are favored by many riders because they improve control and feel, but padding in the palm can provide additional protection.


Because mountain bikes are prone to crashes, we need gloves that are both protective and functional. These gloves can become very hot due to their tight fit and functionality. Even in the summer, mountain bikers wear full-finger gloves because they provide additional grip and protection.

Socks

No specific sock style is best for mountain biking, but you can wear just about any sock. Rain and mud are often a concern for mountain bikers who wear waterproof socks. Your feet will remain dry and warm while the water won’t drip down into your shoes.


A waterproof shoe cover slips over your shoes and keeps water from penetrating your feet. Cycling socks designed for warm weather are lightweight and breathable.

Padding

Some mountain bikers wear knee and elbow pads to protect themselves from crashes during more extreme rides. Adding protection to the knees and elbows will help prevent injuries.
Knee pads for mountain bikes can vary in thickness and weight, as well as being thin and lightweight. As a beginner learning to hike, you can use it, while as a fearless racer taking risks to reach the trail’s bottom, you can use it.

Jersy

Mountain bikes benefit from looser jerseys because they provide more protection than road bikes. Mountain bike speed is usually determined by your ability to handle corners rather than your ability to push against the wind. Mountain bikers can protect themselves even in summer from branches and twigs by wearing a long sleeve jersey.

Jersy-biking-gear
Caption: Surly logo sleeve t-shirt available

However, cross-country mountain bikers and hot-weather riders do often wear a good quality one. Many of these jerseys feature rear pockets where you can store your phone, tools, and food.

Shoes

Shoes

Your decision is yours. Even seasoned riders need help deciding whether to wear flat pedal or clip less shoes despite their professional status. For now, stay within your comfort zone. Although many cross-country or road cyclists use clip-in pedals, we recommend gaining experience in whatever you feel comfortable in.

Flat shoe 8
Caption: Five ten free rider pro flat shoe for men available

If you don’t already have a shoe with a wide and flat sole, then you should start with a clip-less (SPD style) shoe. Choosing a pedal with a large profile or one that looks like a flat pedal will offer excellent balance and stability if you stand up on the bike frequently. Although plenty of trail riders wear cross-country shoes while trail riding, there are still plenty who do not. Compared to trainers, flat shoes provide a better grip on flat pedals than trainers.

Helmet

With a quality helmet, you will be able to enjoy your mountain biking trip. The kind of helmet you wear depends on what type of riding you do. Helmets are universally necessary for riders.

Helmet-biking-gear-biking-accessories
Credit: Pro Tec full cut certified helmet available

You should wear a helmet with a significant amount of coverage if you intend to ride in highly technical terrain with significant risks. If you are taking it easy, avoiding hazards, and taking it easy on more spacious trails, wearing a well-made helmet is not necessary, but it’s always a good idea to make sure you stay safe.

Shorts and trousers

The bottom half of your clothing should be chosen based on your riding style. If you plan to wear knee pads, you will need to know what to wear. Wearing shorts or trail pants is your choice when choosing what to wear. When riding in the summer, you might want to wear shorts. Under their shorts, mountain bikers wear tights during the colder months.

Biking-gear-biking-accessories
Caption: Andiamo men’s padded skin liner available

MTB trail pants might be a good choice for those who prefer something that covers their legs and isn’t a pair of shorts. It is usually possible to fit kneepads around the knee of MTB trail pants thanks to their slim fit. Wearing waterproof and insulated trail pants in muddy weather is a great idea.

Goggles or glasses for eye protection

When mountain biking, there is no way to avoid danger. It is possible to encounter random rocks and trees thrown from the sky. Pedaling after rain or mud is also very difficult because the trails are slippery.

Bolle bolt 2. 0 sunglasses acid yellow matte volt gun polarized
Caption: Bolle Bolt 2.0 sunglasses for UV protection available.

You should wear glasses or goggles while hiking as a means of keeping dirt and debris away from your eyes, as well as to protect them from vandalism. You can also wear these when shredding down the trail in order to keep your eyes safe from dirt and rocks.

What should you strictly avoid while riding mountain bikes?

Some gear and accessories are basic things that you need to have on your mountain biking but you will find more specific accessories such as summer jersey, winter jacket, summer mountain biking shorts, etc. Road-cycling-style bib shorts with chamois pads are perfect both by themselves, or, more commonly on trail rides, as a base layer with a baggy pair of mountain bike shorts on top.    

You do not want to wear underwear with padding on with a pair of shorts that have a built-in chamois, but you could use it with a pair of baggy bike shorts, or even underneath a regular pair of shorts or pants. Most mountain bikers wear two layers of shorts; the first layer is typically a pair of fitted, padbed shorts, usually called chamois shorts or shammies, with a pair of slouchy, slimmer cargo-style shorts over the top. Like most biking shorts, you will typically also find a certain amount of padding built-in, which can lead to much more comfortable days on the trail.    

Sunglasses are also a crucial safety add-on, since often trails take you over areas where branches and twigs may be up close to eye level, or dirt or gravel can get kicked up in your eyes if you are riding with others. You can choose padding if you need it for confidence (usually knee and elbow pads are recommended for beginners on technical trails), but most mountain bikers that are not riding Enduro or downhill are going to skip the padding. As far as gear goes, you will want cycling gloves, sunglasses, and likely high socks if you are riding in areas where there is lots of brush. For bike parks, downhill rides, and DH racing, mountain bikers typically wear a full-face helmet, which offers full-face protection.   

For competitions and technical riding, some mountain bikers will also wear other body armor, such as elbow pads and back protectors. While the necessity for helmets is universal for all riders, the particular style of helmet you wear will vary depending on the type of riding you enjoy doing. Obviously, you can wear whatever you like while riding a mountain bike, it does not need to be an obstacle in making mountain biking accessible — some folks prefer the less is more approach, too.    

6-tips-to-choose-the-right-saddle-for-mountain-bikeCategoriesBike

6 Tips on Choosing the Right Saddle for Mountain Bike

For every rider, their is a need of right saddle for mountain bike. Mountain bike saddles can be tricky to find – here are a few things you must do to simplify the process. In theory, you should be able to find the perfect saddle for your mountain bike much more straightforward than it is. You only need something that fits well, lasts a long time, and doesn’t cost much, right?

It might seem impossible to understand how such a simple process could get so complicated when walking into a bike shop or surfing the internet for ideas to find out the best saddle for mountain bike. The walls of large bike shops tend to have saddles hanging but with so much of options you get confused.

Half-saddles are sometimes needed; some are wide, narrow, flat, and curved, with slots so large that your hand can pass through them. Do you know what to do first?

You should consider your cycling frequency, type, experience, position on the bike, weight, hip width, and gender and your weight, hip width, and riding position. Every cyclist wants to ride comfortably, especially mountain bikers who ride frequently. Finding a mountain bike saddle tailored to your riding style can be a little confusing, especially with so many options available on the market.

If you stumble upon this article, you can say goodbye to your dilemma because we will provide you with brief information about best bike saddle for mountain bike and tips for to choose a saddle you love to ride.

Enjoy your read, and don’t miss a single point in this article!

Best high quality saddle for mountain bike riders available at the local bike shop
Perfect saddle for mountain bike available at the local bike shop

Mountain Bikes: What are they?

In the late 1900s and early 2000s, mountain biking was considered as an extreme sport. As a result of its enhanced durability and excellent performance over rough terrain, the bike then got designed to allow its rider to go off-road riding.

In the beginning, mountain bikes were made like ordinary road bikes, with a broader frame and fork to have wider tires. Mountain bikes thereafter evolved including the latest technology to provide riders with incredible, fun rides allowing them to excel their confidence on any trail they choose.

What are the types of saddle for mountain bikes?

A bike saddle comes in different types, we have listed few of the right saddle for the mountain bike:

Road Bike Saddle

Rather than distributing your weight evenly across the saddle, saddle for mountain bike allows you to shift your body weight forward into more aggressive positions. If you want to know the characteristics of the road bike saddle you can see them as; thinner, more rigid, lighter, and stiffer are the characteristics of road bike saddles.

There is usually a narrower and more streamlined saddle on a road bike. The system is designed to transfer power as efficiently as possible. Road bikes are typically composed of lightweight materials like carbon fibre since one of their characteristics is being fast and aerodynamic.

Ride friendly saddle for mountain bike rider available under budget at the local bike shop.
Deity component speedtrap AM Saddle available at the local bike shop

Mountain Bike Saddle

On a bumpy terrain, a mountain bike saddle provides comfort and ease. Usually, reinforced panels on mountain bike saddles protect them from wear and tear due to falls and extreme weather conditions.

Saddle for mountain bike typically reviews feature for pressure-relieving channels especially on the longer rides which adds flexible edges to reduce pressure and prevent soreness. Classic leather or faux finish can be used to cover and protect it from damage and crash.

Remember adding more padding won’t make any saddle for the mountain bike more comfortable. Although mountain bike saddles are unlikely to lack padding, professional saddles rarely have more than a few milimetres.

A comfort saddle for mountain bike comes with more weight. While taking a stroll on the market, you can come across two basic types of extra padding i.e. gel and foam padding.

Affordable saddle for mountain bike riders available at the local bike shop.
Prologo NDR CPC Saddle available at the local bike shop

Tips for Choosing the Perfect Saddle

After understanding the types of saddle for mountain bike, now here we share the tips in choosing the perfect saddle for mountain bike. Some people recommend mountain bike seat as the best match, but remember that everyone’s needs are different, and you need to read the following tips before making any decisions.

Choose the Right Shape Saddle

There are many saddles available on the market because every rider has different requirements for a comfortable saddle. And a typical women’s saddle is more comprehensive, designed to fit a female’s anatomy, making the riders get more comfortable for while enjoying the mountain bike ride.

Adjust the saddle height and position as needed

It is not enough to have a perfect saddle. To gain maximum comfort, you’ll need to ensure it is set at the right height.

If you want a bike saddle that fits you perfectly, consider buying from a shop that offers professional assistance. Apart from keeping your saddle horizontal, ensure that you are not pointing it too high or too low to avoid discomfort in some unwanted areas.

Choosing the riding position

You can find out how far you can reach with your hands by sitting on the ground and seeing how far you can get.

Flexibility is determined by how well you can come forward. As a result, saddles with rounded shapes are more suitable for riders who are less flexible in general.

You will find more benefits if you choose a slightly curved saddle if you can reach your toes in that sitting position on the ground, then yes go for it. Lastly, riders who get halfway are considered flexible, allowing a more stable position on the bike and providing more freedom to move.

Cut-outs, channels, and grooves

It is common for saddles to feature central channels or cut-outs that relieve pressure. By doing this, you’ll be reducing soft tissue pressure and enhancing blood circulation. Consider saddle as a main channel or cut-out if you are experiencing numbness while riding.

Are saddles with cut-outs still acceptable if you don’t experience numbness? Almost everyone does. The most important thing is to find what kind is more comfortable for you. A cut-out near the channel edge can cause pressure points for some people.

It’s a good idea to consider a saddle without a full-depth hole if your riding often takes place in bumpy conditions. Several saddles are explicitly designed for off-road use which have draining shelves to prevent the occurrence of bumpiness.

Price of the saddle

Do you have a budget? A saddle’s price is primarily determined by the materials used.

Usually, a carbon-fibre shells and rails cost more if you require a robust and lightweight design. If you are willing to purchase Deity component speed trap AM saddle, with the highest quality EVA foam, you must pay $67.99.

Conversely, entry-level saddles made from polymer shells with alloy rails can be reasonably priced, and the weight difference won’t make much difference to a whole bike.

Material of the saddle

Considering the saddle top-surface, material is another important factor. Durability and intended use are essential factors to consider before buying any saddle for mountain bike.

For an immediate attraction, we prefer, leather. Which is beautiful and malleable, but leather does not respond well. On the other hand, synthetic materials can be less breathable and more susceptible to deterioration in the weather. So find a good quality material saddle for the every day ride.

How to correctly measure the saddle for mountain bike?

You can measure a bike’s width with special tools in a bike shop, but you can easily calculate it at home if you don’t want to go there. 

A saddle’s width is easy to measure when shopping for one. Those are the distances between your pelvic protrusions.

Seats and saddles are available in various sizes and shapes to fit different riders – typically based on their sit bones.

It is also possible to use the width of your wrist to estimate your sit bone width. For the right measurement you can take support from the store keeper or use the basic measurement guide lines for the saddles.

What is the reason for your uncomfortable bike saddle?

The saddle of a bicycle is designed to support only a portion of the rider’s weight.  Your arms support some of your body weight when you lean on your handlebars and provide to your weight.

You can also support your weight with your legs if you pedal consistently. You’ll notice that your saddle feels less comfortable when you haven’t ridden your bike for a long time.

As your saddle wears and tears over time, it will further suffer a fair amount of wear and tear. As your saddle stiffens, it will no longer offer the same level of support as it did when you first bought it.

Finally, the saddle you used may not have been the right choice for you from the start. New bikes come with saddles that are fine for short rides but not suitable for long rides.

Regardless of the reason, if your saddle is uncomfortable, just change it instead of compromising on every ride.


Comfortable bike seats for overweight ridersCategoriesBike Seats

Most Comfortable Bike Seats for Overweight Riders

Most Comfortable Bike Seats for Overweight Riders

Bicycle riding has been one of the most preferable activities of all time. Be it for fun or exercising, cycling is indeed one of the best activities to go for. 

Well, no matter the intention, comfort is always the priority!

The comfort bicycle riders tend to seek for while cycling comes in majority from the type of seat they use. In fact, the comfort factor for cycle riders revolves around the seat and the saddle, viz its type, its height, the angle it’s placed at, and so on. 

Bicycle riders

So the question here is- do different types of riders need different types of bike seats? The answer is simple, it depends! 

We know that no two people are the same and hence depending upon their choice and preferences, it’s likely that they’ll opt for the type of seat that best fits their comfort needs.

Here in this blog, we are particularly going to talk about different bike seats for overweight riders. 

Please stick with us till the end while we take you on this journey of choosing the most comfortable bike seats for overweight riders.

Do We Need Different Bike Seats for Overweight Riders?

As mentioned earlier, different types of people may or may not have different preferences about their choice of bicycle seats. But when it comes to overweight riders, the answer is yes!

The regular bike seats tend to have a small area. And, if the bike seats are small and hard, that can bring misery to riders with lots of painful and unpleasant experiences. 

Being overweight, there’s gonna be more weight that needs to be distributed uniformly over a space (usually an extra space than usual) and therefore they require unique seats; wider and softer seats. 

Regardless of weight, it’s likely for other riders too to face issues with their cycle seats. Also, an uncomfortable seat can ruin your idea of how a leisure cycle outing should be.

So, it’s very important to find the best seat that’s comfortable and gives you joy during your ride. 

But as we are particularly going to talk about overweight riders, so below mentioned are some tips for finding the best bike seats for overweight riders. Don’t forget to spread the word to someone who can benefit from it!

Tips for Finding the Best Bike Seats for Overweight Riders

Finding a bike seat that’s comfortable and is up to your expectations is not very easy. There are plenty of options in the market to choose from and that’s also a reason that makes the process of choosing the best bike seat for overweight riders a deceptively complex task.

But do not worry, we’re here to help you go through the process. Below listed is an overview of what to check for while choosing a bike seat for overweight riders (and almost everyone):

Seat Cover

Things you consider while buying a bike seat are how long is it gonna last, is it worth the bucks you’re paying for, how comfortable it is, and so on. 

Talking about the seat cover of a bicycle, it is one of the most important specs you need to look at while buying yourself a seat. 

Make sure you search for a seat cover that’s made of a stronger material, is thick and waterproof.

Saddle Width

Next, you would want to consider the width of the seat. For overweight riders, they need extra space to accommodate their base. 

Having a small saddle is problematic, especially if you’re planning on going on a long bicycle ride.

Seat Cushion

Further, a seat cushion is something crucial for all riders. The softer the seat cushion, the better is the riding experience. 

Nobody would want to sit on a seat that’s hard, poky, and uncomfortable. 

A quality cushion that’s softer, spongier, and thick can make your adventure worth every second, especially if you’re the kind of rider who likes sitting back and relaxing while you pedal.

Seat Mounting

To install your new bike seat, you may need the correct tools to do so. Make sure your seat comes with a mounting kit, if not then there’s no issue to have on-hand mounting supplies. Almost all seats will fit your bike if you have the correct tools to fix it up.

Never forget to cross-check that the seat you’ve bought is compatible with your bike.

Suspension of the Seat

The seat needs to be adjustable according to the height at which you need it. While many riders tend to keep the seat higher, some (especially overweight riders) choose to have lower seats such that their feet can easily touch the ground.

So choose the most comfortable height, otherwise, you know it’s always easy to adjust it.

Seat Durability

Apart from comfort, when it comes to buying a bike seat, the first concern is regarding its cost and lifespan.

Trust us, if a seat is durable enough, spending a few extra pounds would do no harm. 

Let us ask you a simple question: Would you rather have an inexpensive less durable seat that you need to change every year or a seat that’s quite costly but lasts longer? 

It’s entirely up to you but remember to make the best choice!

Top 5 Best Bike Seats for Overweight Riders

Now that we know the factors we need to consider while buying a seat, let us now move forward and explore the top 5 best bike seats for overweight riders.

Zacro Oversized Bike Seat

Zacro Oversized Bike Seat is specially designed for overweight riders. With wider seat width and valuable cost, this seat fits well for both men and women.

Zacro’s seat is made up of durable microfiber leather that makes it waterproof, scratch-resistant, and breathable.

Zacro seat for overweight riders

Click here to shop

The seat has good cushion support designed with the rider’s comfort in mind. The cushion system in this seat helps reduce pain and provides more comfort to the riders.

This type of seat can easily be mounted using a mounting wrench. The seat is suitable for mountain bikes, stationary bicycles, and road bikes. 

Its low cost makes it likable among the riders.

Mango Cruiser Seat

Mango Cruiser seat is the best in terms of comfort, price, durability, appearance, etc for overweight riders.

It has an incredibly thick seat with a good thickness suitable for off-road rides with a review of almost 4.5 stars.

Mango cruiser seats for overweight riders

Click here to shop

The seat is made up of heavy-duty vinyl material which makes it incredibly durable while still retaining its comfort. 

We recommend Mango Cruiser seats to all fellow riders for whom comfort is the top priority!

Giddy Up! Bike Seat

The next on the list is Giddy Up! Bike seats. It has the second best overall specifications (fit for oversized riders) after Mango Cruiser Seats. 

The seat comes with a wide saddle and padded cushion that offers the most comfortable riding experiences.  

Giddy up! Bicycle seat for overweight riders

Giddy Up! Seats as well are waterproof and run up to expectation in a long term. The seat’s Universal Fit Shock Absorbing features are what make it a unique type of seat for overweight riders.

Bikeroo Seat

Bikeroo oversize seats are designed to improve bike riding experiences. 

These seats come in large sizes that undoubtedly are comfortable for people wanting to get out and ride. 

Bikeroo seats for overweight riders

Shop from here

The Bikeroo Seats are made up of Memory foam inside out that provides pain relief comfort providing riders a reason to go the extra mile.

The extra padding and wider space make this seat a better alternative for overweight riders. 

Overall, it’s an amazing product one can invest in while being content and complementing the bike riding journey.

Prologo Dimension Saddle

Prologo Dimension Saddle with a wider seating area allows a better distribution of body weight. What makes it best from the rest is its comfort, performance, and lightweight. 

This product has got an outstanding shape, size, and ergonomic shape suitable for all types of riders. 

Prologo dimension saddle

Click here to shop

Its seat cover is made up of microfibre that offers exceptional strength and improved breathability while the cushion is composed of light foam material giving the seat the volume it requires.

Conclusion

We hope that this blog was helpful for you to know about the most comfortable bike seats for overweight riders. If it did then do not forget to share it with your friends and people for whom this can be of great help. 

You can also explore other types of seats here. All the best for your next ride!