Disc Brake Rotor when you need to check and fix it!
When mountain biking down a treacherous slope or navigating through a bustling city, the one thing every cyclist depends on – often subconsciously – is their disc brake rotor. But how often do we pause to reflect on its significance, and the need for its proper maintenance? Let’s dive in.
The Heart of Stopping Power: The Mountain Bike Disc Brake Rotor
Every time you squeeze your mountain bike’s brake lever, it’s the disc brake rotor that ensures you stop safely and effectively. Like the heart pumps blood throughout the body, the disc brake rotor is at the center of the bike’s braking system, regulating the stop-and-go rhythm of your ride.
Why is the Disc Brake Rotor so Important?
Immediate Response: On unpredictable terrains, especially while mountain biking, immediate braking response can mean the difference between a successful ride and a fall. The disc brake rotor provides this instant response.
Heat Dissipation: Braking produces heat. The disc brake rotor is designed to dissipate this heat effectively, ensuring that the brake system doesn’t overheat and lose its efficiency.
Durable in Wet Conditions: Traditional rim brakes lose their potency in wet conditions. The disc brake rotor, however, maintains its grip, ensuring that come rain or shine, your bike stops when you want it to.
Maintaining the Disc Brake Rotor: Not a Choice, but a Necessity
With the significance of the disc brake rotor established, maintaining it isn’t just about ensuring longevity, but more importantly, about safety.
Regular Inspection: At regular intervals, inspect the rotor for any signs of wear, warping, or damage. Over time, even the toughest rotors can wear out, and it’s better to spot the signs early.
Cleanliness is Key: After muddy rides, ensure that the rotor is free from grime and debris. A clean rotor ensures optimum performance.
Check for Even Wear: If one side of the rotor wears out faster than the other, it indicates an alignment issue, which needs immediate attention.
Responsive Braking: Always be attentive to the responsiveness of your brakes. If you feel any lag, or if the brakes feel “spongy,” it might be time for a rotor check.
Literally! The next time you’re out on your bike, remember that each squeeze of your brake lever is a testament to the reliability of your disc brake rotor. Just like any other critical piece of equipment, give it the attention and care it deserves. After all, when you’re barreling down a mountainside or avoiding obstacles in urban settings, it’s that disc brake rotor that has got your back!
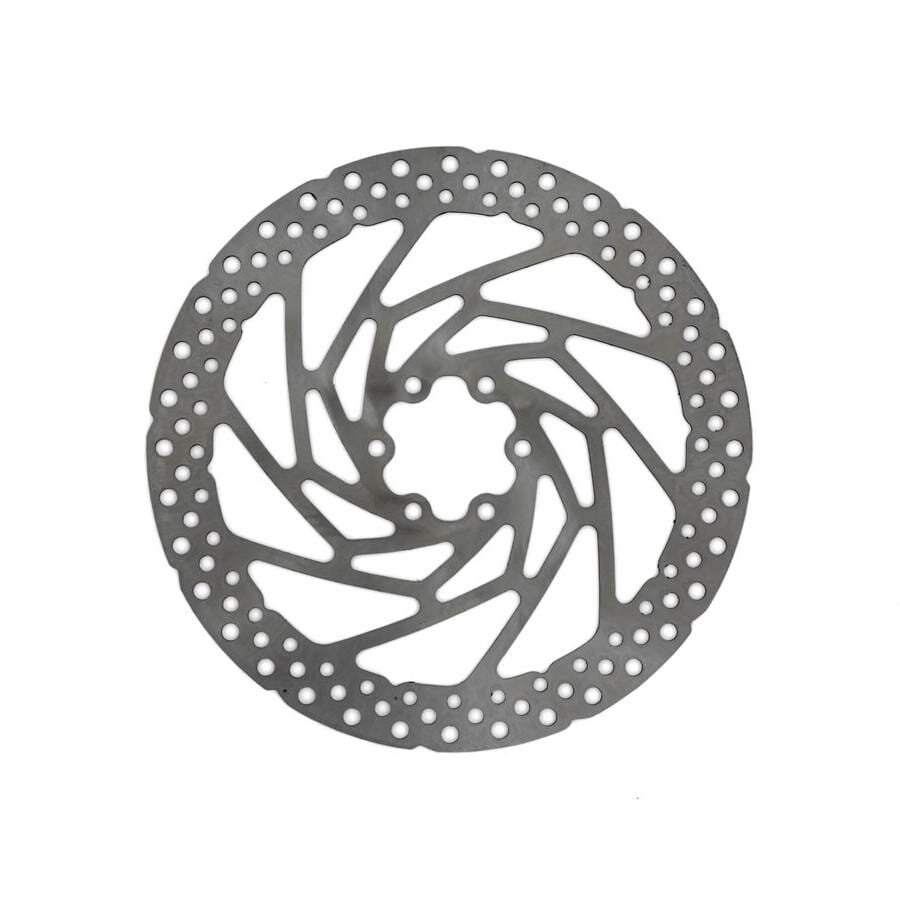
You can buy this Hope Moto V2-6 Bolt Standard Disc for $57 here!
Excessive Wear and Thickness Reduction
The connection between a cyclist and their bike is both physical and spiritual. Yet, beneath the surface, certain parts of the bike, like the disc brake rotor, silently do their job with little attention—until, of course, they start to falter. One of the subtle but serious issues that these rotors face is excessive wear and thickness reduction. Understanding this, monitoring it, and addressing it in time is crucial for every rider.
Understanding Excessive Wear and Thickness Reduction
Every turn, stop, or sudden brake exerts force on the disc brake rotor. Over time, these repeated actions can result in excessive wear, reducing the rotor’s thickness. This might sound trivial, but this thinning can significantly compromise the rotor’s performance and, in turn, the safety of the rider.
Signs of a Worn-Out Disc Brake Rotor
Visual Scratches and Grooves: One of the most apparent signs is visible deep scratches, grooves, or “scores” on the rotor’s surface. These are indicators of uneven wear.
Noisy Braking: If your bike squeals or produces a grinding noise when you brake, it’s likely because of an excessively worn rotor.
Reduced Brake Responsiveness: If the rotor has thinned significantly, you might feel a delay or reduced effectiveness when braking.
Vibration: A worn-out disc brake rotor can cause an unsettling vibration in the brake lever or through the bike’s frame when applied.
Measures to Check Wear and Thickness Reduction
Regular Visual Inspection: Make it a habit to visually inspect your rotors after rides. Look for any uneven wear or visible deep grooves that might be emerging.
Use a Micrometer: A micrometer is a tool that measures small distances with precision. By using one, you can measure the thickness of your rotor and compare it to the manufacturer’s specifications to determine if it’s time for a replacement.
Listen to Your Bike: Your bike often communicates its health through sounds. Pay attention to any unusual noises during braking.
Feel the Brake Lever: If the lever feels “spongy” or if you need to squeeze harder than usual, it’s a sign that the rotor might be wearing thin.
The Path Forward
Recognizing wear and thickness reduction is just the first step. Once identified, it’s vital to address the issue, which might involve resurfacing the rotor or, in more severe cases, complete replacement.
Riding, for many, is not just about mobility but also about freedom and connection with the environment. Ensuring that each component of your bike, especially something as critical as the disc brake rotor, is in top condition means that you’re not only guaranteeing your safety but also ensuring that your rides remain smooth, enjoyable, and free from unexpected interruptions. Always remember: A little attention today can prevent a significant mishap tomorrow. Safe riding!
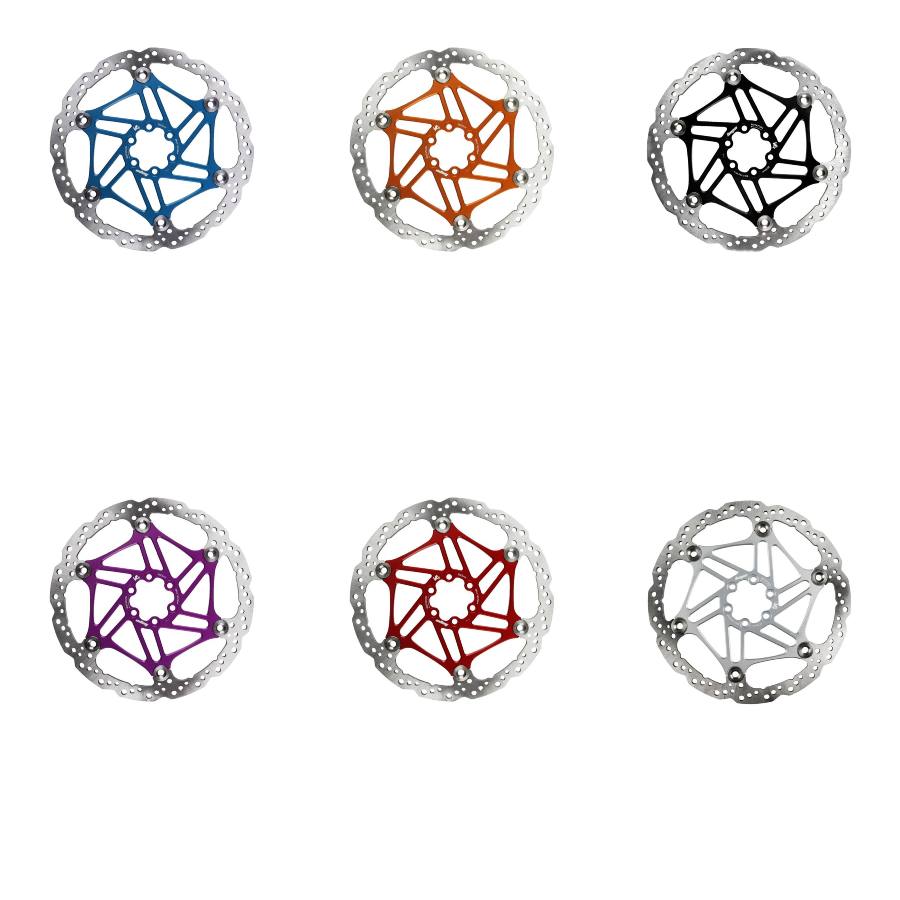
You can buy Hope V4 Vented 6 Bolt Floating Disc fro $164.37 here!
Deep Scoring or Grooving on the Rotor Surface
While the streamlined design of a mountain bike appears simple to the untrained eye, each component tells a tale of intricate engineering and thoughtful construction. The disc brake rotor, often taken for granted, is no exception. One of the most common, yet potentially dangerous, ailments it can suffer from is deep scoring or grooving. Recognizing this early can be the difference between a thrilling ride and a disastrous fall.
Demystifying Scoring and Grooving
The continuous friction between brake pads and the rotor can lead to more than just wear and tear; it can result in deep lines or grooves—often referred to as ‘scoring. Think of it as the battle scars of a warrior; only, in this context, these scars can hinder performance and compromise safety.
The Implications of Scoring on a Disc Brake Rotor
Reduced Braking Efficiency: Scoring can diminish the rotor’s surface area in contact with the brake pads, leading to reduced braking power.
Accelerated Wear of Brake Pads: Deep grooves can cause uneven and faster wear of the brake pads, demanding more frequent replacements.
Potential for Rotor Crack: In extreme cases, these scores can become stress points, increasing the risk of the rotor cracking during intense braking situations.
Spotting Grooves on Your Mountain Bike Rotor
Visual Examination: The most straightforward method. Look for any lines or depressions that are deeper than usual wear marks on the rotor’s surface. Shine a light from the side to highlight any inconsistencies in the surface.
Feel the Surface: Run your finger (carefully) over the rotor. If you can feel significant indentations or ridges, it might be a sign of deep scoring.
Listen for Noises: Scoring can often produce a rhythmic scraping sound when braking, especially at higher speeds.
Vibration or Pulsation: Deep grooves can result in a juddering sensation through the brake lever or pedals during braking.
Addressing Deep Scoring and Grooving
Rotor Resurfacing: For mild to moderate scoring, resurfacing the rotor might be an option. However, this should only be done if the rotor’s thickness remains within the manufacturer’s specified limits after resurfacing.
Rotor Replacement: If the scoring is too deep or if resurfacing would make the rotor too thin, a replacement is the safest bet.
Inspect Brake Pads: Alongside the rotor check, ensure that the brake pads aren’t causing the scoring. Damaged or contaminated pads can be a primary culprit.
A smooth rotor surface might seem like a minor detail in the grand scheme of mountain biking. However, deep scoring and grooving can quickly turn an adrenaline-filled adventure into a precarious situation. By routinely inspecting and addressing issues with your bike’s disc brake rotor, you’re not only preserving the longevity of your ride but also ensuring the safety of your journey. Mountain biking is all about embracing challenges with preparedness, and that includes the challenges your bike might face!
Heat Damage and Discoloration
The exhilarating descent on a mountain trail is one of the most adrenaline-pumping experiences a biker can have. But with every descent and sharp bend, your brakes work tirelessly, generating heat. While disc brake rotors are engineered to handle high temperatures, they are not invincible. Excessive heat can lead to significant damage and discoloration, and understanding these signs can be crucial to ensure a safe ride.
The Underlying Science: Why Do Rotors Heat Up?
When you apply the brakes, kinetic energy (motion) is converted into thermal energy (heat) due to friction between the brake pads and the rotor. This is a natural process, but when brakes are overused, especially during long descents or sudden stops, it can lead to excessive heat generation.
Consequences of Overheated Disc Brake Rotors
Reduced Braking Efficiency: Overheated rotors can lose their flat shape, leading to a phenomenon called “brake fade,” where braking power is significantly reduced.
Compromised Structural Integrity: Excessive heat can weaken the metal, making the rotor more susceptible to cracks and fractures.
Aesthetic Damage: While not as critical as the functional implications, heat can cause unsightly discoloration on the rotor, indicating potential underlying issues.
Spotting the Signs of Heat Damage and Discoloration
Visual Inspection for Discoloration: A typical sign of overheating is a change in the rotor’s color. A bluish or purplish tint often indicates areas of extreme heat exposure.
Warped Rotors: Overheating can cause rotors to warp, leading to uneven braking. This can be felt as a pulsation when applying the brakes.
Smell and Smoke: In extreme cases, excessive heating can produce a distinct burning smell or even visible smoke from the braking system.
Decreased Braking Power: If the brakes feel less responsive than usual, it may be due to heat damage affecting the rotor’s structure and its interaction with the brake pads.
How to Mitigate and Address Heat Damage?
Adopt Progressive Braking: Instead of hard, sudden stops, apply brakes progressively. This method distributes the heat over a longer duration and area, preventing localized overheating.
Allow Brakes to Cool: During long descents, take periodic breaks to let the braking system cool down.
Rotor Replacement: In cases of severe warping or visible discoloration that affects braking performance, consider replacing the rotor for safety.
Upgrade to Ventilated Rotors: If you frequently bike in conditions that stress your brakes, consider upgrading to ventilated rotors, designed to dissipate heat more efficiently.
Mountain biking often pushes both the rider and the bike to their limits. As you navigate challenging terrains, remember that your disc brake rotor is silently bearing the brunt of the heat. By being vigilant and understanding the signs of heat damage, you ensure that your braking system remains efficient and reliable. After all, a successful mountain biking adventure is not just about speed and thrill—it’s also about safety and ensuring that your equipment is in top shape to tackle whatever lies ahead.
Warping or Bent Rotor
The balance between speed and control is a constant game played by mountain bikers as they tackle varied terrains. At the heart of this equilibrium lies the disc brake rotor, ensuring that you stop when you want to and as you intend. However, even this robust component has its vulnerabilities. One such issue, often overlooked but with pronounced effects, is rotor warping or bending.
The Curved Culprit: How Do Rotors Warp or Bend?
Rotors can become warped or bent due to various reasons:
Heat Stress: As discussed in previous sections, excessive heat can not only discolor the rotor but also change its shape. Rapid heating followed by sudden cooling (like splashing through a water puddle after a heated descent) can cause warping.
Physical Impact: A direct hit from a rock, fall, or even mishandling during transportation can lead to a bent rotor.
Improper Installation or Over-Tightening: Not adhering to torque specifications when installing can result in uneven pressure, leading to warping.
Challenges Posed by a Warped or Bent Rotor
Inconsistent Braking: A rotor that isn’t perfectly flat won’t have consistent contact with the brake pads. This can lead to “grabby” brakes or a pulsing sensation when braking.
Increased Wear: The uneven surface will cause faster and inconsistent wear on brake pads.
Noise: Warped rotors can produce a periodic scraping or squealing noise, especially noticeable at low speeds.
Diagnosing a Warped or Bent Rotor
Visual Inspection: With the bike lifted, spin the wheel and observe the rotor as it passes through the brake caliper. Any wobbling or side-to-side movement can indicate warping.
Braking Test: At a moderate speed, apply the brakes gently. A warped rotor will produce a pulsing sensation through the brake lever.
Listen for Sounds: As mentioned, a periodic scraping noise during wheel rotation is a telltale sign of a bent rotor.
Solutions and Preventions
Rotor Truing: Minor bends can be corrected using a rotor truing tool. This requires patience and a delicate touch to gently bend the rotor back to its original shape.
Replacement: In cases where the warping is significant or if truing doesn’t resolve the issue, replacing the rotor is the safest option.
Use Proper Techniques: When installing or removing rotors, always adhere to manufacturer guidelines and torque specifications to prevent inadvertent bending.
Protect During Transit: If you’re transporting your bike, ensure the disc brake rotors are protected from potential impacts.
While the natural terrains and trails of mountain biking come with their unpredictability, your equipment’s performance should not be one of them. A warped or bent rotor can compromise the very essence of control during your rides. By staying informed, conducting regular checks, and addressing issues promptly, you maintain the harmony between speed and safety, ensuring that every twist and turn of your journey is a choice, not a surprise. Happy and safe biking!
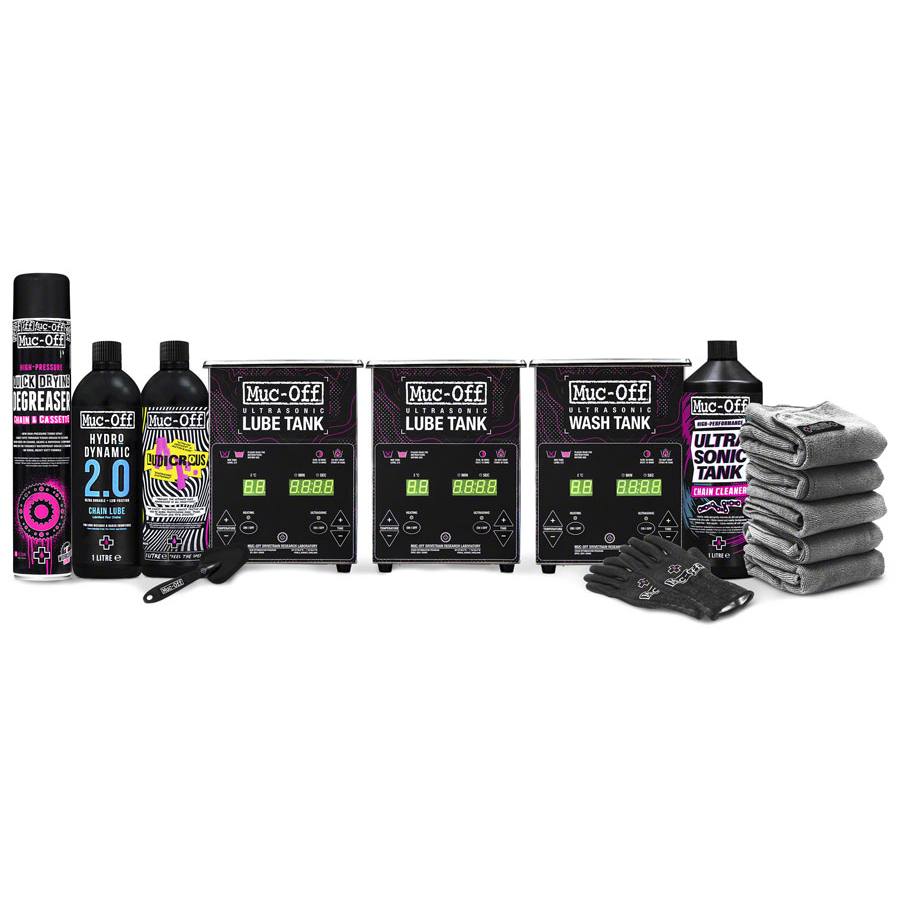
You can buy Muc-Off Ultrasonic Optimization Bundle for $1100 here!
Squealing or Grinding Noises during Braking: When Your Bike Cries Out for Attention
Mountain biking is often associated with the serene sounds of nature, the crunch of tires on trails, or the whoosh of wind against the helmet. Yet, there’s one sound no rider wants to hear: the dreaded squeal or grind during braking. Such noises are not just bothersome; they’re your bike’s distress call.
Why Do Brakes Squeal or Grind?
Contaminated Rotors or Pads: Dirt, oil, or other contaminants can get onto the brake pads or the rotor, causing a squealing noise when braking.
Worn-Out Brake Pads: As brake pads wear down, they may reach the “wear indicator,” producing a grinding sound as a warning.
Misaligned Calipers: If the brake caliper isn’t perfectly aligned with the rotor, it can lead to uneven contact and result in noises.
Vibrational Resonance: Sometimes, the frequency at which the brakes vibrate can produce a squealing noise, even if everything appears fine visually.
Troubleshooting Noises in Brakes
Clean the Rotors and Pads: Using a dedicated brake cleaner, ensure that both the rotor and brake pads are free from contaminants.
Check Brake Pad Thickness: Inspect the brake pads. If they’re worn out or nearing their end, consider replacing them.
Realign the Caliper: Ensure the brake caliper is precisely aligned with the rotor for even contact.
Anti-Squeal Compounds: Applying these compounds on the back of brake pads can dampen vibrations and reduce squealing.
Reduced Braking Performance: Don’t Let Your Safety Slide
The thrill of mountain biking often lies in the unexpected twists and turns, but your brakes’ performance should always be predictably excellent. If you find that you’re squeezing the lever harder for the same stopping power or if the brakes feel “off,” you might be facing deteriorating braking performance.
Signs of Diminished Stopping Power
Longer Stopping Distances: It takes more time and distance to come to a complete stop than usual.
Spongy Brake Lever: The brake lever feels soft or spongy when pressed.
Reduced Responsiveness: There’s a noticeable lag between applying the brakes and feeling the braking effect.
Visible Wear on the Rotor: Excessive grooves, scoring, or thinning of the rotor.
Tackling Deteriorating Braking Performance
Inspect Brake Pads: Worn-out or contaminated brake pads are often the culprit. Regularly check and replace them as needed.
Bleed the Brake System: Air bubbles in the brake fluid can lead to a spongy feel. Bleeding the brakes can help restore performance.
Rotor Check: Ensure the rotor is in good condition, free from warping, excessive wear, or damage.
LBS, the Local Bike Store: Your Go-To for Every Biking Woe
Between all the DIY checks and fixes, remember that professional expertise is just around the corner at LBS, your Local Bike Store. With experienced staff, state-of-the-art tools, and a passion for biking, they ensuEvery creak, grind, or squeal from your bike is a message, a call to action.
As you traverse challenging terrains and test your limits, ensuring that your equipment, especially your braking system, is in top-notch condition is paramount. And whenever in doubt, remember, LBS, your Local Bike Store, is always ready to assist. Safe trails lead to thrilling tales. That every squeal, grind, or braking issue is promptly and effectively addressed.
Whether you’re looking for a routine check-up or a complex repair, trust LBS to get you back on the trails, safe and sound. And whenever in doubt, remember, LBS, your Local Bike Store, is always ready to assist. Safe trails lead to thrilling tales. Happy biking!