Top-20-mountain-bike-saddlesCategoriesBike

Top 20 Mountain Bike Saddles for A Hard Core Rider

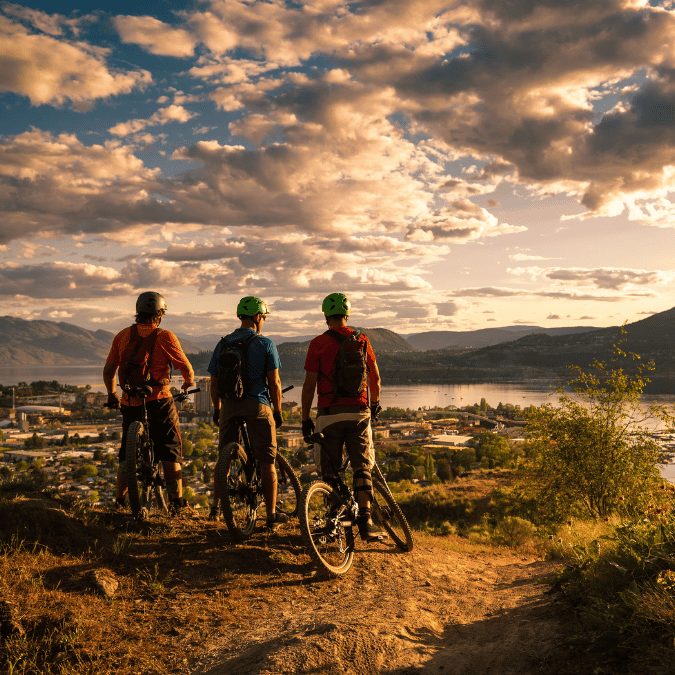
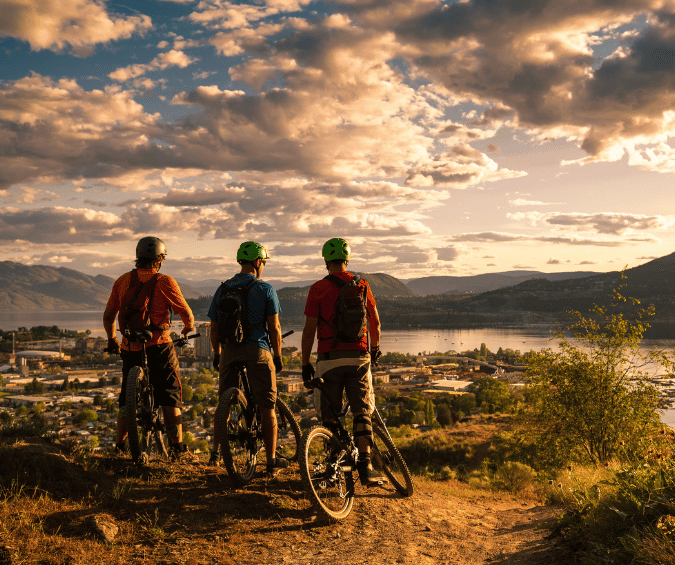
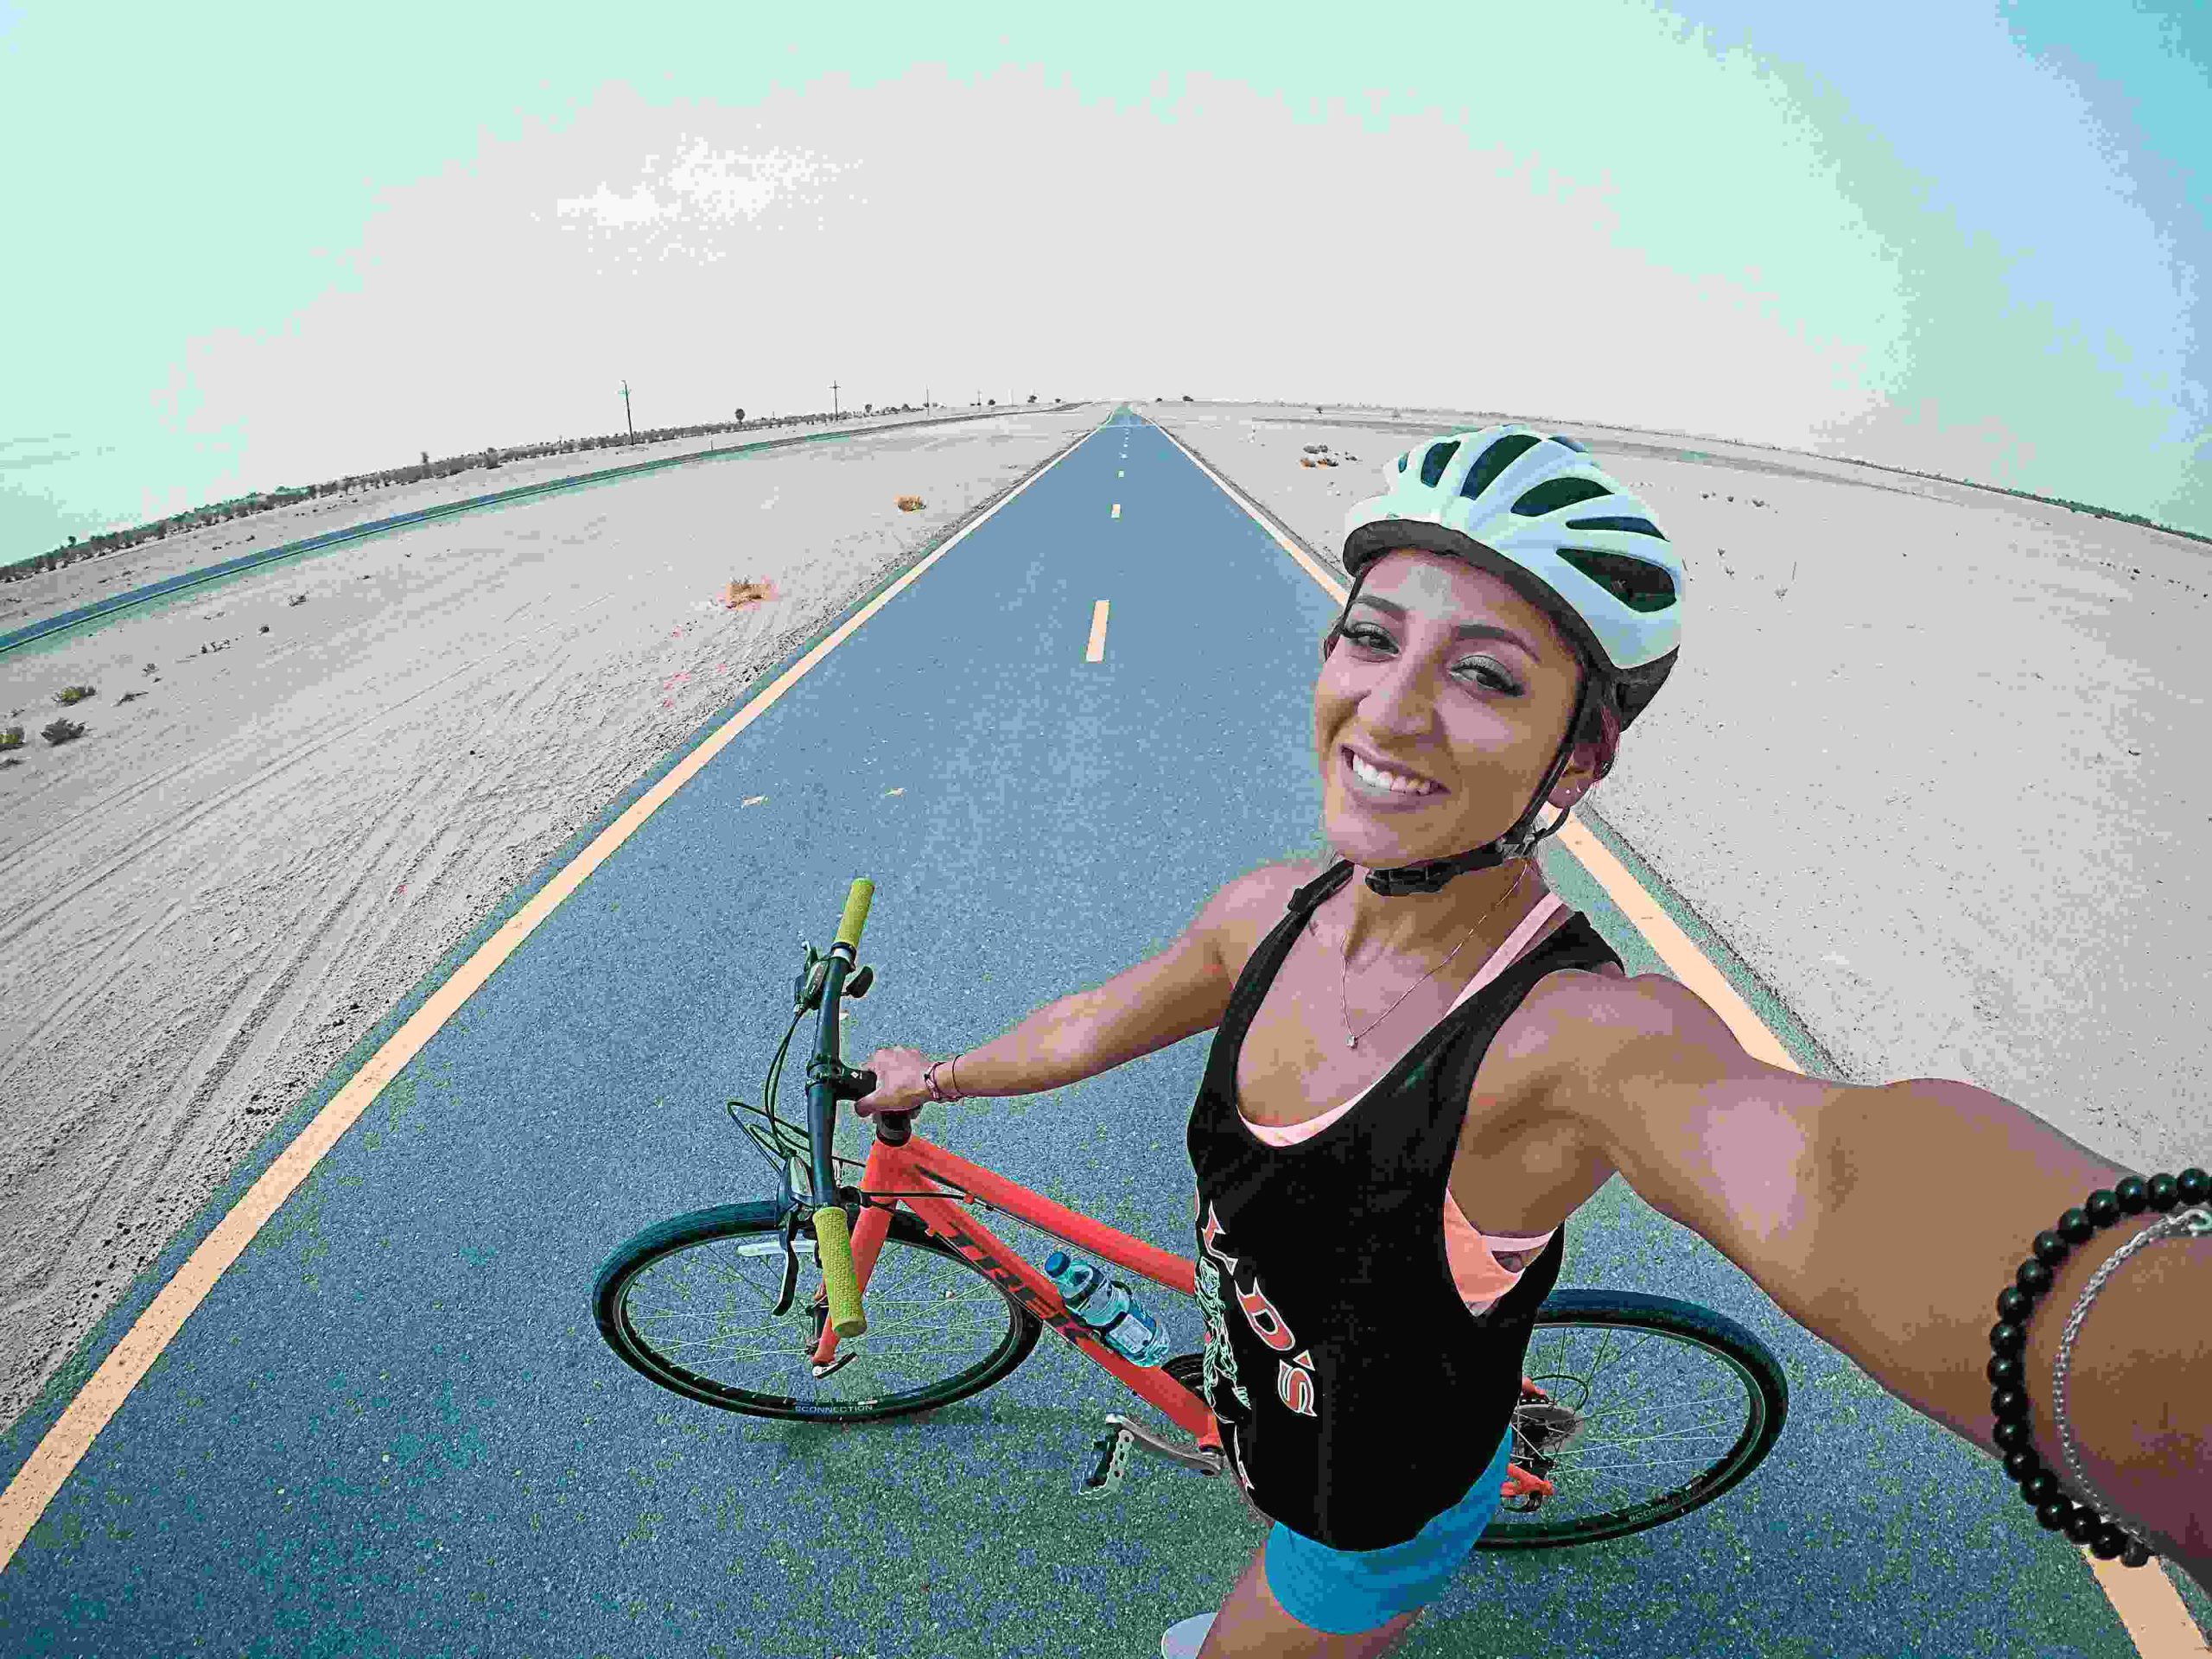
Explore the intricacies of mountain bike saddles!

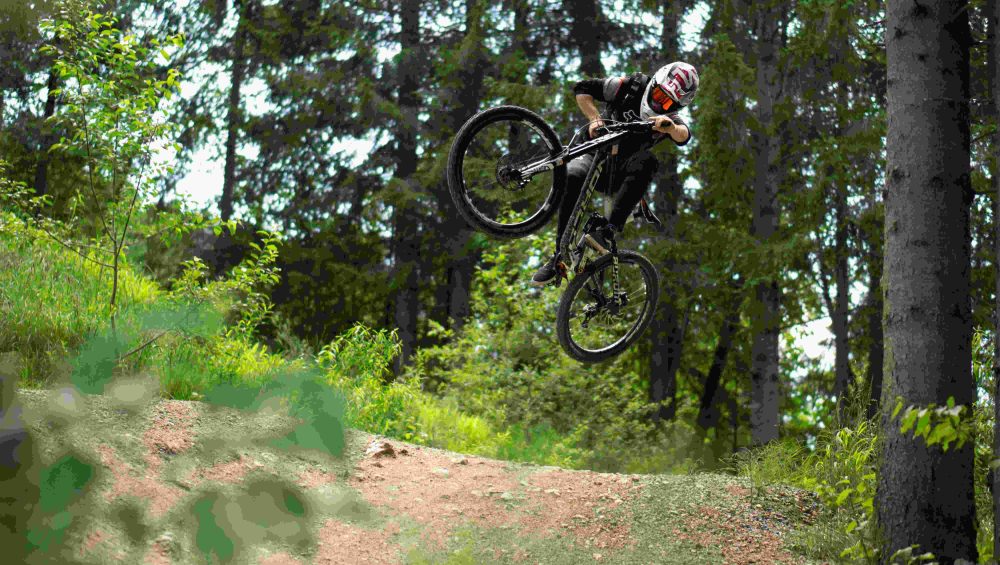
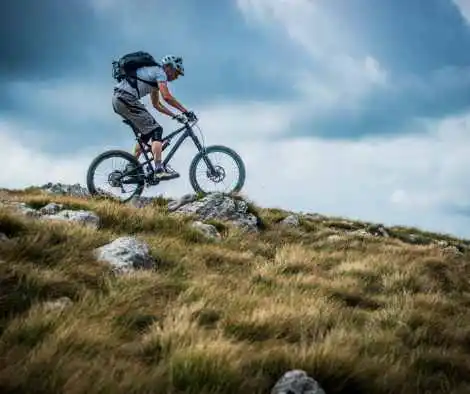
Every mountain biker, from the seasoned trailblazer to the weekend enthusiast, understands that the thrill of the ride is a blend of adrenaline, skill, and equipment quality. Among these, an often overlooked yet critical component is the bike saddle. The connection between rider and bike, the saddle plays a pivotal role in determining comfort, performance, and the overall enjoyment of the ride.

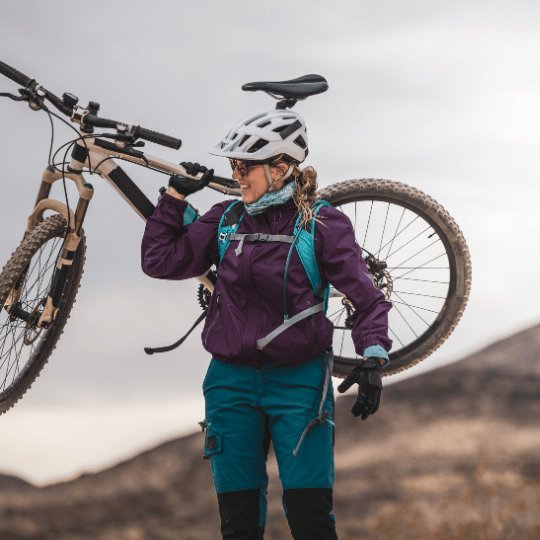
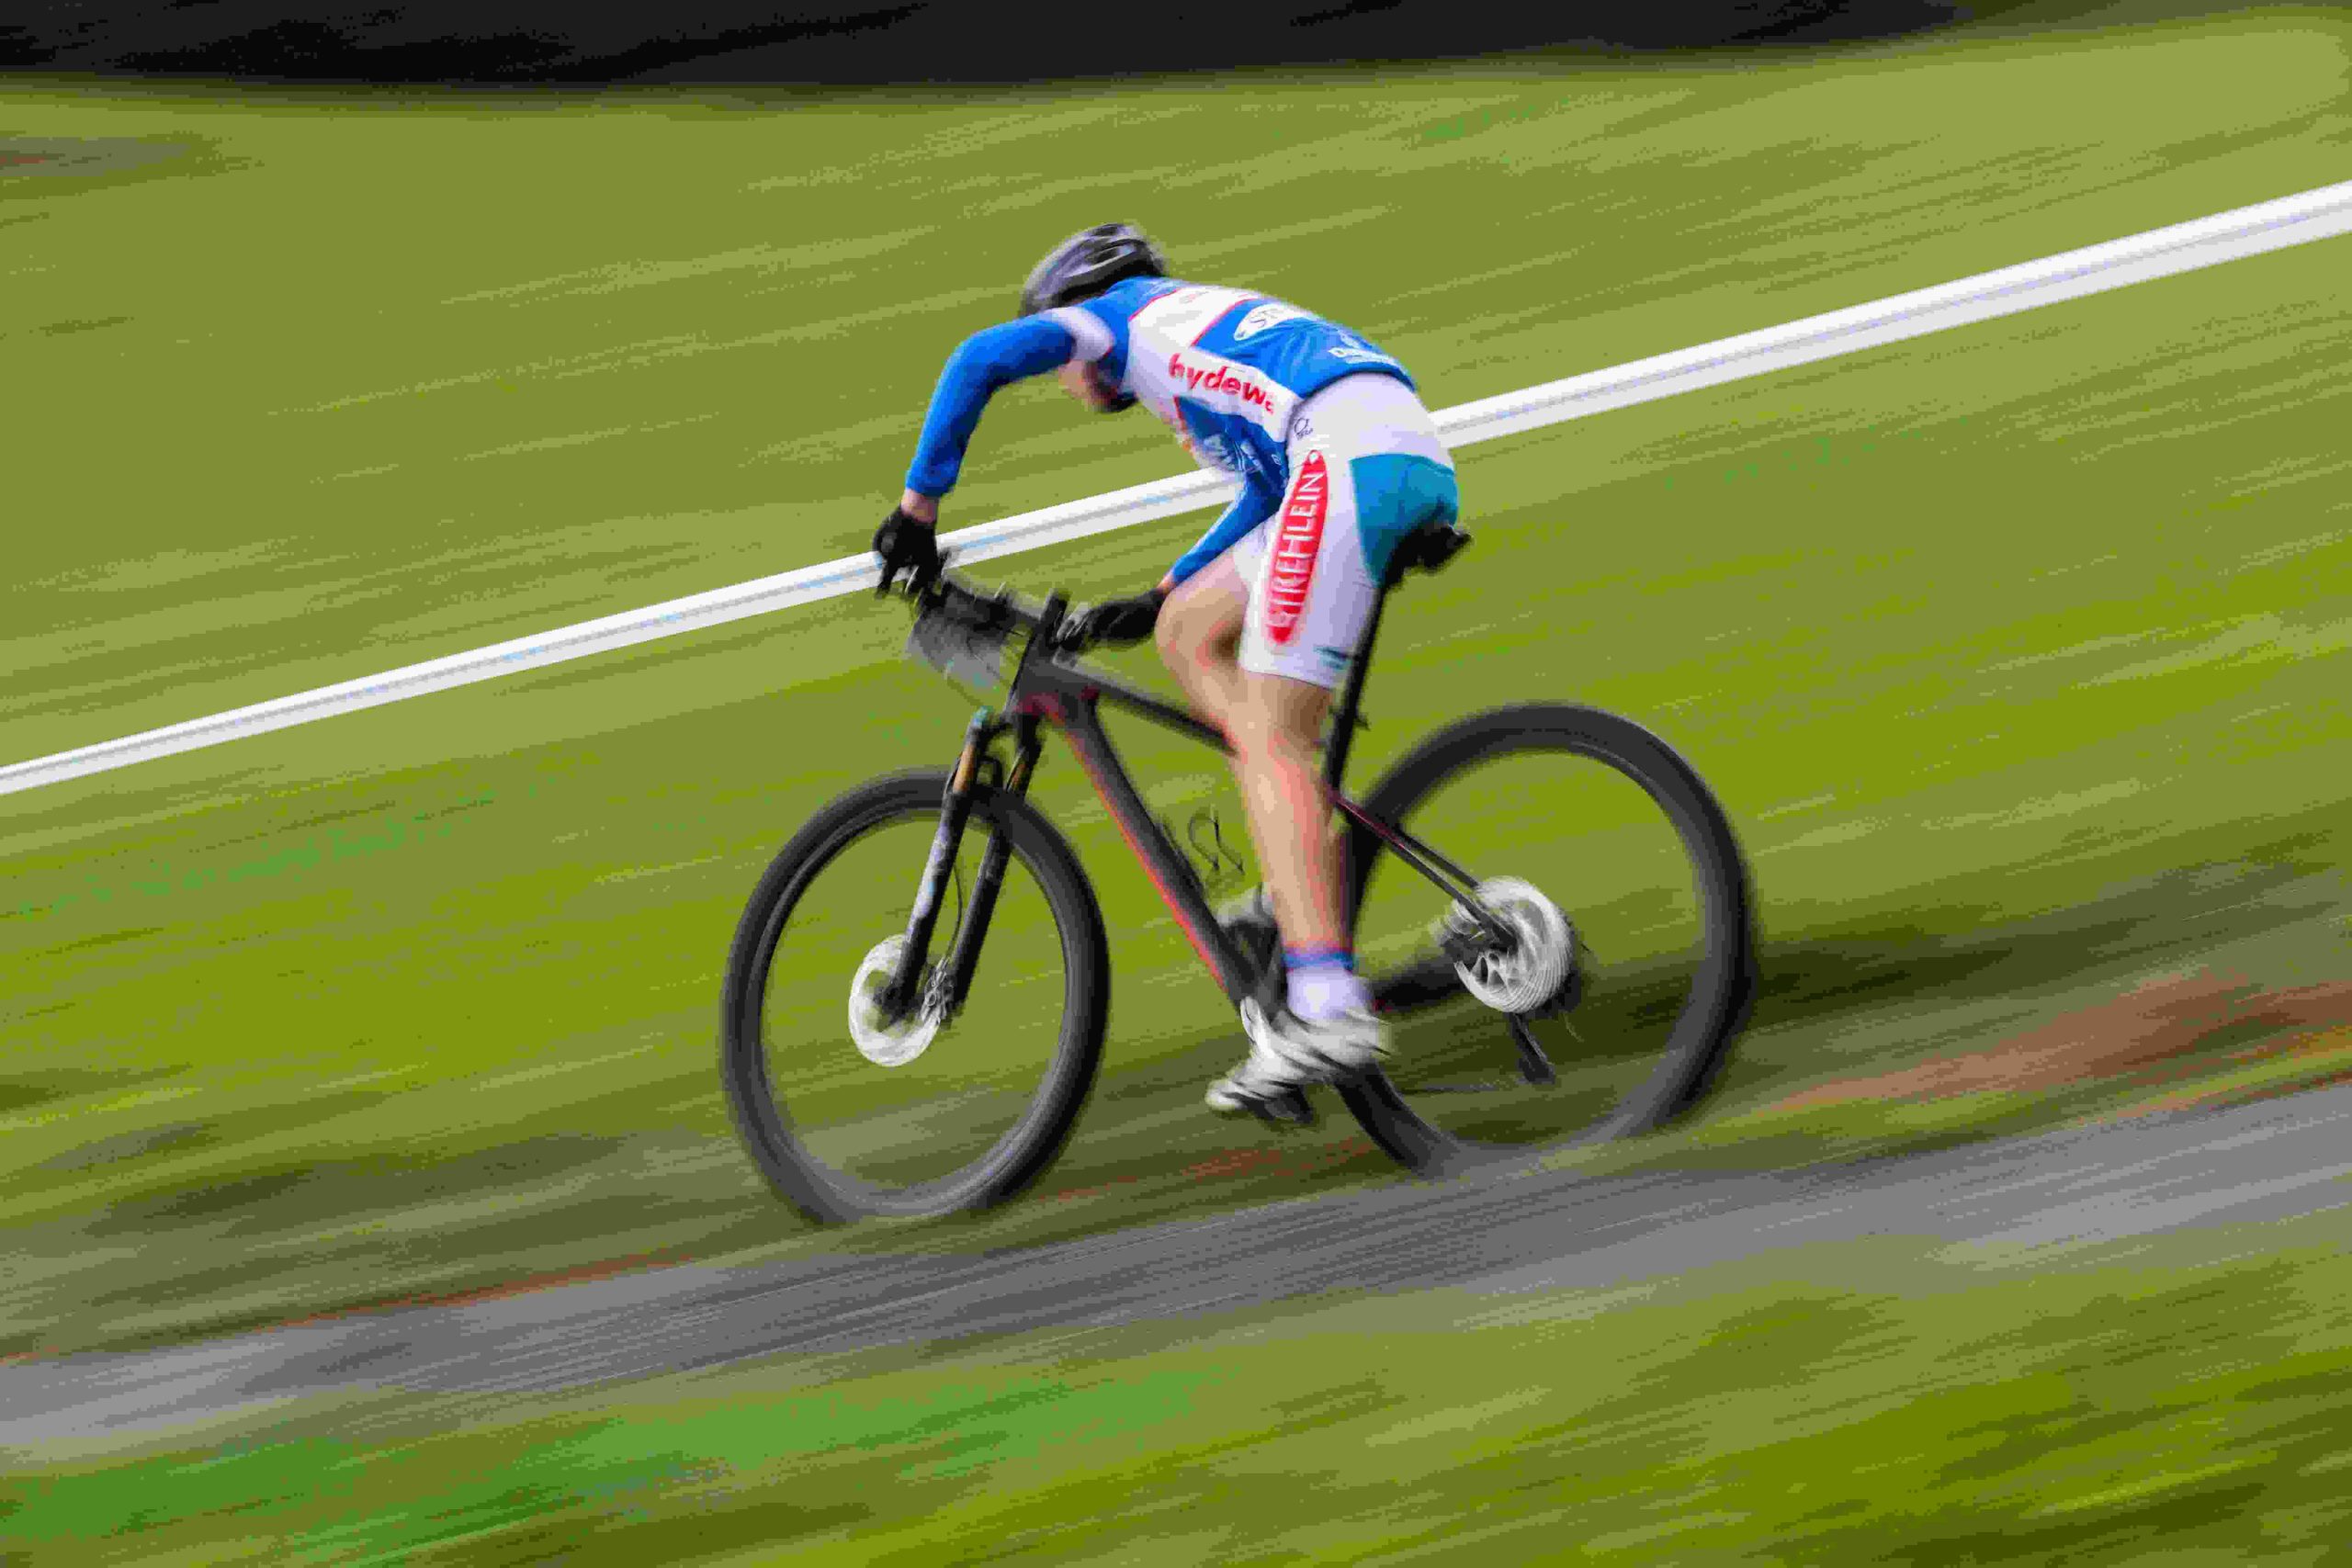
Choosing the best mountain bike saddle is not just about aesthetics or brand loyalty; it’s about finding that perfect nexus of support, durability, and fit. The right saddle can be the difference between an epic day on the trails and a painful one, between feeling in sync with your bike and detached. It’s a personal choice, shaped by factors like body anatomy, riding style, and personal preferences.

As we delve deeper into mountain biking, this guide will highlight the importance of the bike saddle, share insights on choosing the right one, and introduce you to some of the best mountain bike saddles available. Get ready to elevate your riding experience, one seat at a time.

Saddle mountain bike affordable

The Top 20 Mountain Bike Saddles That Provide Comfort and Performance

Saddle Option 1: TerraRide – Everest Comfort

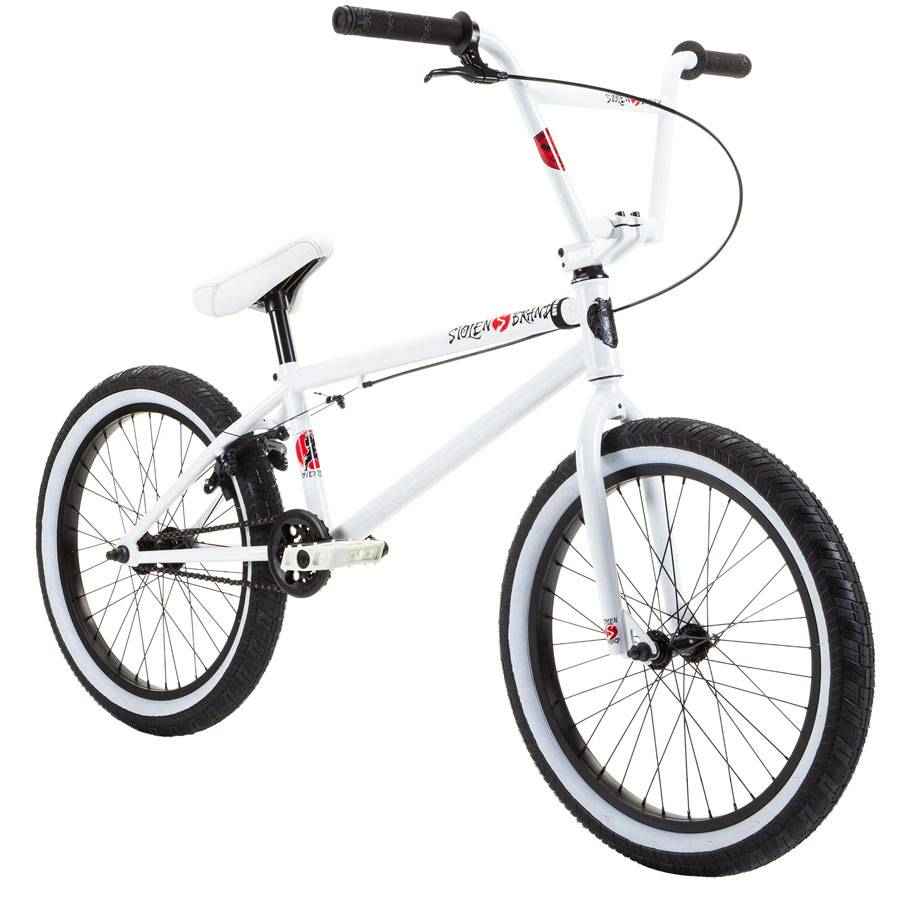
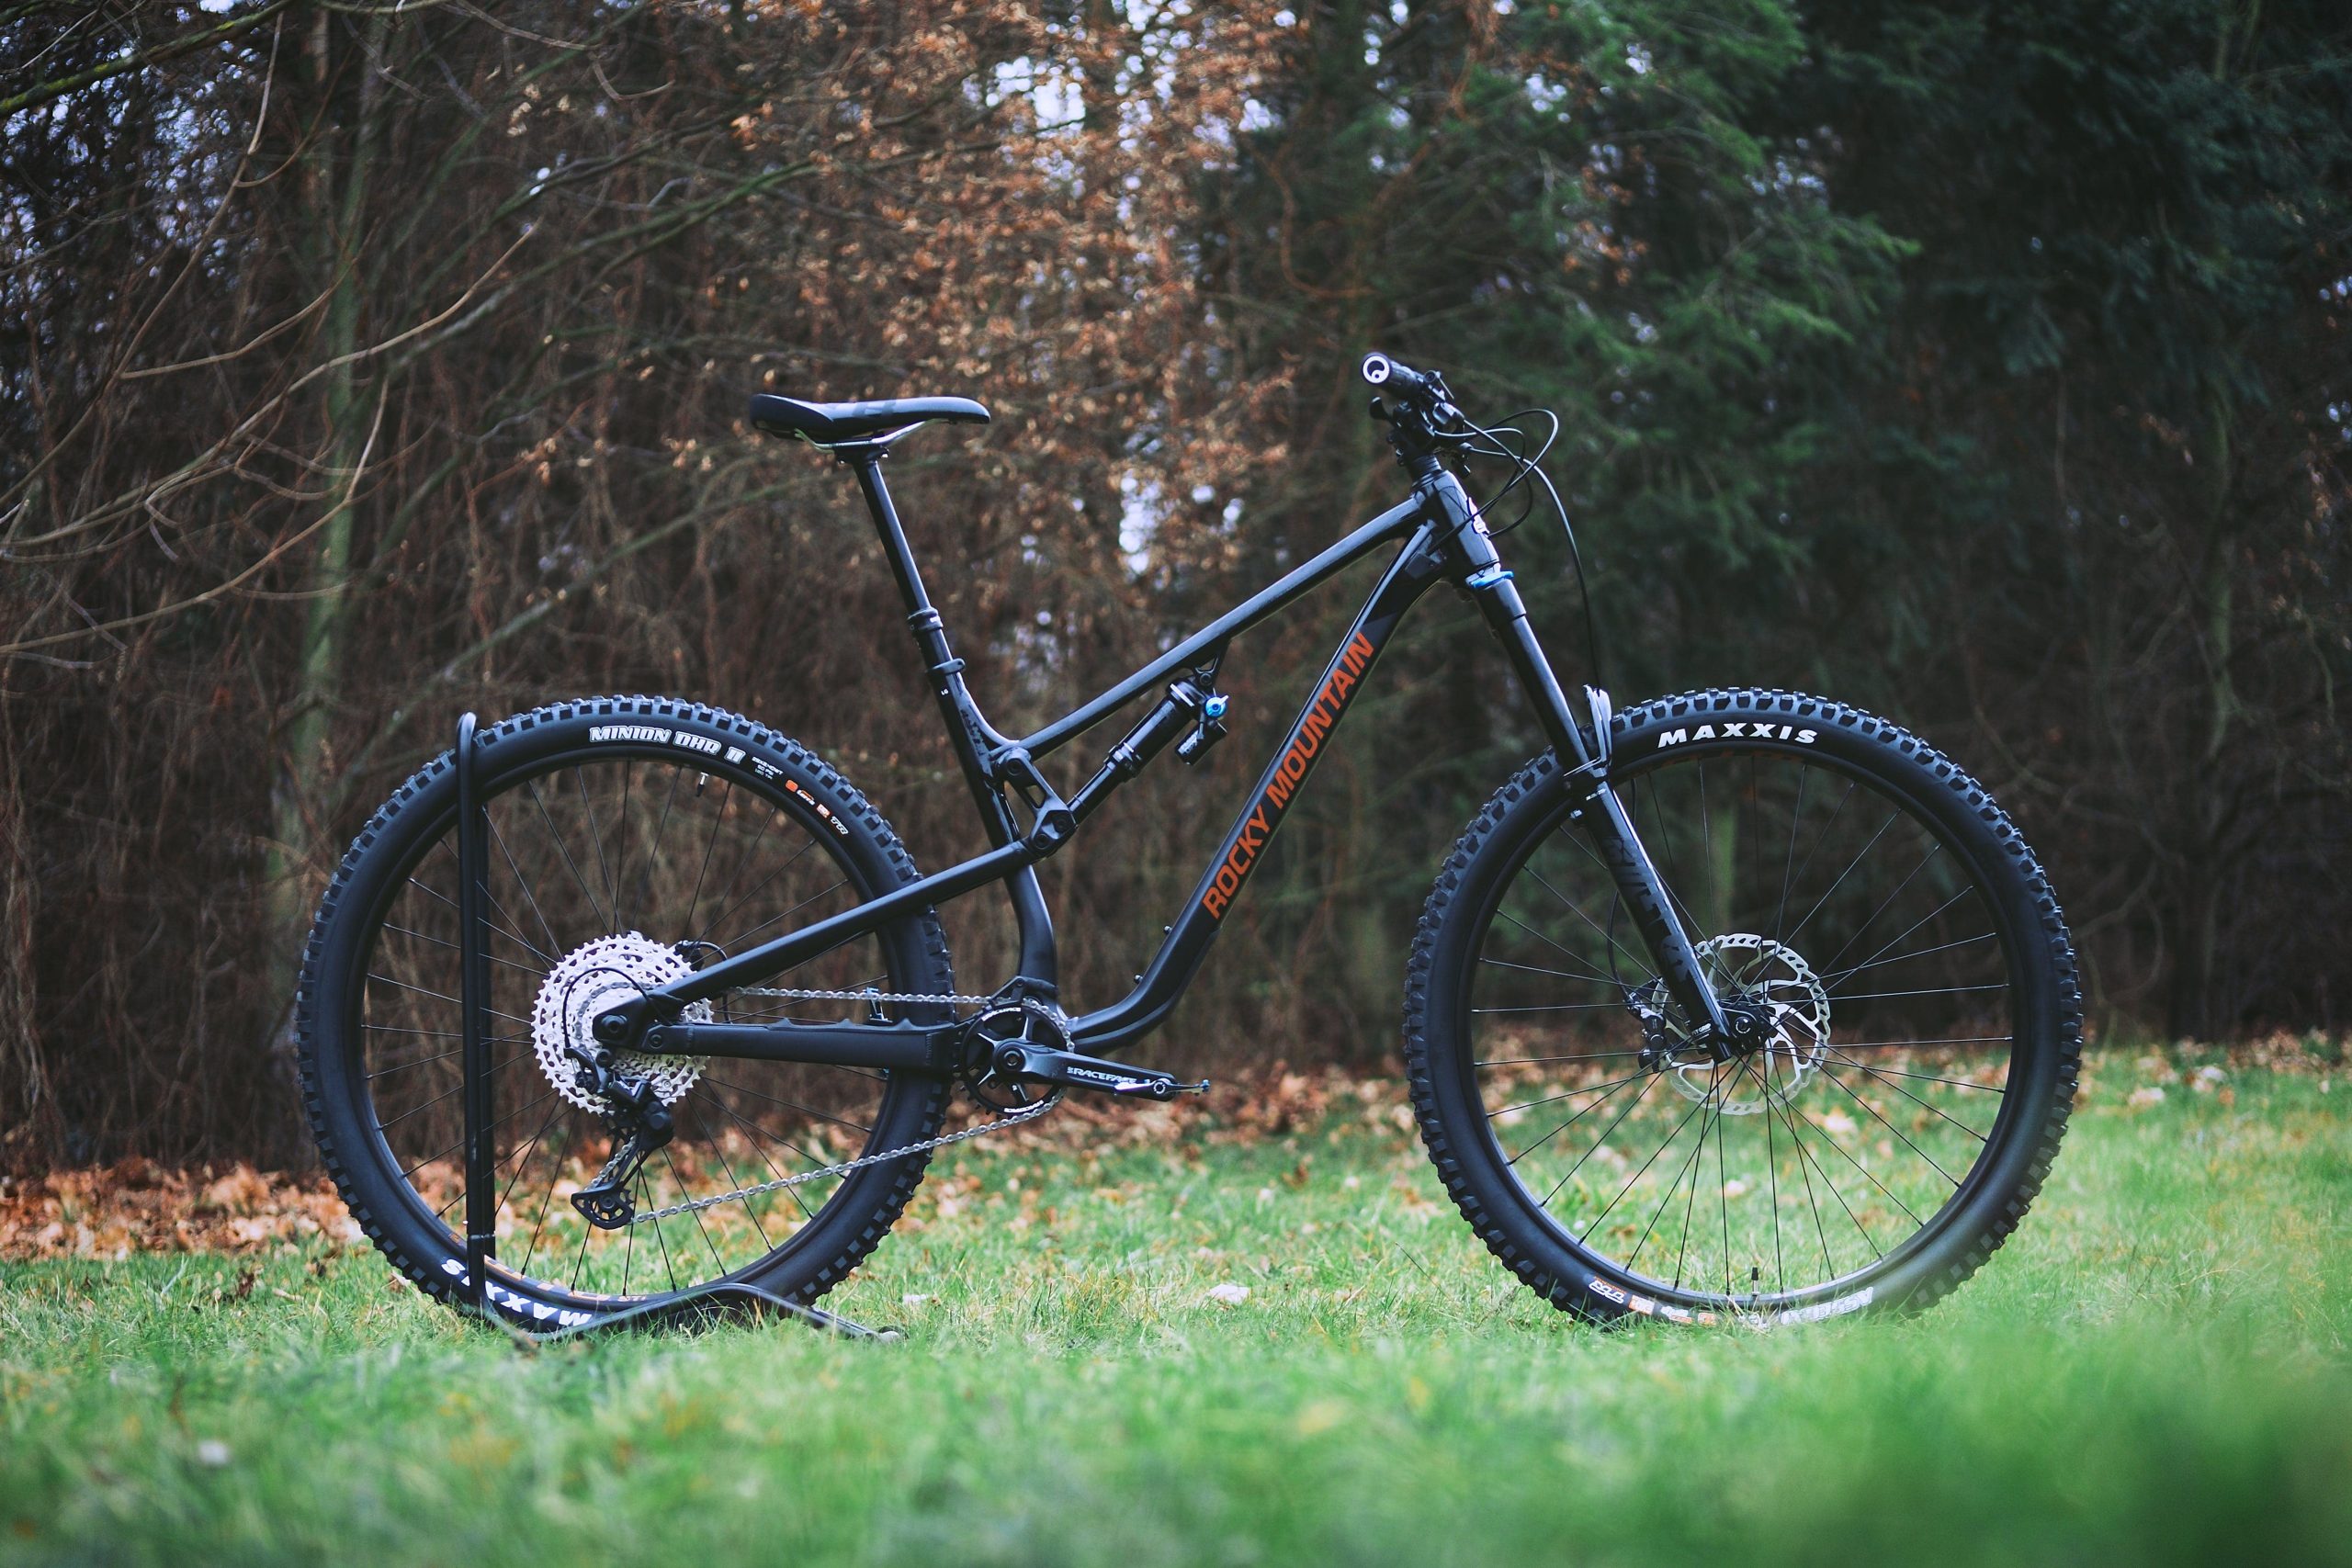
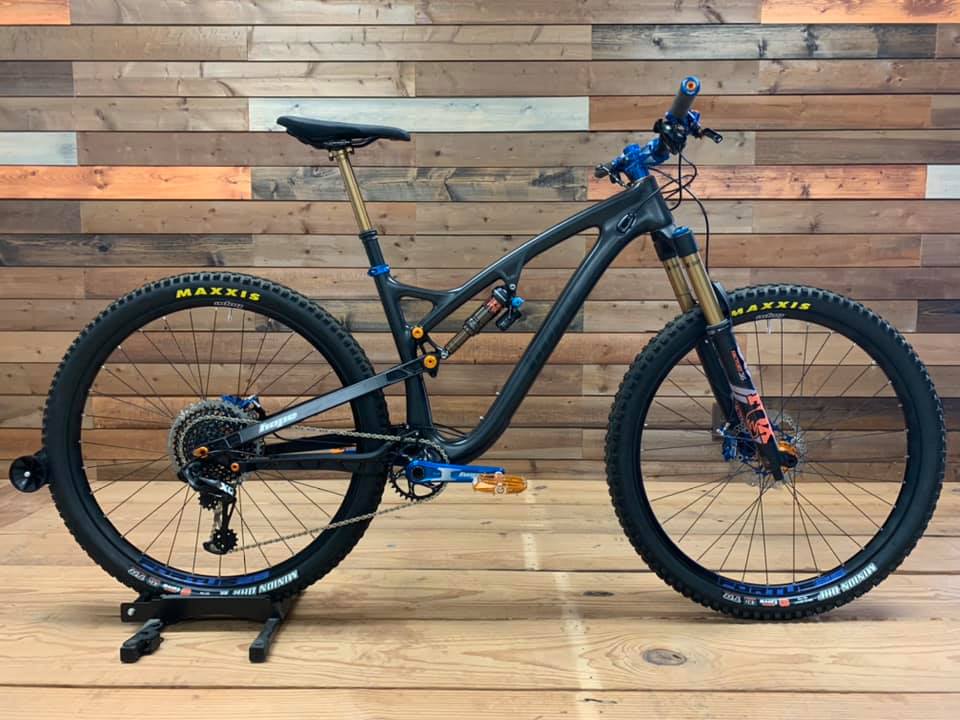
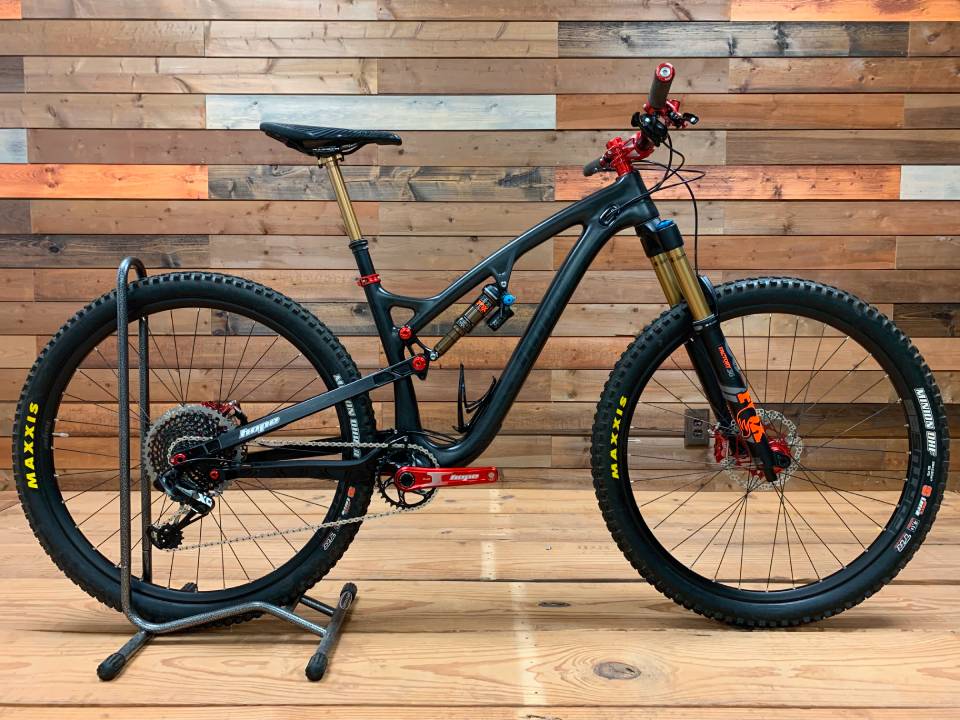
Comfortable mountain bike saddles

  1.  Best for Long Rides: TerraRide’s Everest Comfort has become a favorite among trail enthusiasts for its ergonomic design. The saddle contours naturally to the rider, ensuring minimized pressure points even during extended adventures.
  2.  Durable Materials: Crafted from high-grade materials, the Everest Comfort is both durable and flexible, maintaining its integrity ride after ride.

Saddle Option 2: AeroCushion – Falcon Flex

  1. Lightweight & Flexible Design: The Falcon Flex is known for its weight-saving construction without skimping on the comfort. Its inherent flexibility means it moves with the rider, adapting swiftly across terrains.
  2. Pressure Relief Technology: Integrated with advanced pressure distribution mechanics, this saddle guarantees less strain and more gain, especially on rocky trails.

Saddle Option 3: MountainMeld – RockRider Pro

  1. Optimal Padding & Shock Absorption: Designed for bumpy paths and uneven trails, the RockRider Pro offers unparalleled shock absorption. Its dense padding ensures riders feel fewer jolts and more joy.
  2.  Tailored for Technical Terrains: Whether it’s a sharp descent or a steep climb, this saddle provides optimal support and stability, making technical terrains feel like a breeze.
Top 20 mountain bike saddles for a hard core rider

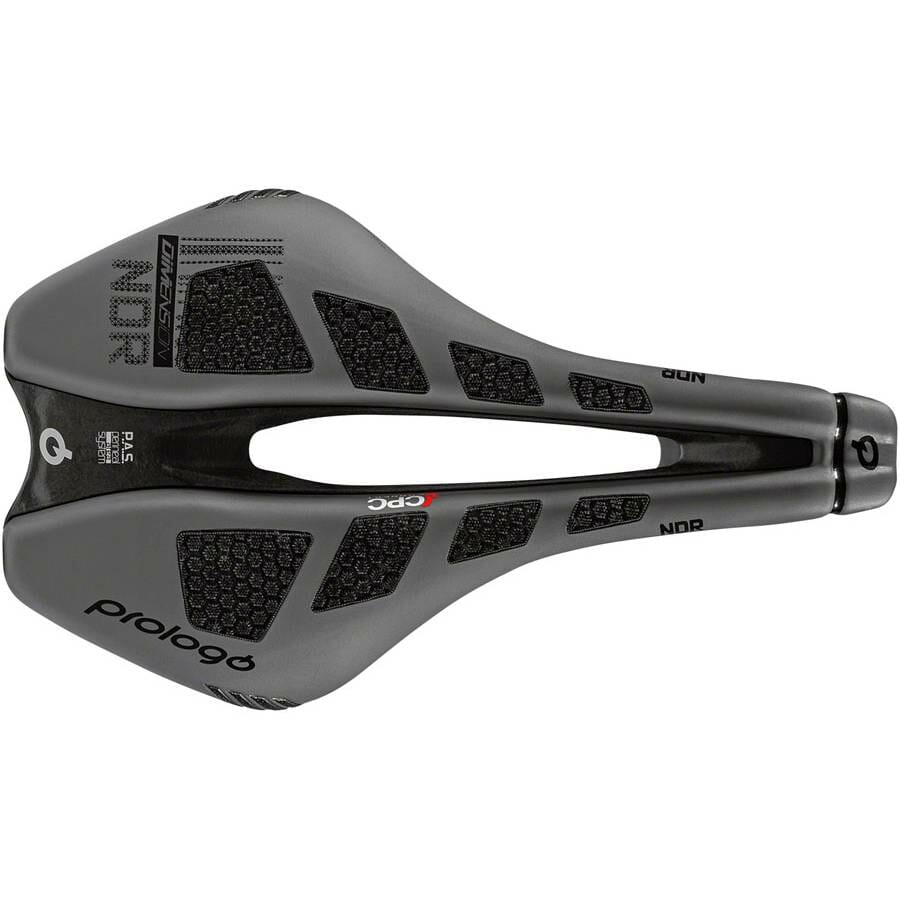
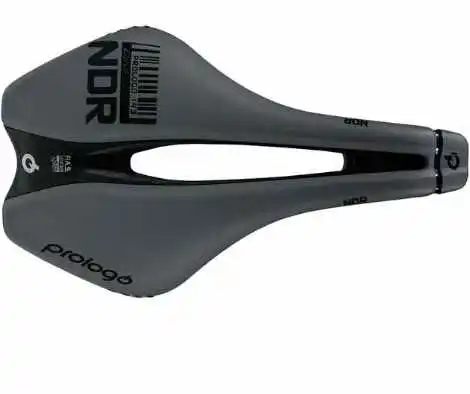
You can buy Prologo Dimension NDR Saddle for $115

Saddle Option 4: WindSlice – SpeedStream V2

  1. Streamlined for Speed: For those with a need for speed, the SpeedStream V2 is a dream. Its aerodynamic structure means less drag and more velocity, ensuring riders can maintain a fast pace with reduced effort.
  2. Ventilation & Moisture Management: With its unique breathable design, it promises to keep riders dry by efficiently wicking away moisture.

Saddle Option 5: ContourCraft –  Adaptive Glide

  1. Adaptive Fit: What sets the Adaptive Glide apart is its ability to adjust to the rider’s anatomy. This saddle feels almost tailor-made, striking the right balance between support and comfort.
  2.  Tough Yet Gentle: While it’s constructed to withstand the roughest terrains, the saddle surface ensures a gentle touch to the rider, making every ride delightful.

Saddle Option 6: SummitSeeker – Peak Pinnacle

  1. Endurance Support: Designed with long-distance riders in mind, the Peak Pinnacle offers extended support to reduce fatigue and enhance endurance on marathon rides.
  2.  Weather Resistant: Made with materials resistant to rain, snow, and even the scorching sun, this saddle promises durability across various weather conditions.

Saddle Option 7: TrailTamer – PathMaster X1

  1. Dynamic Adaptability: The PathMaster X1 adjusts in real-time to the rider’s movements, ensuring that every twist and turn on the trail feels natural and fluid.
  2.  Enhanced Grip: A unique textured surface reduces the chances of slipping, especially during wet conditions, ensuring the rider remains firmly in place.

Saddle Option 8: GlideGuardian –  Horizon Hold

  1. Maximized Comfort: With its plush cushioning, the Horizon Hold guarantees a comfy ride, no matter the trail’s roughness.
  2.  Vibration Damping: Built-in technology reduces the vibrations felt from bumpy paths, ensuring smoother rides even on the most challenging terrains.

Saddle Option 9: TerraTech – GroundGrip GT

  1. Geared for Technical Terrains: This saddle shines on technical terrains, with its design focusing on stability and precision.
  2.  Heat Dissipation: Integrated channels help dissipate heat, especially during long rides under the sun, keeping the rider cooler for longer.

Best saddle mountain bike rider

Prologo Dimension NDR Saddle Tirox, Anthracite/Black, 143 mm for $149 !

Saddle Option 10: AeroAbyss – VoidVent V3

  1. Aerodynamic Excellence: The VoidVent V3’s sleek design not only looks good but also aids in reducing wind resistance, especially during high-speed descents.
  2. Memory Foam Cushioning: This saddle remembers your contours, ensuring a personalized comfort experience every time you ride.

Saddle Option 11: RidgeRuler – Summit Serenity

  1. Deep Cushioning: Summit Serenity focuses on delivering unparalleled comfort with its deep cushioning, ensuring riders stay pain-free even after hours on the trail.
  2. Water-Drain Channels: This saddle features unique channels that efficiently drain water during wet conditions, keeping the rider relatively dry.

Saddle Option 12: SwiftSaddle – Lightning Luxe

  1. Featherweight Design: As the name suggests, Lightning Luxe is built for riders who seek minimal weight without compromising on comfort. Its light build ensures maximum speed.
  2. Reinforced Edges: Designed to endure, the saddle’s edges are reinforced to withstand wear and tear from consistent use.
Affordable saddle mountain bike

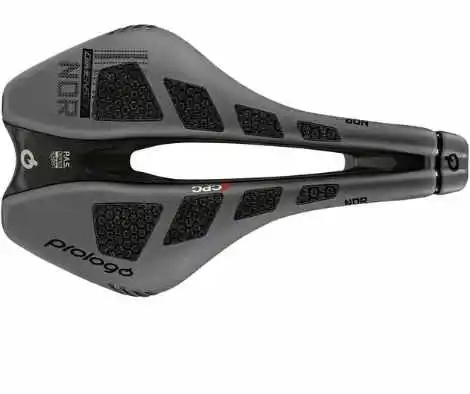
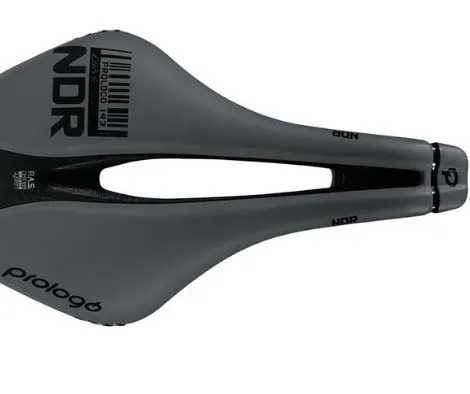
Prologo Dimension NDR CPC Saddle Tirox, Anthracite/Black, 143 mm for $185

Saddle Option 13: TerraTrek – TrailTouch TT2

  1. Natural Contouring: TrailTouch TT2 is crafted to mimic the natural anatomy of the rider, ensuring a snug fit and intuitive feel.
  2. Abrasion-Resistant Surface: This saddle boasts a tough surface that resists abrasions from rough clothing or unexpected falls.

Saddle Option 14: BreezeBound – AirAlign Alpha

  1. Ventilated Design: AirAlign Alpha stands out with its unique ventilation system, ensuring airflow and reducing sweat accumulation during hot rides.
  2. Impact Absorption: Featuring advanced shock-absorbing materials, this saddle minimizes the jolts and bumps on rocky terrains.

Saddle Option 15: MountainMystic – Pinnacle Pro-Pad

  1. Multi-Density Padding: The Pinnacle Pro-Pad is designed with varying padding densities to offer support where needed and softness where desired.
  2. Anti-Slip Texture: Integrated textures prevent riders from slipping, especially during aggressive maneuvers, ensuring stability at all times.

Saddle Option 16: ZenithZephyr – SkyStride Supreme

  1. Altitude Comfort: Crafted for those who aim for the highest trails, SkyStride Supreme ensures consistent comfort, even in changing altitudes.
  2.   UV-Resistant Material: Designed for rides under the blazing sun, this saddle features material that resists UV damage, ensuring longevity and sustained aesthetics.

Saddle Option 17: TerraTorch –  Blaze Balance

  1.  Heat Dispersion Technology: Blaze Balance features a unique technology that disperses heat, ensuring the saddle remains cool even during intense, long rides.
  2. Ergonomic Edges: The edges are ergonomically shaped to reduce pressure points and provide optimal support during turns and maneuvers.

Saddle Option 18: MoonMeadow – LunarLuxe L2

  1. Night Ride Ready: LunarLuxe L2 boasts reflective materials, ensuring visibility and safety during low-light or night rides.
  2.  Memory Mold: The saddle adjusts and molds according to the rider’s unique shape, providing a personalized seating experience each time.

Saddle Option 19: PinnaclePulse – Summit Sync

  1. Adaptive Suspension: Summit Sync offers an adaptive mini-suspension system in the saddle, absorbing shocks from the roughest terrains and ensuring a buttery-smooth ride.
  2.  Breathable Build: Integrated mesh portions allow for better airflow, significantly reducing sweat accumulation during strenuous rides.

Saddle Option 20: AeroAura – WindWave Wonder

  1. Streamlined Shape: WindWave Wonder is built for speed, with its aerodynamic shape ensuring minimal wind resistance and maximum velocity.
  2.  Hydrophobic Surface: Designed to repel water, this saddle ensures a dry seating experience, even through puddles and light rain.

Price Range of Mountain Bike Saddles

  • Premium Saddles: Often incorporating the latest technology, superior materials, and specialized designs (e.g., for particular types of MTB riding such as downhill, cross-country, or enduro). Brands like Selle Italia, Brooks, Fizik, and some models from WTB might be found in this category. Price Range: $100 to $300 and above.
  • Mid-Range Saddles: These saddles provide a good balance between comfort, durability, and performance. Brands like Specialized, Bontrager, and some offerings from WTB and Fabric can be found here. Price Range: $50 to $100.
  • Budget Saddles: More affordable options, which might be ideal for beginner riders or those on a tight budget. Some brands like Planet Bike, Diamondback, or off-brand models can be found in this range. Price Range: $20 to $50.
  • Specialized Saddles: These can include those with specific ergonomic designs, women-specific designs, or saddles tailored to solve particular issues like prostate problems or coccyx pain. They can span a wide price range based on the specialization: $40 to $250.

Always remember that the most expensive saddle isn’t necessarily the best one for every rider!

How do i choose mountain bike saddle

How Do I Choose a Mountain Bike Saddles?

Typically, saddles with a flatter profile tend to offer increased comfort, especially when the width doesn’t precisely match your sit bones. The flatter design provides additional flexibility for a comfortable riding experience. On the other hand, a more contoured saddle, perfectly tailored to your anatomy, enhances stability and grants a subtle boost in control by ensuring your alignment at the center of the bike.

A saddle with a more pronounced curve takes a different approach. Tailored to fit your anatomy seamlessly, it serves as a precision instrument in maintaining your central alignment on the bike. This contoured design not only provides comfort but also bestows a heightened sense of control.

By anchoring you securely in the middle of the saddle, it contributes to a more stable and responsive riding experience, particularly during maneuvers that demand precision and balance. In essence, the choice between a flatter or curved saddle involves a nuanced consideration of personal comfort preferences and the level of control desired during cycling endeavors.

What Size Saddles Do I Need MTB?

Selecting the right size mountain bike (MTB) saddle involves considering factors such as sit bone measurement for width, riding position preferences, and the shape of the saddle. Measure your sit bones to determine the appropriate width, keeping in mind that a more upright position might benefit from a wider saddle, while a narrower one may suit a forward-leaning, aggressive stance.

Consider gender-specific designs if available, and test ride different saddles to assess comfort and fit. Personal preferences, such as padding and firmness, also play a role, and getting a professional bike fitting can provide valuable insights into your unique anatomical needs. Ultimately, the ideal MTB saddle is a subjective choice that combines your body’s measurements with your riding style and comfort preferences for an enjoyable cycling experience.

Saddle shape is another key consideration, with variations in curvature and design. Some riders may prefer a flatter profile, while others find more contoured shapes accommodating. Additionally, gender-specific designs take anatomical differences into account, offering tailored options for both men and women.

Practical testing is invaluable in the saddle selection process. Many bike shops provide the opportunity to test ride different saddles, allowing you to gauge comfort and fit during actual riding conditions. Pay attention to personal preferences, such as the level of padding and firmness, which can significantly impact comfort.

For a more personalized approach, consider seeking a professional bike fitting. Experts can assess your riding posture, flexibility, and unique anatomical characteristics to recommend an ideal saddle size and type. Keep in mind that finding the perfect MTB saddle is often a trial-and-error process, and adjustments may be necessary along the way to ensure a harmonious match between your body, riding style, and the demands of the terrain.

Conclusion

The world of mountain biking is diverse, echoing the variety of terrains and trails. Just as riders have individual styles and preferences, the perfect saddle is unique to each individual. It isn’t merely a seat; it’s an embodiment of how you interact with your bike and the trails you traverse. Whether you’re soaring downhill at breakneck speeds, tackling technical terrains, or taking on long-distance cross-country rides, the right saddle can make the difference between achieving an ecstatic high and nursing an aching back. 

Also, the journey of mountain biking is one of discovery, challenge, and unparalleled joy. The saddle you choose becomes an integral chapter in this journey, influencing the narrative of each ride. It stands as a testament to your choices, preferences, and the respect you accord to the sport. So, dive deep, undertake the research, and let your chosen saddle be a reflection of your commitment to mountain biking. After all, every ride is a story, and the right saddle ensures it’s a memorable one.

Furthermore, as mountain biking continues to surge in popularity and attract diverse enthusiasts, the industry must keep pace. This involves continuous innovation, ensuring that every rider, regardless of their preference or style, finds their saddle soulmate. Whether you’re a nocturnal rider who thrives under the moonlight or a speed enthusiast constantly pushing the envelope, rest assured, there’s a saddle crafted with your unique demands in mind.

Best mountain bike helmets under $100CategoriesBike

The Best Mountain Bike Helmet under $100 for the Riders

Get the best mountain bike helmet under $100 for your adult & kid’s mountain bike rider!

Taking on an exhilarating mountain biking adventure is a thrilling experience that promises adrenaline, breathtaking views, and a heart-pounding journey through nature’s rugged terrain. While the thrill of conquering challenging trails is unparalleled, safety should always be a top priority for every rider. The mountain bike helmet is an essential piece of gear that stands as a stalwart guardian between you and unforeseen obstacles.

In this comprehensive guide, we explore mountain bike helmets and their vital role in ensuring rider safety while highlighting a few standout products that seamlessly combine protection and style. Among the exceptional helmets that have caught our attention are the ProTec Classic Certified Helmet in Matte Black and the Kali Protectives Chakra Youth Helmet.

8 Best Mountain Bike Helmets for the Mountain Bike Riders

The ProTec Classic Certified Helmet in Matte Black epitomizes timeless style and certified protection. Boasting a classic silhouette, this helmet is constructed with high-quality materials that meet stringent safety standards, giving riders peace of mind as they conquer challenging trails. The matte black finish adds a touch of sophistication, making it a must-have for riders who prioritize safety and style. Here we explore the best MTB helmet full face for beginners and experienced riders.

ProTec Classic Certified Helmet Matte Black, Large — Best Mountain Bike Helmet under $100

The ProTec Classic in matte black combines the timeless design of the classic helmet with modern safety standards. The large size ensures a snug fit for riders with a larger head circumference, offering streamlined protection that doesn’t compromise on style. Ideal for riders who prioritize both safety and aesthetics. The ProTec Classic Certified Helmet ensures optimal protection and comfort for riders, providing a secure and comfortable trail experience.

Specifications:

Gender/Age: Adult

Maximum Head Circumference: 60

Minimum Head Circumference: 58

Helmet Style: BMX

Weight: 400

Best mountain bike helmet under $100

You can buy ProTec Classic in Matte Black here for just $ 49.99

ProTec Classic Certified Helmet Matte Black, Small

What is the best brand of MTB helmet? This is the smaller counterpart to the ProTec Classic in matte black. Designed to cater to riders with a smaller head size, it offers the same blend of classic design and modern safety features, ensuring riders remain protected while looking sharp. The Classic certified helmet provides a high level of comfort and protection.

Specifications:

Gender/Age: Adult

Maximum Head Circumference: 56

Minimum Head Circumference: 54

Helmet Style: BMX

Weight: 400

Protec classic certified helmet matte black, small - best mountain bike helmet under $100

ProTec Classic Certified Helmet Matte Black, Small for $49.99

ProTec Full Cut Certified Helmet Matte Black, Large

What helmet should I wear for mountain biking?

Offering extended protection, the ProTec Full Cut helmet in matte black covers more of the head, providing added safety, especially around the back. Its large size ensures a comfortable fit for those with a larger head size, and its design stands out in terms of safety.

The Full Cut helmet combines retro design with advanced safety features, featuring classic ear protection styling, a durable HDPE or ABS shell with EPS lining, and compression molded pads. Its premium two-stage liner, stainless steel hardware, and soft tubular webbing ensure optimal comfort and protection. With multi-impact capability and certifications including CPSC, CE, ASTM, and AS/NZS 2063:2008, this helmet is a stylish choice for riders prioritizing safety without sacrificing the timeless appeal of a retro look.

Specifications:

Gender/Age: Adult

Maximum Head Circumference: 60

Minimum Head Circumference: 58

Helmet Style: BMX

Weight: 400

Protec full cut certified helmet matte black, large

ProTec Old School Certified Helmet Matte Red, Small

A nod to vintage designs, the ProTec Old School in matte red boasts a vibrant color and a design reminiscent of earlier biking days. The small size fits those with a smaller head circumference, ensuring a snug fit. Perfect for those looking to combine nostalgia with modern-day protection.

Derived from the iconic 1973 Full-Tec, the Old School Cert has undergone modifications to present riders with a retro-shaped helmet that sits low on the head, ensuring exceptional impact protection. Its rounded design effortlessly conforms to various head shapes, complemented by a high-impact ABS shell and a premium heat-sealed EPS liner for a comfortable and secure fit. The helmet’s 11 open vents enhance airflow, keeping riders cool during their adventures.

Specifications:

Gender/Age: Adult

Maximum Head Circumference: 56

Minimum Head Circumference: 54

Helmet Style: BMX

Weight: 400

Price: $49.99

Protec old school certified helmet matte red, small

ProTec Full Cut Certified Helmet Gloss White, Small

The ProTec Full Cut in a glossy white finish offers comprehensive head protection for smaller heads. The bright white finish is not only stylish but also enhances visibility on the trail. So, which is the highest quality helmet?

The Full Cut helmet showcases a timeless retro design enhanced with state-of-the-art features. Boasting classic ear protection styling, its robust HDPE or ABS shell is lined with EPS and incorporates compression molded pads for optimal impact resistance.

The helmet ensures superior comfort with a two-stage premium liner, while stainless steel hardware adds durability to its construction. Additionally, soft tubular webbing enhances the overall wear experience, making the Full Cut helmet a stylish and secure choice for riders who prioritize both aesthetics and safety on their adventures.

Specifications:

Gender/Age: Adult

Maximum Head Circumference: 56

Minimum Head Circumference: 54

Helmet Style: BMX

Weight: 400

Price: $59.99

Protec full cut certified helmet gloss white, small

ProTec Old School Certified Helmet Matte Metallic Blue, Large

A nostalgic nod with a modern twist, this Old School helmet in a matte metallic blue finish caters to riders with a larger head size. The unique color combined with the signature Old School design makes for a standout choice.

The original 1973 Full-Tec, the Old School Cert has been modified to boast a retro shape that sits low on the head, ensuring excellent impact protection. Its rounded design seamlessly molds to accommodate various head shapes, while the high-impact ABS shell provides robust durability.

The premium heat-sealed EPS liner guarantees a comfortable fit, and the presence of 11 open vents enhances airflow to keep riders cool. Equipped with compression molded pads, the Old School Cert stands as a stylish and protective choice for those seeking a blend of vintage aesthetics and modern safety features.

Specifications:

Gender/Age: Adult

Maximum Head Circumference: 60

Minimum Head Circumference: 58

Helmet Style: BMX

Weight: 350

Price: $49.99

Protec old school certified helmet matte metallic blue, large

Kali Protectives Chakra Mono Helmet – Brick, Small/Medium

The Chakra Mono Helmet in Brick color protects with a modern aesthetic. Its small/medium size is ideal for those needing a more tailored fit. Evolving from Kali’s popular Chakra line, the Chakra Mono takes helmet technology to the next level. Utilizing Composite Fusion technology, it incorporates a lower polycarbonate wrap and an integrated bug liner, enhancing stability during rapid turns.

The helmet boasts anti-microbial pads for added hygiene, while the polycarbonate shell paired with EPS foam ensures top-notch impact protection. The convenient Dial-Fit closure allows for a customizable and secure fit. With 21 vents strategically positioned, the Chakra Mono maximizes airflow, keeping riders cool and comfortable. Its sleek design, featuring simple graphics and a gloss finish, adds a touch of style to the safety and performance that riders have come to expect from the Chakra series.

Specifications:

Gender/Age: Adult

Maximum Head Circumference: 57

Minimum Head Circumference: 52

Helmet Style: Recreation

Weight: 292

Price: $40

Kali protectives chakra mono helmet – brick, small/medium

Kali Protectives Chakra Child Helmet – Monsters Blue, Children’s, X-Small

Designed for the youngest riders between 18 months to 3 years, this X-Small Monsters Blue helmet promises safety while adding a touch of fun to their rides.

The Chakra Child, powered by Kali’s Composite Fusion technology and in-mold construction, offers enhanced safety and protection with extended rear coverage. Designed to inspire confidence, it features a molded-in visor and a convenient dial closure system, encouraging young riders to embark on exciting biking adventures.

The helmet’s washable, anti-microbial, and moisture-wicking pads ensure hygiene and comfort. Constructed with a polycarbonate shell and EPS foam, it provides robust impact resistance.

With 21 strategically placed vents, the Chakra Child ensures maximum airflow, while the X-Small variant introduces an elastic band-fit system, specially designed for the safety and ease of tiny heads. Suitable for children aged 1 year and older, this helmet is a perfect blend of style, safety, and comfort for the youngest riders.

Specifications:

Gender/Age: Adult

Maximum Head Circumference: 50

Minimum Head Circumference: 44

Helmet Style: Recreation

Weight: 208

Price: $40

Kali protectives chakra child helmet – monsters blue, children’s, x-small

The Importance of Proper Fit: How to Measure Your Head Size and Find the Right Helmet

Mountain biking is exhilarating, but without the right protective gear, it can be risky. Ensuring a correct helmet fit is paramount. Here’s how:

Measuring Your Head Circumference

Materials Needed: Flexible measuring tape (or a piece of string you can measure afterward)

Procedure:

  1. Stand in front of a mirror.
  2. Wrap the tape around your head, ensuring it’s about an inch above your eyebrows and settles at the point on your head that achieves the largest circumference.
  3. Note down the measurement.

MTN Bike Helmet Sizing Guide

  1. X-Small: 51-53 cm
  2. Small: 53-56 cm
  3. Medium: 56-59 cm
  4. Large: 59-62 cm
  5. X-Large: 62-65 cm

(N.B: These are standard sizes; always refer to the manufacturer’s sizing chart.)

Fitting a Mountain Bike Helmet Correctly

  1. Positioning: The helmet should sit level on your head, not tilted back or forward.
  2. Side Straps: Should form a V-shape under, and slightly in front of, the ears.
  3. Buckle: Under the chin without being too tight. You should be able to breathe and talk comfortably.
  4. Final Test: No more than two fingers should fit between your eyebrows and the helmet.

Tips for Maintaining and Extending the Lifespan of Your Mountain Bike Helmet

A helmet’s life can be extended with proper care. Here are some essential tips:

Cleaning Your MTB Helmet: Use mild soap and water. Avoid abrasive materials. Whereas, remove the inner lining if possible and hand wash using a mild detergent for the interior.

Storage: Store your helmet in a cool, dry place away from direct sunlight.

Avoid Unnecessary Wear: Don’t toss your helmet around carelessly. Small cracks can compromise its safety.

Replace Worn-Out Parts: Straps and buckles wear out. Replace them periodically.

Regular Inspection: Check for dents, cracks, or any signs of wear. If the helmet has been through an accident, replace it immediately.

Your safety is paramount when mountain biking. Always ensure you’re getting the correct fit and taking good care of your helmet. And while everyone loves a good deal, safety standards should never be compromised for a lower price. Safe riding!

The ultimate mountain bike tune up checklist: a comprehensive guide to ensuring peak performanceCategoriesBike

The Ultimate Mountain Bike Tune Up Checklist: A Comprehensive Guide to Ensuring Peak Performance

Mountain Bike Tune Up Checklist! Are you ready to take your mountain biking experience to new heights? The key to unlocking peak performance lies in a well-maintained and finely-tuned mountain bike. Whether you’re a beginner or a seasoned rider, our ultimate tune-up checklist is here to guide you through essential maintenance tasks and advanced tuning techniques. Get ready to elevate your ride and ensure that your mountain bike is in top condition for your next thrilling adventure.

Pre-Ride Inspection:

Before hitting the trails, start with a thorough pre-ride inspection. Check for any visible damage, loose bolts, or worn-out components. Inspect your tires, brakes, and suspension system. Addressing issues at this stage can prevent more significant problems down the line.

Clean and Lubricate:

A clean bike is a happy bike. Regularly clean your mountain bike to remove dirt, mud, and debris that can affect performance. After cleaning, make sure to lubricate the chain, derailleurs, and other moving parts. This not only improves efficiency but also extends the lifespan of your components.

Brake System Check:

 Your safety depends on the effectiveness of your brakes. Inspect brake pads for wear and replace them if needed. Check brake fluid levels in hydraulic systems and ensure proper brake lever responsiveness. A well-functioning brake system is crucial for navigating challenging terrains with confidence.

Gear Shifting and Drivetrain:

 Smooth gear shifting is essential for conquering various terrains. Inspect the drivetrain for any signs of wear, and adjust the gears accordingly. Lubricate the chain and ensure that the derailleurs are properly aligned. A well-tuned drivetrain enhances your bike’s overall performance.

Suspension Setup:

Fine-tune your suspension settings based on your riding style, weight, and the type of terrain you’ll be tackling. Adjust the sag, rebound, and compression to optimize comfort and control. If you’re unsure about the settings, consider consulting your bike’s manual or seeking professional advice.

Wheel Inspection and Truing:

Inspect your wheels for any loose spokes, dents, or damage. Check for proper tire inflation and ensure that your wheels spin true. Wheel truing may be necessary to correct any wobbles, contributing to a smoother and more efficient ride.

Check Bearing Systems:

Bearings play a crucial role in the smooth operation of various bike components. Check and grease headset, bottom bracket, and hub bearings. Replacing worn-out bearings prevents unnecessary friction, ensuring a smoother ride and prolonging the life of your bike.

Frame and Component Torque Check:

Ensure that all bolts and fasteners on your bike are tightened to the manufacturer’s specifications. A torque wrench can be handy for this task. Pay special attention to critical areas such as the handlebars, stem, seatpost, and pedals. Proper torque prevents unnecessary stress on components and ensures your safety during rides.

Raise your mountain biking experience by incorporating our ultimate tune-up checklist into your regular maintenance routine. Whether you’re a beginner or an experienced rider, taking the time to address these key areas will ensure that your mountain bike delivers peak performance on every trail. Don’t just ride—conquer the mountains with confidence, knowing that your bike is finely-tuned and ready for any adventure that comes your way. Happy trails!

The ultimate mountain bike tune up checklist: a comprehensive guide to ensuring peak performance

Introduction to Mountain Bike Tune-Up

Embarking on a mountain biking journey is not just about conquering challenging terrains; it’s a holistic experience that involves the rider and their trusty steed working seamlessly in tandem. Introducing the concept of a mountain bike tune-up is akin to investing in the longevity, performance, and safety of your two-wheeled companion. In this section, we delve into the importance of regular maintenance and explore the myriad benefits that a well-tuned bike can offer to riders of all skill levels.

Importance of Regular Maintenance

Imagine tackling steep descents, navigating rocky trails, or powering through muddy terrains with a bike that hasn’t received the attention it deserves. Regular maintenance is the foundation of a reliable and high-performance mountain bike. Beyond preventing breakdowns and ride interruptions, consistent care ensures that your bike operates at its full potential, enhancing your overall riding experience.

Preventing Costly Repairs

Neglecting maintenance can lead to minor issues snowballing into major repairs. Regular checks and tune-ups allow you to catch and address problems early, preventing them from evolving into costly fixes. A stitch in time indeed saves nine, and the same principle applies to bike maintenance.

Ensuring Safety on the Trails

 Mountain biking is an exhilarating sport, but it comes with inherent risks, especially when tackling challenging terrains. Regular maintenance ensures that your brakes, gears, and other critical components are in top condition, contributing to a safer riding experience. A well-maintained bike responds predictably, allowing you to navigate obstacles with confidence.

Maximizing Performance

A finely-tuned mountain bike performs at its best. From smooth gear shifts to responsive brakes and efficient suspension, each component plays a role in elevating your riding experience. Regular maintenance optimizes these elements, ensuring that your bike is ready to tackle any trail you choose.

Benefits of a Well-Tuned Bike

Investing time and effort into tuning up your mountain bike pays dividends in terms of performance, durability, and overall enjoyment. Let’s explore the tangible benefits that riders can experience when their bikes are finely-tuned.

Enhanced Efficiency

A well-maintained drivetrain, properly inflated tires, and smooth gear shifts contribute to a more efficient ride. Every pedal stroke translates into forward momentum, allowing you to cover more ground with less effort. Efficiency is key, especially when conquering long climbs or challenging terrains.

Improved Handling and Control

Precision matters when navigating technical trails. A well-tuned suspension system, balanced wheel alignment, and responsive brakes enhance your bike’s handling and control. This translates to better maneuverability, allowing you to confidently tackle descents, corners, and obstacles.

Extended Lifespan of Components

Regular maintenance and tune-ups contribute to the longevity of your bike’s components. By addressing wear and tear promptly, you reduce the risk of premature failure and extend the lifespan of crucial parts. This not only saves you money on replacements but also ensures that your bike remains a reliable companion for years to come.

Personalized Riding Experience

Each rider has a unique style and preference when it comes to tackling trails. Fine-tuning your bike allows you to personalize its performance to match your riding style. Adjusting suspension settings, optimizing gear ratios, and fine-tuning other elements create a bespoke riding experience tailored to your preferences.

In the world of mountain biking, a well-tuned bike is not just a luxury; it’s a necessity. Regular maintenance is the key to unlocking the full potential of your mountain bike, ensuring that it performs at its best on every trail. As we journey through the subsequent sections of our ultimate tune-up checklist, keep in mind the invaluable benefits that await those who invest time and effort into the care of their trusty steed. Happy trails and happy riding!

Importance of regular maintenance

Essential Tools for Mountain Bike Tune-Up

Taking on the journey of tuning up your mountain bike requires the right set of tools. Whether you’re a novice or a seasoned rider, having the basics on hand is essential for routine maintenance. Here’s a breakdown of the essential tools needed for a thorough mountain bike tune-up:

Multitool

A multitool is a compact, versatile tool that combines various functions into one handy device. It typically includes hex wrenches, screwdrivers, and a chain tool. This all-in-one tool is invaluable for making on-the-go adjustments and handling minor repairs during your rides.

Tire Levers

 Changing a flat tire is a skill every mountain biker should master. Tire levers make this task much easier by helping you pry the tire away from the rim. Invest in a durable set of tire levers to streamline the process of fixing flats on the trail.

Pump

Keeping your tires properly inflated is crucial for a smooth and efficient ride. A reliable pump, whether a floor pump for home use or a compact hand pump for on-the-go adjustments, is an essential tool to maintain optimal tire pressure.

Chain Lubricant

 Lubricating your chain is a fundamental aspect of bike maintenance. A good-quality chain lubricant keeps your drivetrain running smoothly, reduces friction, and extends the lifespan of your chain and cassette.

Cleaning Brushes

 Dirt and grime can accumulate on your bike after every ride. A set of cleaning brushes, including a stiff brush for the drivetrain and softer brushes for other components, will help you keep your bike clean and ready for action.

Chain Checker

   Monitoring the wear on your chain is crucial for preventing premature wear on other drivetrain components. A chain checker tool allows you to gauge chain wear accurately and determine when it’s time to replace your chain.

Torque Wrench

 Precision is key when tightening bolts to manufacturer specifications. A torque wrench ensures that you apply the correct amount of force, preventing over-tightening or under-tightening, which can lead to component failure.

Essential tools for mountain bike tune up

Advanced Tools for Advanced Tuning Techniques

If you’re ready to take your mountain bike tuning to the next level, consider adding these advanced tools to your kit. These tools are particularly useful for riders who want to delve into more intricate adjustments and optimizations:

Suspension Pump

Fine-tuning your suspension requires a suspension pump. This specialized pump allows you to adjust the air pressure in your fork and rear shock to achieve the optimal balance between comfort and performance.

Cassette Lockring Tool

When it’s time to replace your cassette or make adjustments to your rear hub, a cassette lockring tool is indispensable. This tool allows you to remove the lockring securing the cassette to the freehub body.

Bottom Bracket Tool

   For servicing or replacing your bottom bracket, a bottom bracket tool is essential. Choose the tool that matches the specific type of bottom bracket on your bike, such as external or press-fit, to ensure a proper fit.

Wheel Truing Stand

 Achieving perfectly true wheels contributes to a smoother ride. A wheel truing stand provides a stable platform for assessing and adjusting the true alignment of your wheels, ensuring they spin without wobbles.

Derailleur Hanger Alignment Gauge

A misaligned derailleur hanger can cause shifting issues. An alignment gauge allows you to check and correct the alignment of your derailleur hanger, ensuring precise gear changes.

Bearing Press and Puller

 For more advanced maintenance tasks, such as replacing headset or bottom bracket bearings, a bearing press and puller set is invaluable. These tools help you remove and install bearings with precision.

As you progress in your mountain biking journey, acquiring and becoming proficient with these advanced tools will empower you to take on more intricate tuning techniques, ultimately enhancing the performance and longevity of your mountain bike. Remember, a well-maintained bike is a reliable bike, ready to tackle any trail with confidence. Happy tuning!

Advanced tools for advanced tuning techniques

Pre-Ride Inspection Checklist

Your tires are the first point of contact with the trail, making them a critical element in your bike’s performance. Follow these steps to assess your tires:

Inflation: Use a reliable pump to check and adjust tire pressure according to the manufacturer’s recommendations. Optimal tire pressure provides the right balance between traction and efficiency.

Tread Condition: Inspect the tread for signs of wear, cuts, or punctures. Worn-out treads can compromise traction and increase the risk of flats. Replace tires that show significant wear.

Sidewall Inspection: Examine the sidewalls for any bulges, cuts, or damage. Damaged sidewalls may compromise the structural integrity of the tire and pose a safety risk.

Inspecting Brakes and Cables

A well-functioning brake system is paramount for your safety on the trails. Perform the following checks to ensure your brakes are in optimal condition:

Brake Pads: Inspect the brake pads for wear. Worn-out brake pads may reduce stopping power and increase braking distances. Replace pads that are excessively worn.

Brake Fluid (for Hydraulic Systems): Check the brake fluid level in hydraulic systems. Low fluid levels can affect brake performance. Top up the fluid if necessary, and inspect for any signs of leaks.

Cable Tension: For bikes with cable-actuated brakes, assess cable tension. Ensure there is no slack in the cables, and adjust as needed. Lubricate cables to ensure smooth operation.

Assessing the Drivetrain

A smooth and efficient drivetrain is essential for conquering various terrains. Follow these steps to assess and optimize your bike’s drivetrain:

Chain Lubrication: Apply a suitable chain lubricant to ensure a well-lubricated chain. Wipe off any excess lubricant to prevent attracting dirt and debris.

Gearing: Shift through all gears to ensure smooth and precise shifting. If you notice any hesitation or difficulty in shifting, make adjustments to the derailleur’s indexing.

Chain Wear: Use a chain checker tool to measure chain wear. If the chain is excessively worn, it can accelerate wear on other drivetrain components. Replace the chain if needed.

Crankset and Pedals: Check the crankset and pedals for tightness. Ensure that there is no play in the bottom bracket, and tighten any loose bolts.

By systematically going through this pre-ride inspection checklist, you set the foundation for a safe and enjoyable mountain biking experience. Regularly conducting these checks helps identify and address potential issues before they escalate, contributing to the overall reliability and performance of your mountain bike. Now that your bike has passed the pre-ride inspection, it’s time to hit the trails with confidence! Stay tuned for the next segments of our ultimate mountain bike tune-up guide as we delve into more advanced maintenance tasks and tuning techniques. Happy riding!

Cleaning and Lubrication: Elevating Your Mountain Bike’s Performance

Now that we’ve covered the essentials of the pre-ride inspection, let’s dive into the next crucial steps of mountain bike maintenance – cleaning and lubrication. These tasks may seem simple, but their impact on your bike’s performance and longevity is profound. Follow these guidelines to ensure your mountain bike stays in peak condition:

Proper Cleaning Techniques:

A clean bike not only looks great but also functions better. Dirt and grime can accelerate wear on components, hinder performance, and compromise the smooth operation of moving parts. Here’s a step-by-step guide to effective bike cleaning:

Gather Your Supplies: You’ll need a bucket of soapy water, a brush set (with soft and stiff brushes), a sponge, degreaser, and a hose for rinsing.

Remove Excess Dirt: Use a stiff brush to knock off loose dirt and mud from the frame, wheels, and components. Pay attention to hard-to-reach areas and the underside of the bike.

 Soapy Water Wash: Mix a bike-friendly soap or mild detergent with water in the bucket. Use a sponge to wash the entire bike, including the frame, fork, wheels, and drivetrain. Avoid using high-pressure water directly on sensitive areas like bearings.

Degrease the Drivetrain: Apply a degreaser to the chain, cassette, and derailleur pulleys. Use a brush to scrub away built-up grease and grime. Rinse thoroughly.

Clean the Braking Surfaces: Wipe down the braking surfaces with a clean, damp cloth. Ensure that no contaminants, such as oil or grease, are present on the brake pads or rotors.

Inspect and Dry: While cleaning, inspect the frame and components for any signs of damage or wear. Once the bike is clean, use a dry cloth or towel to wipe away excess water.

You can best cleaning tools for your mountain bike at THE LOCAL BIKE SHOP starting from $11.99

Lubricating Key Components

Lubrication is the lifeblood of your bike. It reduces friction, prevents corrosion, and ensures smooth operation. Here’s how to properly lubricate key components:

Chain Lubrication: Apply a suitable chain lubricant to the chain, ensuring that each link is adequately coated. Wipe off excess lubricant with a clean cloth to prevent attracting dirt.

Derailleurs and Pivot Points: Use a light lubricant to coat the pivot points of derailleurs, brake levers, and other moving components. This reduces friction and enhances responsiveness.

 Cables and Housing: Apply a small amount of lubricant to the exposed sections of cables. Work the lubricant into the housing by shifting through the gears and braking. This ensures smooth cable movement.

Pedal and Cleat Interface: Lubricate the pedal spindle and cleat interface to prevent creaking and ensure smooth engagement and disengagement.

Importance of Regular Cleaning and Lubrication

Regular cleaning and lubrication are not just cosmetic rituals – they are fundamental to the health and performance of your mountain bike. Here’s why these tasks should be integrated into your maintenance routine:

Prolongs Component Life: Dirt and grime act as abrasives, accelerating wear on critical components. Regular cleaning removes these contaminants, prolonging the lifespan of your bike’s parts.

 Enhances Performance: A well-lubricated drivetrain and moving parts result in smoother operation. This, in turn, contributes to better shifting, braking, and overall bike performance.

Prevents Corrosion: Moisture and dirt can lead to corrosion, particularly on metal components. Lubrication creates a protective barrier, guarding against rust and corrosion and preserving the integrity of your bike.

Maintains Consistency: Consistency is key in mountain biking. Regular cleaning and lubrication ensure that your bike consistently performs at its best, allowing you to predict its behavior on the trail.

By incorporating proper cleaning techniques and timely lubrication into your mountain bike maintenance routine, you invest in the longevity and reliability of your trusted two-wheeled companion. Stay tuned for the next segment of our ultimate mountain bike tune-up guide, where we’ll explore the intricacies of the brake system and gearing. Happy trails and happy maintenance!

Importance of regular cleaning and lubrication

Adjusting and Tuning Components: Fine-Tuning Your Ride

Now that your mountain bike is clean and well-lubricated, it’s time to delve into the heart of the tuning process – adjusting and fine-tuning key components. Ensuring that your gears shift smoothly, your suspension is dialed in, and your brakes provide optimal performance is essential for an enjoyable and efficient ride. Let’s explore these adjustments in detail:

Fine-Tuning the Gears and Shifters

Smooth and precise gear shifts are crucial for conquering diverse terrains. Follow these steps to fine-tune your gears and shifters.

Check Derailleur Alignment: Ensure that the derailleur hanger is straight. Misalignment can lead to poor shifting performance. If necessary, use a derailleur hanger alignment tool to straighten it.

Adjust Cable Tension: Fine-tune the tension of your gear cables. Shift through all gears and make adjustments to the barrel adjusters as needed. A well-adjusted cable tension ensures crisp and reliable shifts.

Indexing Gears: If your gears are not shifting smoothly, indexing may be required. Use the barrel adjusters to align the jockey wheel with each gear. The goal is to achieve precise alignment for smooth shifting.

Limit Screw Adjustments: Ensure that the limit screws on the front and rear derailleurs are set correctly. These screws determine how far the chain can move, preventing over-shifting or dropping the chain.

Adjusting the Suspension

Fine-tuning your suspension settings enhances comfort, control, and performance on the trail. Here’s how to adjust your suspension:

Set Sag: Adjust the air pressure or preload on your suspension to achieve the recommended sag. This is the amount the suspension compresses under your weight when you’re on the bike. Refer to your bike’s manual for the appropriate sag settings.

Rebound Damping: Adjust the rebound damping to control how quickly your suspension returns after compressing. A slower rebound is ideal for technical descents, while a faster rebound suits smoother terrain.

Compression Damping: Some suspension systems offer adjustable compression damping. Experiment with these settings based on the type of terrain you’ll be riding. Increase compression for smoother trails and decrease for rougher terrains.

Aligning the Brakes for Optimal Performance

Brakes are your primary means of control, and ensuring they operate at their best is paramount. Here’s how to align and optimize your brakes:

Check Brake Pad Alignment: Ensure that the brake pads are evenly aligned with the braking surface on the rotor. Adjust the caliper position if necessary to achieve optimal alignment.

Inspect and Align Rotors: Examine the rotors for any warping or damage. If the rotors are bent, use a rotor truing tool to straighten them. Properly aligned rotors prevent brake squeal and improve braking performance.

Brake Lever Adjustment: Adjust the brake lever to your preference. A comfortable lever reach ensures that you can easily modulate braking force with your fingers.

Wrapping Up Your Tune-Up

With your gears, suspension, and brakes finely tuned, it’s time to wrap up your mountain bike tune-up with a final inspection and a test ride:

Final Inspection and Test Ride

Inspect Bolts and Fasteners: Double-check that all bolts and fasteners are tightened to the manufacturer’s specifications. Pay special attention to critical areas such as the handlebars, stem, seatpost, and pedals.

Check for Any Unusual Noises: Spin the wheels, bounce the suspension, and compress the brakes. Listen for any unusual noises that might indicate loose components or potential issues.

 Test Shifting and Braking: Take your bike for a short test ride to ensure that the gears shift smoothly, the suspension performs as expected, and the brakes provide reliable stopping power. Address any issues that arise during the test ride.

Tips for Ongoing Maintenance

Maintaining your mountain bike’s performance is an ongoing process. Consider these tips for regular upkeep:

Clean and Lubricate Regularly: Schedule routine cleaning and lubrication sessions to keep your bike in top condition. This prevents the accumulation of dirt and ensures smooth operation.

Inspect and Replace Wearable Parts: Regularly inspect components such as brake pads, chain, cassette, and tires for signs of wear. Replace these parts promptly to prevent further damage and maintain optimal performance.

Keep an Eye on Suspension Settings: Adjust your suspension settings based on the type of terrain you’ll be riding. Experiment with different settings to find what works best for your riding style.

Benefits of a Well-Tuned Bike for Performance and Longevity

Maintaining a well-tuned mountain bike offers numerous benefits, including:

Optimal Performance: A well-tuned bike performs at its best, providing smooth shifting, responsive braking, and efficient power transfer.

Longer Component Lifespan: Regular maintenance prevents premature wear and extends the lifespan of crucial components such as chains, cassettes, and brake pads.

Consistent and Predictable Riding Experience: A bike that is consistently well-tuned allows you to predict its behavior on the trail, enhancing your confidence and control.

Reduced Risk of Breakdowns: Addressing potential issues during regular tune-ups reduces the risk of unexpected breakdowns on the trail, ensuring a safer riding experience.

Congratulations! You’ve completed the ultimate mountain bike tune-up. By following these steps and incorporating regular maintenance into your routine, you’re not only enhancing your bike’s performance but also prolonging its lifespan. Get ready to hit the trails with confidence, knowing that your mountain bike is finely tuned and ready for any adventure that comes your way. Happy riding!

Bmx-bikes-under-500CategoriesBike

The Ultimate Guide to Finding High-Quality BMX Bikes Under $500: A Comprehensive Exploration

Finding High-Quality BMX Bikes Under $500! Welcome to our comprehensive guide where we’ll be taking a deep dive into the exciting realm of BMX bikes that won’t break the bank – those priced under $500. Whether you’re just starting out or have some experience under your belt, we’ve got you covered with valuable insights and practical advice to help you make an informed decision.

Picture this guide as your trusty companion on the journey to finding the perfect BMX bike. We understand that the world of bicycles can be overwhelming, especially when you’re on a budget. That’s why we’re here to simplify the process and equip you with all the knowledge you need to pick a high-quality BMX ride that aligns with both your financial boundaries and your riding preferences.

In the coming sections, we’ll break down the key features you should be on the lookout for, compare some top-notch brands and models, and ultimately empower you to make a choice that suits your unique needs. Whether you’re a casual rider cruising around the neighborhood or a dedicated enthusiast pushing the limits at the skate park, our exploration is designed to offer a well-rounded perspective on BMX bikes under $500.So, buckle up and get ready to embark on this exciting journey with us – the ultimate guide to finding the perfect, affordable BMX bike awaits!

The ultimate guide to finding high quality bmx bikes a comprehensive

Understanding BMX Bikes Under $500

When shopping for BMX bikes under $500, several key features can significantly impact your riding experience. Understanding these aspects will help you make an informed decision and ensure that you get the most value for your budget. Here are some crucial features to consider:

 1. Frame Material:

Material Type:Pay attention to the material used in the frame construction. Common materials include steel and chromoly. Chromoly is lighter and more durable, providing a better balance of strength and weight.

 2. Geometry:

  Top Tube Length: The top tube length influences the overall feel of the bike. Choose a length that suits your riding style and body proportions.

  Head Tube Angle: A steeper head tube angle offers quicker steering response, while a more relaxed angle provides stability. Consider your preference for technical tricks or smooth cruising.

 3. Components:

   Cranks: Look for durable cranks, preferably made of chromoly, as they withstand the stress of BMX riding.

   Handlebars and Grips:Comfortable handlebars with good grips are essential. Grips should provide a secure hold and minimize vibration.

4. Fork Type:

    Fork Material:Steel forks are common in budget-friendly BMX bikes. Ensure they are robust and able to handle various terrains.

5. Brakes:

   Brake Type:Rim brakes are standard in this price range. Check for reliable braking performance, as safety is paramount in BMX riding.

6. Wheels and Tires:

   Rims: Look for sturdy rims, and consider double-wall rims for added strength.

   Tires: The type of tires influences traction and ride smoothness. Choose tires suitable for your riding style and the surfaces you’ll encounter.

7. Weight:

   Overall Weight: A lighter bike is generally more maneuverable, but it’s essential to strike a balance. Extremely light bikes might compromise durability.

 8. Brand Reputation:

   Manufacturer: Stick to reputable brands known for producing quality BMX bikes. Research customer reviews and ratings for insight into a brand’s reliability.

 9. Purpose:

   Intended Use: Consider your riding style. Whether it’s street riding, park tricks, or dirt jumping, choose a bike designed for your preferred BMX discipline.

 10. Warranty:

  Manufacturer Warranty: Check if the bike comes with a warranty. A warranty reflects the manufacturer’s confidence in the bike’s durability.

 Choosing the right BMX bike under $500 involves a careful balance of features that align with your preferences and riding style. Prioritize durability, component quality, and overall construction to ensure a bike that not only fits your budget but also provides a thrilling and reliable riding experience. In the next section, we’ll explore the importance of quality and durability in affordable BMX bikes, shedding light on why these factors matter for riders on a budget. Stay tuned!

Understanding bmx bikes under

The Importance of Quality and Durability in Affordable BMX Bikes

In the realm of affordable BMX bikes under $500, the significance of quality and durability cannot be overstated. While these bikes may come with budget-friendly price tags, riders should not compromise on the essential elements that make for a reliable and long-lasting BMX experience.

 1. Durability for Thriving in Extreme Conditions:

 BMX bikes are built to endure the rigors of various terrains and the stress of jumps, tricks, and stunts. Opting for a bike with durable components ensures it can handle the impact and pressure associated with BMX riding.

 2. Frame Strength and Material:

  The frame serves as the backbone of any BMX bike. Look for a bike with a robust frame, preferably made from materials like chromoly or high-tensile steel. These materials provide a good balance between strength and weight, essential for withstanding the forces encountered during BMX maneuvers.

 3. Reinforced Components for Longevity:

  Components such as cranks, pedals, and hubs undergo significant stress during BMX activities. Choosing a bike with reinforced and well-constructed components contributes to the overall longevity of the bike.

 4. Impact Resistance in Critical Areas:

 Pay attention to bikes that feature reinforced critical areas, such as the downtube and bottom bracket. These reinforcements add extra strength where it’s needed most, ensuring the bike can withstand repeated impacts without compromising structural integrity.

 5. Proper Welding and Construction:

 Quality welding is crucial for the structural integrity of a BMX bike. Look for bikes with well-executed welds, as they enhance the overall strength of the frame. Proper construction methods contribute to a bike that can handle the demands of aggressive riding.

 6. Reliable Braking Systems:

 Safety is paramount in BMX, and a reliable braking system is essential. Ensure the bike comes equipped with effective rim brakes or other suitable braking mechanisms. Regular maintenance of the brakes is also crucial for long-term reliability.

 7. Brand Reputation and Customer Reviews:

 Reputable BMX brands prioritize quality and durability even in their budget-friendly models. Researching customer reviews and the reputation of the manufacturer can provide insights into the long-term performance of the bike.

 8. Consider Intended Use:

 The type of BMX riding you intend to pursue influences the required durability. Street riders may prioritize different features compared to those focusing on park or dirt riding. Choose a bike that aligns with your intended use.

Investing in a budget-friendly BMX bike doesn’t mean compromising on quality and durability. In fact, these factors are pivotal for a satisfying and safe riding experience. By prioritizing bikes with strong frames, reinforced components, and a reputation for durability, riders can enjoy the thrill of BMX without constant concerns about wear and tear. In the next section, we’ll delve into specific models, comparing their features to help you make an informed decision on the best BMX bike under $500 for your needs. Stay tuned for detailed insights into some standout options!

Top Brands and Models for BMX Bikes Under $500

BMX riding, the quest for quality doesn’t have to break the bank. Whether you’re a seasoned rider or just stepping into the thrilling realm of tricks and jumps, finding the right bike that combines performance, durability, and affordability is crucial. Fortunately, several top-notch brands have mastered the art of crafting budget-friendly BMX bikes without compromising on quality. From renowned names like Mongoose and Redline to the stylish offerings of Haro and GT Bicycles, the under-$500 range boasts a selection of models that cater to various riding styles and preferences. Join us as we explore some of the standout brands and their coveted models, ensuring that the exhilarating world of BMX remains accessible to all enthusiasts without sacrificing on the thrill.

Reviewing Popular BMX Bike Brands in the Budget-Friendly Range

When it comes to budget-friendly BMX bikes under $500, riders have several exciting options to choose from. In this segment, we will explore and compare eight different BMX models, highlighting their unique features and specifications. Whether you’re into street riding, park stunts, or dirt trails, these bikes promise to deliver an exhilarating experience without breaking the bank.

We The People Nova BMX Bike – 20″ TT

Color: Ultra Violet  

Price: $479.99

The We The People Nova BMX Bike is an entry-level shredding machine that brings WETHEPEOPLE quality to a lower price point. With a super short 12.75” oval chainstay and responsive 26mm offset fork, it mirrors the bikes ridden by the PRO team. The steel frame, durable components, and five incredible colorways make it an appealing choice for riders looking to progress their skills.

Stolen Heist BMX Bike – 21″ TT

Color: Green/Chrome  

Price: $489.99

The Stolen Heist BMX Bike is designed for riders who want a pro-level bike without breaking the bank. Featuring a chromoly downtube, top tube, and fork legs, this model emphasizes higher strength. With a 21” top tube, 170mm tubular 4130 chromoly cranks, and after-market parts, the Heist provides both style and performance.

Stolen overlord bmx bike 20. 7522 tt black 11zon 1

BUY this bike at The Local Bike Shop for $489.99!

Stolen Heist BMX Bike – 21″ TT

Color: Gray  

Price: $489.99

Similar to the Green/Chrome variant, the Stolen Heist BMX Bike in Gray offers the same pro-level features. The chromoly frame, 9.25” TallBoy bars, and sealed bearings contribute to its strength and durability. It’s a versatile option for riders seeking reliability and a sleek design.

Stolen heist bmx bike 11zon

Buy Stolen Heist BMX Bike – 21″ TT at The Local Bike Shop

Stolen Overlord BMX Bike – 20.75″ TT

Color: Black Sabbath  

Price: $454.99

The Stolen Overlord BMX Bike boasts upgrades such as a longer top tube, sealed integrated headset, sealed hubs, Mythos pedals, Sumo Guard sprocket, and two pegs. With hand-welded 1020 Hi-Ten steel tubes, this bike is ready to hit the streets with enhanced durability and performance.

Stolen overlord bmx bike 20. 7522 tt black 11zon

Stolen Overlord BMX Bike – 20.75″ TT

Color: Snow Blind White  

Price: $454.99

In Snow Blind White, the Stolen Overlord BMX Bike maintains the same top-tier features found in the Black Sabbath variant. Its clean aesthetic, combined with the reliable components, makes it a compelling choice for riders who prioritize style and substance.

Stolen overlord bmx bike 20. 7522 tt white 11zon

We The People Nova BMX Bike – 20.5″ TT

Color: Matt Black  

Price: $479.99

The We The People Nova BMX Bike with a 20.5” top tube in Matt Black offers riders an alternative size option. It retains the quality components and construction of its counterparts, providing riders with a versatile and responsive bike to conquer different riding styles.

We the people nova bmx bike 20. 522 tt matt black 1 6 11zon 1

We The People Nova BMX Bike – 20.5″ TT

Color: Matt Raw  

Price: $479.99

For those seeking a silver aesthetic, the We The People Nova BMX Bike in Matt Raw delivers the same performance and features as its counterparts. The short 12.75” oval chainstay and 26mm offset fork remain consistent, ensuring riders experience the same level of quality.

We The People Nova BMX Bike – 20″ TT

Color: Matt Black  

Price: $479.99

In Matt Black, the We The People Nova BMX Bike with a 20” top tube completes the color options. With its super short chainstay and responsive fork, it mirrors the bikes ridden by the PRO team, making it an attractive choice for riders who want performance and style in a budget-friendly package.

Comparing Different Models and Their Unique Features

In the dynamic landscape of BMX bikes, each model brings a distinct set of features and characteristics to the table, catering to the diverse needs and preferences of riders. From the rugged construction of the Mongoose Legion series to the sleek designs, BMX bikes under $500 offer a plethora of unique elements that elevate the riding experience. Whether it’s the precision engineering, or innovative components. Join us as we explore into the distinctive traits of these BMX bikes, dissecting their unique features!

Frame and Construction

  • We The People Nova: Steel frame, short oval chainstay, 26mm offset fork.

Stolen Heist: Chromoly downtube, top tube, and fork legs, 170mm tubular 4130 chromoly cranks.

Components

Stolen Overlord: Longer top tube, sealed integrated headset, sealed hubs, Mythos pedals, Sumo Guard sprocket.

We The People Nova: Quality components, PRO team-inspired design, multiple color options.

Specifications

Stolen Heist: 21” top tube, 13.2” chainstay length, 11.7” bottom bracket height.

Stolen Overlord: 20.75” top tube, 13.75” chainstay length, 11.7” bottom bracket height.

Exploring the Best Value for Money in the Sub $500 BMX Bike Market

In the next segment, we will delve deeper into the performance aspects, rider reviews, and overall value for money offered by these BMX bikes. Stay tuned for an in-depth analysis that will help you make an informed decision on the ideal budget-friendly BMX bike for your riding preferences. Whether you’re a beginner or a seasoned rider, finding the right balance of quality and affordability is key to an enjoyable biking experience.

Tips for Choosing the Right BMX Bike Based on Riding Style and Preferences

Selecting the right BMX bike involves considering your riding style, skill level, and personal preferences. Here are some key tips to help you make an informed decision:

Riding Style

Street Riding: If you enjoy navigating urban landscapes, look for a BMX bike with a sturdy frame, durable components, and responsive handling. Sturdy pegs and hub guards are also beneficial for grinding on rails and ledges.

Park Riding: For those who prefer skate parks and ramps, opt for a bike with a responsive and maneuverable design. Lightweight frames and components contribute to better aerial performance.

Dirt Trails: If you’re into off-road BMX riding, choose a bike with strong and durable construction. Look for models with larger, knobby tires for better traction on dirt trails.

Skill Level

Beginners: Entry-level bikes with simpler components and a more forgiving geometry are ideal for those new to BMX. These bikes are designed to help beginners learn and progress without being overly aggressive.

Intermediate to Advanced Riders: If you have some experience, consider bikes with advanced features such as chromoly frames, sealed bearings, and aftermarket components. These provide enhanced durability and performance for riders pushing their skills.

Personal Preferences

Size: Ensure the bike size matches your height and body proportions. The top tube length and overall geometry play a crucial role in comfort and control.

Color and Design: While not directly related to performance, choosing a bike with a color and design you love adds a personal touch to your riding experience.

Understanding the Maintenance and Upkeep of BMX Bikes Under $500

Proper maintenance is essential to keep your BMX bike in top condition, ensuring longevity and optimal performance. Here are some maintenance tips:

Regular Inspections:

Check Bolts and Nuts: Ensure all bolts and nuts are tightened to the recommended torque specifications. Loose components can affect the bike’s stability and safety.

Inspect Frame and Fork: Regularly check for any cracks, dents, or damage to the frame and fork. Address any issues promptly to prevent further damage.

Lubrication:

Chain Lubrication: Keep the chain properly lubricated to reduce friction and wear. Wipe off excess lubricant to prevent attracting dirt.

Bearings: Check and grease bearings regularly, including those in the headset, bottom bracket, and hubs.

Tire Maintenance:

Inflation: Maintain the correct tire pressure to ensure optimal performance and prevent pinch flats. Inspect tires for cuts or punctures.

Tread Wear: Replace tires if the tread is significantly worn, as it can affect traction and control.

Brake System:

Brake Pads: Regularly inspect brake pads for wear and replace them if necessary. Adjust brake cables to maintain responsiveness.

Where to Buy High-Quality BMX Bikes Under $500: Retailers, Online Stores, and Second-Hand Options

Finding the right place to purchase your BMX bike is crucial to ensure authenticity, quality, and good customer support. Here are some options to consider:

Retailers:

Local Bike Shops: Visit your local bike shops where you can get personalized advice, see the bikes in person, and often receive assembly and maintenance services.

Sports Retailers: Large sports retailers may carry a selection of BMX bikes. Ensure they have knowledgeable staff to assist you with your purchase.

Online Stores:

BMX Specialty Shops: Explore online stores specializing in BMX bikes and equipment. These shops often have a wide selection and expertise in the BMX niche.

Manufacturer Websites: Consider purchasing directly from the manufacturer’s website for authenticity and access to the latest models.

Second-Hand Options:

Online Marketplaces: Platforms like eBay, Facebook Marketplace, or Craigslist can offer second-hand BMX bikes. Exercise caution, thoroughly inspect the bike, and inquire about its history.

Local Classifieds: Check local classified ads for potential second-hand options. Meeting the seller in person allows you to inspect the bike before making a purchase.

Remember to research customer reviews, compare prices, and consider the reputation of the seller or retailer before making your final decision. Whether you choose to buy from a local shop, an online store, or opt for a second-hand option, a well-informed decision ensures you get the best value for your money.

Health-benefits-of-biking-workoutsCategoriesBike

What Muscles Does Biking Work? A Comprehensive Guide to the Targeted Muscles and Health Benefits of Biking Workouts

Health benefits of biking workouts!

Are you on a quest for fitness and health? Look no further than the open road, as biking emerges as a stellar choice for achieving your wellness goals. In this comprehensive guide, we’ll delve into the intricacies of biking workouts, exploring the muscles that benefit the most from this low-impact yet high-reward activity. Whether you’re a seasoned cyclist or just strapping on your helmet for the first time, understanding the muscles engaged and the health benefits reaped will enhance your biking experience.

Health benefits of biking workouts

Muscles at Work

Cycling is a fantastic way to engage various muscle groups simultaneously. Pedaling activates your quadriceps, hamstrings, and calf muscles, while the continuous motion helps tone and strengthen your lower body. Additionally, the stability required while cycling engages your core muscles, contributing to improved abdominal strength and stability. Regular cycling not only enhances muscular endurance but also promotes cardiovascular health, making it a great activity to support overall fitness while enjoying the ride.

1.Quadriceps (Front Thigh Muscles):


Role: The primary workhorses during pedaling are the quadriceps, which extend the knee and power each downward stroke.

Engagement: Intense engagement, especially during climbs and sprints.

2. Hamstrings (Back Thigh Muscles):


Role: Act as antagonists to the quadriceps, flexing the knee during the upward pedal stroke.


Engagement: While not as prominent as the quads, hamstrings play a crucial role in creating a balanced pedal motion.

3. Calves (Gastrocnemius and Soleus):


Role: Propel the pedal downward and stabilize the ankle during the entire pedal cycle.

Engagement: Constant involvement, particularly during the bottom portion of the pedal stroke.

4. Gluteal Muscles (Glutes):


Role: Power the pedal stroke and stabilize the hips.

Engagement: Essential for maintaining a strong and steady cadence.

5. Core Muscles:

 Role: Provide stability and support to the upper body, ensuring efficient power transfer from the lower body to the pedals.

Engagement: Constant activation to maintain an upright posture and efficient energy transfer.

6. Hip Flexors:


Role: Assist in lifting the leg during the upward pedal stroke.

Engagement: Moderate engagement, especially during the recovery phase of the pedal stroke.

7. Deltoids and Trapezius (Shoulder Muscles):

Role: Offer support and stability to the upper body, especially during more aggressive riding positions.

Engagement: Active during climbs, sprints, and maneuvers that require upper body movement.

Health benefits biking scaled

Health Benefits of Biking

Biking isn’t just a mode of transport or a recreational activity; it’s a gateway to a multitude of health benefits. From cardiovascular improvements to muscular strength and mental well-being, cycling offers a holistic approach to fitness. The rhythmic motion of pedaling engages major muscle groups, promoting endurance and strength, while the cardiovascular workout boosts heart health and circulation. Beyond the physical advantages, biking also fosters mental clarity and reduces stress, making it a rewarding pursuit for both body and mind.

Cardiovascular Health

Effect: Biking elevates heart rate, promoting cardiovascular endurance and reducing the risk of heart disease.

Muscular Endurance and Strength

Effect: Regular biking builds strength and endurance in the lower body muscles, contributing to overall fitness.

Weight Managemen


Effect: Biking is an effective calorie-burning exercise, aiding in weight loss or maintenance.

Joint Health


Effect: Being a low-impact exercise, biking is gentle on the joints, making it accessible to a wide range of individuals.

Mental Wellbeing


Effect: Biking has been linked to reduced stress and anxiety levels, promoting mental health and overall well-being.

Improved Posture

Effect: The engagement of core muscles during biking contributes to better posture and spinal alignment.

Social Connection

Effect: Biking can be a social activity, fostering connections with like-minded individuals and promoting a sense of community.

Whether you’re navigating city streets or conquering mountain trails, biking offers a holistic workout experience that targets various muscle groups and delivers numerous health benefits. From the powerful push of the quadriceps to the stability provided by the core, every pedal stroke contributes to a stronger, healthier you. So, whether you’re a seasoned cyclist or just beginning your biking journey, pedal your way to better health and fitness – your body will thank you for it!

Muscles targeted biking workouts scaled

The Muscles Targeted by Biking Workouts

Cycling is a full-body workout that primarily targets the lower body muscles. The pedaling motion engages the quadriceps, hamstrings, and calf muscles, fostering strength and endurance. Additionally, the stability required to maintain balance activates core muscles, including the abdominals and lower back, contributing to improved stability and posture. While the legs bear the brunt of the work, the continuous effort involved in cycling also engages muscles in the arms, shoulders, and upper back, albeit to a lesser extent. This comprehensive engagement of muscle groups makes cycling an excellent exercise for overall strength and conditioning.

Legs:

1. Quadriceps:

   – Role: As mentioned earlier, the quadriceps are pivotal in extending the knee and generating power during the downward pedal stroke.

   – Engagement: Intense engagement, especially during climbs and when pushing against resistance.

2. Hamstrings:

   – Role: Working in opposition to the quadriceps, the hamstrings flex the knee and contribute to a smooth pedal stroke.

   – Engagement: Particularly active during the upward phase of the pedal stroke.

3. Calves:

   – Role: Responsible for pointing the toes downward and providing stability to the ankle.

   – Engagement: Consistent activation, crucial for maintaining control and balance.

4. Glutes (Maximus, Medius, Minimus):

   – Role: The gluteal muscles play a multifaceted role in powering the pedal stroke, stabilizing the hips, and ensuring proper alignment.

   – Engagement: Constant activation, especially during uphill climbs and rapid accelerations.

Core:

1. Abdominals:

   – Role: Essential for maintaining an upright posture and transferring power from the lower body to the pedals.

   – Engagement: Continuous activation to stabilize the spine and pelvis.

2. Obliques:

   – Role: Assist in lateral flexion and rotation, contributing to overall core stability.

   – Engagement: Not as prominent as the abdominals but active during turns and maneuvers.

3. Lower Back Muscles:

   – Role: Provide support to the lumbar spine and contribute to overall core strength.

   – Engagement: Engaged to a varying degree depending on riding position and intensity.

Upper Body:

1. Shoulders:

   – Role: Offer stability and support to the upper body, especially during more aggressive riding positions.

   – Engagement: Engaged during climbs, sprints, and when maneuvering the bike.

2. Triceps:

   – Role: Assist in extending the elbow, contributing to the pushing phase of the pedal stroke.

   – Engagement: Active during the extension phase of the arms, especially when riding in a lower position.

3. Biceps:

   – Role: Assist in flexing the elbow, providing support during the upward phase of the pedal stroke.

   – Engagement: Engaged to a lesser extent than triceps but still active in maintaining arm position.

Biking is a holistic workout that engages a wide array of muscles throughout the body, from the powerful quads and hamstrings to the stabilizing core and upper body muscles. Understanding the specific muscles involved in cycling is crucial for optimizing your workout routine, preventing imbalances, and promoting overall strength and endurance.

So, the next time you hop on your bike, appreciate the symphony of muscle engagement that propels you forward. Whether you’re cruising along a scenic route or conquering challenging terrains, every pedal stroke is a testament to the comprehensive workout that biking provides. Embrace the burn, relish the journey, and let the muscles targeted by biking workouts sculpt a stronger, fitter you. Happy cycling!

Health benefits biking workput scaled

The Health Benefits of Biking Workouts

Biking isn’t simply about riding; it’s a gateway to a treasure trove of health dividends. Beyond its thrill and enjoyment, cycling unveils a multitude of rewards that extend across the spectrum of well-being. From fortifying the heart and muscles to invigorating the mind and fostering an overall sense of vitality, cycling embodies a holistic approach to wellness. It’s more than a workout routine; it’s a journey towards a healthier, more vibrant life, encapsulating the harmony between physical vigor and mental rejuvenation.

1. Improved Cardiovascular Health:

Biking isn’t just a ride in the park; it’s a journey toward a healthier heart. As you pedal, your cardiovascular system gets a boost, leading to:

  •  Lowered Blood Pressure: Regular cycling has been linked to reduced blood pressure, promoting overall heart health.
  • Reduced Risk of Heart Disease: Engaging in consistent biking can lower the risk of cardiovascular diseases, including heart attacks and strokes.
  • Increased Lung Capacity: The rhythmic nature of cycling enhances lung function, increasing oxygen intake and promoting respiratory health.

2. Weight Loss and Management:

Biking is a powerful ally in the battle of the bulge, offering a range of benefits for those aiming to shed pounds or maintain a healthy weight.

  • Increased Calorie Burn: Cycling is an effective calorie-burning exercise, aiding in weight loss by burning calories during and after the ride.
  •  Improved Metabolism: Regular biking helps rev up your metabolism, contributing to more efficient calorie utilization.
  • Reduced Body Fat Percentage: Combining cardiovascular exercise with muscle engagement, biking helps reduce body fat percentage, contributing to a leaner physique.

3. Reduced Stress and Anxiety:

Hop on your bike to pedal away the stress of daily life. Biking provides mental health benefits that extend beyond the physical.

  • Release of Endorphins: The physical exertion of biking triggers the release of endorphins, the body’s natural mood enhancers.
  • Improved Mood: Regular cycling has been associated with reduced symptoms of depression and anxiety, promoting a more positive outlook.
  • Reduced Cortisol Levels: Biking helps regulate stress hormones like cortisol, contributing to an overall sense of calm.

4. Low-Impact Exercise:

Unlike high-impact activities, biking offers a gentle yet effective workout that’s accessible to individuals of all fitness levels.

  • Reduced Risk of Injury: Biking is easy on the joints, minimizing the risk of injuries common in high-impact exercises.
  • Suitable for All Fitness Levels: Whether you’re a seasoned athlete or just starting your fitness journey, biking can be adapted to your fitness level.
  • Easy on the Joints: The smooth, repetitive motion of cycling places minimal stress on the joints, making it an ideal exercise for those with joint issues.

5. Improved Coordination and Balance:

Cycling is not just about moving your legs; it’s about engaging your entire body and refining your coordination and balance.

  •  Engages Multiple Muscle Groups: The complex interplay of muscles during biking engages various muscle groups simultaneously, promoting overall body strength.
  •  Requires Balance and Coordination: Maneuvering a bike challenges your sense of balance and coordination, enhancing these skills over time.
  • Improves Overall Body Control: As you navigate diverse terrains, your body learns to adapt and control its movements, contributing to improved overall coordination.

Embarking on a biking journey goes beyond the physical act of pedaling; it’s a holistic approach to health and well-being. From the cardiovascular benefits that keep your heart pumping strong to the mental health perks that uplift your spirits, biking is a comprehensive workout that delivers results.

So, whether you’re chasing weight loss goals, seeking stress relief, or aiming to enhance your overall fitness, pedal your way to a healthier, happier you. Embrace the myriad benefits of biking, and let the open road become your path to wellness.

Mountain-biking-workouts

Conclusion

As we conclude this journey through the world of biking, it’s evident that this form of exercise isn’t just about the pedal strokes—it’s about embracing a lifestyle that promotes holistic health. To maximize the benefits of your biking workouts and ensure a fulfilling experience, remember the following key tips:

Recap of the Targeted Muscles and Health Benefits of Biking Workouts:

  • Engage major muscle groups: quadriceps, hamstrings, glutes, and core.
  • Enhance cardiovascular health, weight management, and stress reduction.
  • Improve coordination, balance, and overall body control.

Encouragement to Try Biking as a Form of Exercise:

Whether you’re seeking the thrill of speed, the serenity of nature, or the camaraderie of group rides, biking caters to a diverse range of preferences. It’s not just exercise; it’s an adventure waiting to be explored.

Final Tips for Success:

1. Start at Your Own Pace: Don’t rush; build your stamina gradually to avoid burnout or injury.

2. Set Realistic Goals: Whether it’s conquering a challenging trail or increasing your weekly mileage, set achievable goals to keep yourself motivated.

3. Enjoy the Journey: Biking is not just about the destination; relish the process, the scenery, and the joy of being on two wheels.

4. Safety First: Always wear a helmet and follow traffic rules. Safety is paramount for a positive biking experience.

5. Connect with the Biking Community: Join local biking groups or online communities to share experiences, get tips, and find like-minded individuals who share your passion.

In the grand scheme of fitness, biking stands out as a versatile and enjoyable way to stay active. So, whether you’re a seasoned cyclist or someone contemplating their first ride, seize the opportunity to make biking a part of your fitness routine.

Embrace the breeze on your face, the rhythm of your pedal strokes, and the sense of freedom that comes with every ride. Biking isn’t just exercise; it’s a celebration of movement, a journey toward well-being, and an invitation to experience the world from a different perspective.

Happy cycling, and may the open road be your gateway to a healthier, happier you!

Mountain-bike-disc-brakes-the-local-bike-shopCategoriesBike

The Ultimate Guide to Buying Mountain Bikes with Disc Brakes: Everything You Need to Know for a Safe and Thrilling Ride

Remember  the first time you saw a mountain biker whisking down a trail, their wheels gripping the terrain with an almost magical hold, even in the most challenging conditions? How did that happen? Didn’t it appear like a magic? That magic, my reader’s It’s in the disc brakes. If you’ve ever felt lost or overwhelmed at the idea of purchasing aa mountain bike with disc brake’s, you’re not alone. Many have been in your shoes, including me. That’s why I’ve put together this simple guide for you all. From understanding their unique advantages to knowing how they perform across varying terrains and weathers, we’ve got you covered. Whether you’re just starting your biking journey or have countless trails under your belt, this guide is your key to a safer and more exhilarating ride. Let’s rediscover that magic together!

Mountain bike buying guide

Introduction: The Magic Behind Disc Brakes: The Ultimate Game-Changer for Mountain Bikers

Mountain biking is not just a sport; for many, it’s a passion, a way to reconnect with nature and test one’s limits. And at the heart of this exhilarating experience lies the importance of safety and control. Enter disc brakes – the unsung heroes that make your adventurous rides smoother and safer.

Benefits of Mountain Bikes with Disc Brakes

1. Consistent Performance in All Conditions: Unlike traditional rim brakes, which can lose effectiveness in wet or muddy conditions, disc brakes offer consistent stopping power. Come rain, mud, or snow, they’ve got your back.

2. Better Heat Dissipation: During intense downhill rides, brakes can get hot, affecting their performance. Disc brakes dissipate heat more effectively, ensuring they remain functional even during the most demanding descents.

3. Greater Stopping Power: Due to their design and mechanism, disc brakes provide better leverage, translating to powerful and efficient stopping even at higher speeds.

4. Less Maintenance: They are less prone to wear and tear, meaning fewer replacements and adjustments compared to traditional brakes.

A Brief Stroll Down Memory Lane: The Evolution of Disc Brakes in Mountain Biking

The introduction of disc brakes to the world of mountain biking was a revolutionary step. In the early 1990s, as mountain biking grew in popularity, it became evident that the traditional rim brakes had limitations, especially in adverse conditions. Enter disc brakes, initially used in automobiles and motorcycles. The mountain biking community quickly adopted them, recognizing their superior performance. Since then, they’ve become the gold standard for mountain bikes, offering reliability, consistency, and unparalleled control.

Why Picking the Right Mountain Bike with Disc Brakes Matters

Choosing a mountain bike is like choosing a travel partner. The right one makes the journey enjoyable, while the wrong one can turn it into an ordeal. The same goes for disc brakes. There are various types – hydraulic, mechanical, and more – each with its own set of pros and cons.

Understanding your riding style, terrain preferences, and budget can make a huge difference in your choice. A weekend trail rider might have different requirements compared to a downhill racer. Thus, making an informed decision based on your needs ensures not only a thrilling ride but also optimum safety.

The introduction of disc brakes to mountain bikes was more than just an upgrade; it was a transformation. They have played a pivotal role in ensuring riders have both fun and safety while conquering challenging terrains. So, as you embark on your journey to find the perfect mountain bike, remember the magic of disc brakes and let them guide you to an unparalleled riding experience.

Types of Disc Brakes: Mechanical vs. Hydraulic

Mountain biking has come a long way, and so have the technologies that power our rides. Disc brakes, as we’ve discussed, are integral to this evolution. But did you know there are different types of disc brakes? Let’s dive deep into the world of Mechanical and Hydraulic disc brakes, understanding their workings, advantages, disadvantages, and ideal scenarios to use them.

Mechanical Disc Brakes

How They Work: 

Mechanical disc brakes, also known as cable-actuated disc brakes, operate with a cable that runs from the brake lever to the caliper. When the lever is squeezed, the cable tightens, causing the brake pads to clamp down on the disc rotor, which in turn slows down or stops the bike.

Pros: 

1. Simplicity: Easier to install and adjust.

2. Maintenance: Can be maintained with basic tools and doesn’t require specialized knowledge.

3. Cost: Generally more affordable than their hydraulic counterparts.

Cons: 

1. Modulation: Less smooth braking as compared to hydraulic brakes.

2. Effort: Requires more hand strength to achieve the same braking force.

3. Performance Decline: The cables can stretch over time, affecting performance.

Best Use Cases: 

Mechanical disc brakes are ideal for casual riders, those on a budget, or individuals who prefer easy maintenance. They’re great for city rides, light trail riding, or for any biker who values simplicity and affordability.

Mountain bike brakes

Hydraulic Disc Brakes

How They Work?

Hydraulic disc brakes use a sealed system filled with brake fluid. When the brake lever is squeezed, it pushes the fluid through the system, which then activates the brake pads to clamp onto the rotor.

Pros: 

1. Smooth Braking: Offers excellent modulation, allowing for smoother and more controlled braking.

2. Power: Less hand force required for strong braking.

3. Reliability: No cables to stretch or wear out, ensuring consistent performance.

Cons: 

1. Maintenance: Requires specialized knowledge and tools to repair and maintain.

2. Cost: Typically more expensive than mechanical brakes.

3. Potential for Leaks: Though rare, hydraulic systems can develop leaks which may affect performance.

Best Use Cases: 

Hydraulic disc brakes are best for serious mountain bikers who frequently tackle challenging terrains, downhill riders seeking superior stopping power, or anyone who desires optimal braking performance and modulation.

To summarize, the choice between mechanical and hydraulic disc brakes is largely a matter of personal preference, riding style, and budget. Both have their strengths and shortcomings. The key is understanding your riding needs and matching them with the right braking system to ensure every ride is both thrilling and safe.

Mountain bike maintenance guide

Factors to Consider When Buying a Mountain Bike with Disc Brakes

The beauty of mountain biking is that it’s as varied as the riders themselves. From serene trail rides to adrenaline-pumping downhill races, there’s a style, terrain, and weather condition for everyone. But how do you ensure that your bike, especially its disc brakes, aligns with your unique biking profile? Let’s explore the key factors to consider.

Riding Style

Riding Style & Disc Brake Choice!

Your riding style dictates a lot, from the type of bike frame you need to the kind of disc brakes that would best serve you. For instance, someone frequently engaging in aggressive downhill rides would prioritize stronger and more responsive brakes over someone who enjoys casual weekend rides.

Best Mountain Bike with Disc Brakes for Different Riding Styles: 

1. Trail Riding: For general trail riding, both mechanical and hydraulic brakes can suffice. However, hydraulic brakes offer smoother modulation which can be beneficial for varied trails.

2. Downhill & Enduro: For high-speed descents and challenging tracks, hydraulic disc brakes are a must due to their superior stopping power and modulation.

3. Cross-Country: Weight becomes a crucial factor here. Lighter hydraulic systems or efficient mechanical brakes can be considered, based on personal preference and trail specifics.

Terrain

Terrain & Disc Brake Choice?

The type of terrain you frequent plays a vital role in determining brake choice. Rougher terrains require brakes that offer consistent performance and can handle the wear and tear of debris.

Best Mountain Bike with Disc Brakes for Different Terrains: 

1. Flat Terrains: Mechanical brakes are often sufficient, offering adequate stopping power for less demanding terrains.

2. Mountainous and Rocky Terrains: Hydraulic brakes, with their superior modulation and power, are ideal for these challenging terrains where sudden stops might be necessary.

3. Mixed Terrains: For riders who tackle a bit of everything, hydraulic brakes are recommended due to their versatility and consistent performance.

Weather Conditions

Weather & Disc Brake Choice?

Weather can affect the performance of disc brakes. Wet and muddy conditions can challenge the efficiency of rim brakes, making disc brakes the preferred choice.

Best Mountain Bike with Disc Brakes for Different Weather Conditions: 

1. Dry Conditions: Both mechanical and hydraulic disc brakes perform efficiently.

2. Wet & Muddy Conditions: Hydraulic disc brakes shine here due to their sealed system and consistent performance, regardless of external conditions.

3. Snowy or Icy Conditions: Hydraulic brakes, with their precise modulation, offer better control in slippery situations.

In conclusion, the world of mountain biking is vast and diverse. Choosing the right bike equipped with the perfect disc brakes ensures not only a safer ride but also a more enjoyable one. Take time to evaluate your riding style, the terrains you tackle, and the weather conditions you often ride in. By aligning these factors with your bike and brake choice, you’re setting yourself up for countless memorable adventures on the trails. Happy riding!

Maintenance and Care for Mountain Bikes with Disc Brakes

Like any high-performance machine, a mountain bike, especially one equipped with disc brakes, requires regular maintenance to ensure optimal performance. Proper care not only prolongs the life of your bike and its components but also ensures a safer and more efficient ride.

Cleaning and Lubrication

How to Clean and Lubricate Mountain Bikes with Disc Brakes?

1. Cleaning: Begin by using a soft brush to remove loose dirt and debris from the brakes and rotor. Use a bike-specific cleaner or a mild soapy solution to clean the rotor, ensuring to avoid any oil or lubricants on the braking surface. Rinse with clean water and dry using a soft cloth.

2. Lubrication: While the braking surface should be kept free from oils and lubricants, the moving parts of the brake caliper can benefit from periodic lubrication. Use a bike-specific lubricant and apply sparingly to these parts.

Best Practices: 

1. Always ensure the braking surface remains free from oils and contaminants.

2. Regularly check for any signs of wear or damage, especially after intense rides.

3. If your brakes start making unusual noises, a thorough cleaning might be needed.

Mountain bike disc brake cleaning kits

Brake Pad Replacement

When and How to Replace Brake Pads?

1. When: The thickness of the brake pad material is a good indicator. If the pad wears down to a thickness of about 1mm or less, it’s time for a replacement. Also, if braking becomes less efficient or produces a squealing sound, check your pads.

2. How: With the bike steady, remove the wheel. Using appropriate tools, extract the retaining pin or clip from the brake pad. Slide out the worn pads and replace them with new ones. Ensure the pads are seated properly and replace the retaining pin or clip.

Best Practices: 

1. Always refer to the manufacturer’s guidelines for specific brake models.

2. Periodically inspect the pads for uneven wear.

3. After replacement, do some gentle braking to bed in the new pads. This helps in achieving optimal performance.

Conclusion

Mountain bikes with disc brakes are undeniably a game-changer. Their consistent performance, adaptability to diverse terrains and weather conditions, and the sheer power they provide can significantly elevate the biking experience. However, as with any piece of advanced equipment, understanding its nuances and ensuring proper maintenance is key.

As you consider diving into the world of mountain biking or perhaps upgrading your existing bike, always weigh in your riding style, preferred terrains, and often-encountered weather conditions. The right bike with the perfect disc brakes tailored to your needs will not only promise thrilling escapades but also ensure that safety never takes a backseat.

Remember, the journey of mountain biking, filled with challenges, breathtaking views, and personal achievements, becomes even more rewarding when you’re equipped with the right knowledge and gear. Here’s to many safe and exhilarating rides ahead!

Frequently Asked Questions (FAQ)

1) Do mountain bikes benefit from the use of disc brakes?

Yes, mountain bikes often benefit from the use of disc brakes. Disc brakes provide superior stopping power, especially in wet and muddy conditions, making them a popular choice for off-road riding. They offer better modulation and control, helping riders maintain stability and confidence on challenging trails. Additionally, disc brakes require less maintenance compared to traditional rim brakes, making them a practical choice for many mountain biking enthusiasts.

2) Are disc brakes or drum brakes superior for bicycles?

Disc brakes are generally considered superior to drum brakes for bicycles. Disc brakes offer several advantages, including better stopping power, improved modulation, and more efficient heat dissipation. They are particularly well-suited for high-performance and off-road biking, providing consistent and reliable braking even in adverse conditions.

Drum brakes, on the other hand, are less common on modern bicycles and are often found on older or utility-style bikes. While they are more enclosed and less susceptible to external elements, they tend to offer less stopping power and modulation compared to disc brakes. Ultimately, the choice between the two depends on your specific biking needs and preferences.

3) Do bikes with disc brakes have reduced speed?

Bikes with disc brakes do not inherently result in reduced speed. The choice of brake type (disc or rim) is primarily about braking performance and modulation, with disc brakes often offering advantages in adverse conditions. A bike’s speed depends on various factors, including the rider’s fitness, terrain, tire choice, and overall bike design, rather than the brake type.

4) Do disc brakes on bicycles produce noise?

Bike disc brakes can sometimes produce noise, especially in wet or muddy conditions. This noise is often described as a squealing or squeaking sound, which can be caused by contamination, pad glazing, or other factors. However, proper maintenance and adjustment can minimize or eliminate disc brake noise, ensuring quieter and more efficient braking performance.

5) What is the process for cleaning disc brakes on a bike?

To clean your bike’s disc brakes, start by removing the wheels to access the rotors. Wipe the rotor surfaces with isopropyl alcohol to remove any contaminants, and check the brake pads for debris. Reassemble the wheels, ensuring they are properly secured, and test the brakes to ensure they are functioning correctly. This routine maintenance helps keep your disc brakes in good working condition and enhances your bike’s braking performance.

6) How should I select a mountain bike based on my height?

Choosing the right mountain bike based on your height is essential for a comfortable and efficient ride. Refer to the manufacturer’s size chart for frame size recommendations corresponding to your height, ensuring adequate standover clearance and a comfortable reach to the handlebars. Test ride different bikes to find the most comfortable one, and remember that sizing can vary between brands and models, so expert advice from your local bike shop can be helpful.

7) What are the indicators of a high-quality bike?

To evaluate a bike’s quality, consider factors such as frame material (preferably aluminum, carbon fiber, or steel), reputable components from Hope Tech have well-executed welding and finishing, a comfortable ride feel, and the manufacturer’s reputation. While price matters, it’s not the sole indicator. This combination of factors will help you make an informed decision when selecting a high-quality bike.

CategoriesBike

Elevate Mountain Biking Experience with These 6 Essential Tips for Upgrading Your Disc Brake Rotor

Disc Brake Rotor when you need to check and fix it!

When mountain biking down a treacherous slope or navigating through a bustling city, the one thing every cyclist depends on – often subconsciously – is their disc brake rotor. But how often do we pause to reflect on its significance, and the need for its proper maintenance? Let’s dive in.

Disc brake rotor when you need to check and fix.

The Heart of Stopping Power: The Mountain Bike Disc Brake Rotor

Every time you squeeze your mountain bike’s brake lever, it’s the disc brake rotor that ensures you stop safely and effectively. Like the heart pumps blood throughout the body, the disc brake rotor is at the center of the bike’s braking system, regulating the stop-and-go rhythm of your ride.

Why is the Disc Brake Rotor so Important?

Immediate Response: On unpredictable terrains, especially while mountain biking, immediate braking response can mean the difference between a successful ride and a fall. The disc brake rotor provides this instant response.

Heat Dissipation: Braking produces heat. The disc brake rotor is designed to dissipate this heat effectively, ensuring that the brake system doesn’t overheat and lose its efficiency.

Durable in Wet Conditions: Traditional rim brakes lose their potency in wet conditions. The disc brake rotor, however, maintains its grip, ensuring that come rain or shine, your bike stops when you want it to.

Maintaining the Disc Brake Rotor: Not a Choice, but a Necessity

With the significance of the disc brake rotor established, maintaining it isn’t just about ensuring longevity, but more importantly, about safety.

Regular Inspection: At regular intervals, inspect the rotor for any signs of wear, warping, or damage. Over time, even the toughest rotors can wear out, and it’s better to spot the signs early.

 Cleanliness is Key: After muddy rides, ensure that the rotor is free from grime and debris. A clean rotor ensures optimum performance.

 Check for Even Wear: If one side of the rotor wears out faster than the other, it indicates an alignment issue, which needs immediate attention.

 Responsive Braking: Always be attentive to the responsiveness of your brakes. If you feel any lag, or if the brakes feel “spongy,” it might be time for a rotor check.

Literally! The next time you’re out on your bike, remember that each squeeze of your brake lever is a testament to the reliability of your disc brake rotor. Just like any other critical piece of equipment, give it the attention and care it deserves. After all, when you’re barreling down a mountainside or avoiding obstacles in urban settings, it’s that disc brake rotor that has got your back!

Maximum stopping power: the mountain bike disc brake rotor

You can buy this Hope Moto V2-6 Bolt Standard Disc for $57 here!

Excessive Wear and Thickness Reduction

The connection between a cyclist and their bike is both physical and spiritual. Yet, beneath the surface, certain parts of the bike, like the disc brake rotor, silently do their job with little attention—until, of course, they start to falter. One of the subtle but serious issues that these rotors face is excessive wear and thickness reduction. Understanding this, monitoring it, and addressing it in time is crucial for every rider.

Understanding Excessive Wear and Thickness Reduction

Every turn, stop, or sudden brake exerts force on the disc brake rotor. Over time, these repeated actions can result in excessive wear, reducing the rotor’s thickness. This might sound trivial, but this thinning can significantly compromise the rotor’s performance and, in turn, the safety of the rider.

Signs of a Worn-Out Disc Brake Rotor

Visual Scratches and Grooves: One of the most apparent signs is visible deep scratches, grooves, or “scores” on the rotor’s surface. These are indicators of uneven wear.

Noisy Braking: If your bike squeals or produces a grinding noise when you brake, it’s likely because of an excessively worn rotor.

Reduced Brake Responsiveness: If the rotor has thinned significantly, you might feel a delay or reduced effectiveness when braking.

Vibration: A worn-out disc brake rotor can cause an unsettling vibration in the brake lever or through the bike’s frame when applied.

Measures to Check Wear and Thickness Reduction

Regular Visual Inspection: Make it a habit to visually inspect your rotors after rides. Look for any uneven wear or visible deep grooves that might be emerging.

Use a Micrometer: A micrometer is a tool that measures small distances with precision. By using one, you can measure the thickness of your rotor and compare it to the manufacturer’s specifications to determine if it’s time for a replacement.

Listen to Your Bike: Your bike often communicates its health through sounds. Pay attention to any unusual noises during braking.

Feel the Brake Lever: If the lever feels “spongy” or if you need to squeeze harder than usual, it’s a sign that the rotor might be wearing thin.

The Path Forward

Recognizing wear and thickness reduction is just the first step. Once identified, it’s vital to address the issue, which might involve resurfacing the rotor or, in more severe cases, complete replacement.

Riding, for many, is not just about mobility but also about freedom and connection with the environment. Ensuring that each component of your bike, especially something as critical as the disc brake rotor, is in top condition means that you’re not only guaranteeing your safety but also ensuring that your rides remain smooth, enjoyable, and free from unexpected interruptions. Always remember: A little attention today can prevent a significant mishap tomorrow. Safe riding!

Precision performance: upgrading your disc brake rotor

You can buy Hope V4 Vented 6 Bolt Floating Disc fro $164.37 here!

Deep Scoring or Grooving on the Rotor Surface

While the streamlined design of a mountain bike appears simple to the untrained eye, each component tells a tale of intricate engineering and thoughtful construction. The disc brake rotor, often taken for granted, is no exception. One of the most common, yet potentially dangerous, ailments it can suffer from is deep scoring or grooving. Recognizing this early can be the difference between a thrilling ride and a disastrous fall.

Demystifying Scoring and Grooving

The continuous friction between brake pads and the rotor can lead to more than just wear and tear; it can result in deep lines or grooves—often referred to as ‘scoring. Think of it as the battle scars of a warrior; only, in this context, these scars can hinder performance and compromise safety.

The Implications of Scoring on a Disc Brake Rotor

Reduced Braking Efficiency: Scoring can diminish the rotor’s surface area in contact with the brake pads, leading to reduced braking power. 

Accelerated Wear of Brake Pads: Deep grooves can cause uneven and faster wear of the brake pads, demanding more frequent replacements.

Potential for Rotor Crack: In extreme cases, these scores can become stress points, increasing the risk of the rotor cracking during intense braking situations.

Spotting Grooves on Your Mountain Bike Rotor

Visual Examination: The most straightforward method. Look for any lines or depressions that are deeper than usual wear marks on the rotor’s surface. Shine a light from the side to highlight any inconsistencies in the surface.

Feel the Surface: Run your finger (carefully) over the rotor. If you can feel significant indentations or ridges, it might be a sign of deep scoring.

Listen for Noises: Scoring can often produce a rhythmic scraping sound when braking, especially at higher speeds.

Vibration or Pulsation: Deep grooves can result in a juddering sensation through the brake lever or pedals during braking.

Addressing Deep Scoring and Grooving

 Rotor Resurfacing: For mild to moderate scoring, resurfacing the rotor might be an option. However, this should only be done if the rotor’s thickness remains within the manufacturer’s specified limits after resurfacing.

 Rotor Replacement: If the scoring is too deep or if resurfacing would make the rotor too thin, a replacement is the safest bet.

 Inspect Brake Pads: Alongside the rotor check, ensure that the brake pads aren’t causing the scoring. Damaged or contaminated pads can be a primary culprit.

A smooth rotor surface might seem like a minor detail in the grand scheme of mountain biking. However, deep scoring and grooving can quickly turn an adrenaline-filled adventure into a precarious situation. By routinely inspecting and addressing issues with your bike’s disc brake rotor, you’re not only preserving the longevity of your ride but also ensuring the safety of your journey. Mountain biking is all about embracing challenges with preparedness, and that includes the challenges your bike might face!

Heat Damage and Discoloration

The exhilarating descent on a mountain trail is one of the most adrenaline-pumping experiences a biker can have. But with every descent and sharp bend, your brakes work tirelessly, generating heat. While disc brake rotors are engineered to handle high temperatures, they are not invincible. Excessive heat can lead to significant damage and discoloration, and understanding these signs can be crucial to ensure a safe ride.

The Underlying Science: Why Do Rotors Heat Up?

When you apply the brakes, kinetic energy (motion) is converted into thermal energy (heat) due to friction between the brake pads and the rotor. This is a natural process, but when brakes are overused, especially during long descents or sudden stops, it can lead to excessive heat generation.

Consequences of Overheated Disc Brake Rotors

Reduced Braking Efficiency: Overheated rotors can lose their flat shape, leading to a phenomenon called “brake fade,” where braking power is significantly reduced. 

Compromised Structural Integrity: Excessive heat can weaken the metal, making the rotor more susceptible to cracks and fractures.

Aesthetic Damage: While not as critical as the functional implications, heat can cause unsightly discoloration on the rotor, indicating potential underlying issues.

Spotting the Signs of Heat Damage and Discoloration

 Visual Inspection for Discoloration: A typical sign of overheating is a change in the rotor’s color. A bluish or purplish tint often indicates areas of extreme heat exposure.

 Warped Rotors: Overheating can cause rotors to warp, leading to uneven braking. This can be felt as a pulsation when applying the brakes.

 Smell and Smoke: In extreme cases, excessive heating can produce a distinct burning smell or even visible smoke from the braking system.

 Decreased Braking Power: If the brakes feel less responsive than usual, it may be due to heat damage affecting the rotor’s structure and its interaction with the brake pads.

How to Mitigate and Address Heat Damage?

Adopt Progressive Braking: Instead of hard, sudden stops, apply brakes progressively. This method distributes the heat over a longer duration and area, preventing localized overheating.

 Allow Brakes to Cool: During long descents, take periodic breaks to let the braking system cool down.

 Rotor Replacement: In cases of severe warping or visible discoloration that affects braking performance, consider replacing the rotor for safety.

 Upgrade to Ventilated Rotors: If you frequently bike in conditions that stress your brakes, consider upgrading to ventilated rotors, designed to dissipate heat more efficiently.

Mountain biking often pushes both the rider and the bike to their limits. As you navigate challenging terrains, remember that your disc brake rotor is silently bearing the brunt of the heat. By being vigilant and understanding the signs of heat damage, you ensure that your braking system remains efficient and reliable. After all, a successful mountain biking adventure is not just about speed and thrill—it’s also about safety and ensuring that your equipment is in top shape to tackle whatever lies ahead.

Warping or Bent Rotor

The balance between speed and control is a constant game played by mountain bikers as they tackle varied terrains. At the heart of this equilibrium lies the disc brake rotor, ensuring that you stop when you want to and as you intend. However, even this robust component has its vulnerabilities. One such issue, often overlooked but with pronounced effects, is rotor warping or bending.

The Curved Culprit: How Do Rotors Warp or Bend?

Rotors can become warped or bent due to various reasons:

Heat Stress: As discussed in previous sections, excessive heat can not only discolor the rotor but also change its shape. Rapid heating followed by sudden cooling (like splashing through a water puddle after a heated descent) can cause warping.

Physical Impact: A direct hit from a rock, fall, or even mishandling during transportation can lead to a bent rotor.

Improper Installation or Over-Tightening: Not adhering to torque specifications when installing can result in uneven pressure, leading to warping.

Challenges Posed by a Warped or Bent Rotor

Inconsistent Braking: A rotor that isn’t perfectly flat won’t have consistent contact with the brake pads. This can lead to “grabby” brakes or a pulsing sensation when braking.

Increased Wear: The uneven surface will cause faster and inconsistent wear on brake pads.

Noise: Warped rotors can produce a periodic scraping or squealing noise, especially noticeable at low speeds.

Diagnosing a Warped or Bent Rotor

Visual Inspection: With the bike lifted, spin the wheel and observe the rotor as it passes through the brake caliper. Any wobbling or side-to-side movement can indicate warping.

 Braking Test: At a moderate speed, apply the brakes gently. A warped rotor will produce a pulsing sensation through the brake lever.

 Listen for Sounds: As mentioned, a periodic scraping noise during wheel rotation is a telltale sign of a bent rotor.

Solutions and Preventions

Rotor Truing: Minor bends can be corrected using a rotor truing tool. This requires patience and a delicate touch to gently bend the rotor back to its original shape.

 Replacement: In cases where the warping is significant or if truing doesn’t resolve the issue, replacing the rotor is the safest option.

 Use Proper Techniques: When installing or removing rotors, always adhere to manufacturer guidelines and torque specifications to prevent inadvertent bending.

 Protect During Transit: If you’re transporting your bike, ensure the disc brake rotors are protected from potential impacts.

While the natural terrains and trails of mountain biking come with their unpredictability, your equipment’s performance should not be one of them. A warped or bent rotor can compromise the very essence of control during your rides. By staying informed, conducting regular checks, and addressing issues promptly, you maintain the harmony between speed and safety, ensuring that every twist and turn of your journey is a choice, not a surprise. Happy and safe biking!

Tackle any trail with confidence: explore disc brake rotor options

You can buy Muc-Off Ultrasonic Optimization Bundle for $1100 here!

Squealing or Grinding Noises during Braking: When Your Bike Cries Out for Attention

Mountain biking is often associated with the serene sounds of nature, the crunch of tires on trails, or the whoosh of wind against the helmet. Yet, there’s one sound no rider wants to hear: the dreaded squeal or grind during braking. Such noises are not just bothersome; they’re your bike’s distress call.

Why Do Brakes Squeal or Grind?

Contaminated Rotors or Pads: Dirt, oil, or other contaminants can get onto the brake pads or the rotor, causing a squealing noise when braking.

Worn-Out Brake Pads: As brake pads wear down, they may reach the “wear indicator,” producing a grinding sound as a warning.

Misaligned Calipers: If the brake caliper isn’t perfectly aligned with the rotor, it can lead to uneven contact and result in noises.

Vibrational Resonance: Sometimes, the frequency at which the brakes vibrate can produce a squealing noise, even if everything appears fine visually.

Troubleshooting Noises in Brakes

 Clean the Rotors and Pads: Using a dedicated brake cleaner, ensure that both the rotor and brake pads are free from contaminants.

 Check Brake Pad Thickness: Inspect the brake pads. If they’re worn out or nearing their end, consider replacing them.

 Realign the Caliper: Ensure the brake caliper is precisely aligned with the rotor for even contact.

 Anti-Squeal Compounds: Applying these compounds on the back of brake pads can dampen vibrations and reduce squealing.

Reduced Braking Performance: Don’t Let Your Safety Slide

The thrill of mountain biking often lies in the unexpected twists and turns, but your brakes’ performance should always be predictably excellent. If you find that you’re squeezing the lever harder for the same stopping power or if the brakes feel “off,” you might be facing deteriorating braking performance.

Signs of Diminished Stopping Power

Longer Stopping Distances: It takes more time and distance to come to a complete stop than usual.

Spongy Brake Lever: The brake lever feels soft or spongy when pressed.

Reduced Responsiveness: There’s a noticeable lag between applying the brakes and feeling the braking effect.

Visible Wear on the Rotor: Excessive grooves, scoring, or thinning of the rotor.

Tackling Deteriorating Braking Performance

 Inspect Brake Pads: Worn-out or contaminated brake pads are often the culprit. Regularly check and replace them as needed.

 Bleed the Brake System: Air bubbles in the brake fluid can lead to a spongy feel. Bleeding the brakes can help restore performance.

 Rotor Check: Ensure the rotor is in good condition, free from warping, excessive wear, or damage.

LBS, the Local Bike Store: Your Go-To for Every Biking Woe

Between all the DIY checks and fixes, remember that professional expertise is just around the corner at LBS, your Local Bike Store. With experienced staff, state-of-the-art tools, and a passion for biking, they ensuEvery creak, grind, or squeal from your bike is a message, a call to action.

As you traverse challenging terrains and test your limits, ensuring that your equipment, especially your braking system, is in top-notch condition is paramount. And whenever in doubt, remember, LBS, your Local Bike Store, is always ready to assist. Safe trails lead to thrilling tales. That every squeal, grind, or braking issue is promptly and effectively addressed.

Whether you’re looking for a routine check-up or a complex repair, trust LBS to get you back on the trails, safe and sound. And whenever in doubt, remember, LBS, your Local Bike Store, is always ready to assist. Safe trails lead to thrilling tales. Happy biking!

CategoriesBike

The 10 Best Mountain Bike Headsets Under $50: Budget-Friendly 

Budget-friendly-headset-mountain-bike-riders

Introduction: What to Look for When Shopping for a best mountain bike headsets for Less Than $50?

When it comes to mountain bike riding, having a smooth and enjoyable ride is essential, and one of the critical components contributing to this experience is the bike headset. The headset allows you to steer your bike with precision and stability, making it an essential part of your cycling setup. In this blog post will look at the ten best headsets under $50. 

Sunday Integrated Headset – 1-1/8″-15mm, Black, Conical – $21.99

The Sunday Integrated Headset is a popular choice for those looking for a simple and affordable headset. It can be used on most BMX bikes with a 1-1/8″ steerer tube. You’ll need to remove the old headset from your bike using a headset press tool to install the headset. Once the old headset is removed, slide the new headset into place and press it in using the same device. It’s essential to make sure the headset is properly aligned and tightened to ensure smooth operation.

You can buy your favorite headset here >> Sunday Integrated Headset !

Screenshot 2023 05 09 at 21. 16. 52

Salt Plus Echo Integrated Headset – $23.99 – $44.99

The Salt Plus Echo Integrated Headset is a high-quality headset that comes in two versions: steel bearings and ceramic bearings. It can be used on most BMX bikes with a 1-1/8″ steerer tube. To install the headset, you’ll need to remove the old headset using a headset press tool. Once the old headset is removed, simply slide the new headset into place.To avoid harming the bearings, special care must be used when installing the ceramic version of this headset.

You can get the budgeted headset >> Salt Plus Echo Integrated Headset here !

Salt plus echo integrated headset the local bike shop

Cult Original Headset with 2 Top Caps – Black – $24.99

The Cult Original Headset is a stylish option with two top caps, allowing riders to customize the look of their bike. It can be used on most BMX bikes with a 1-1/8″ steerer tube. To install the headset, you’ll need to remove the old headset using a headset press tool. Some riders have noted that the installation process can be complex, so having a professional mechanic install this headset may be helpful.

You can get the affordable headset >> Cult Original Headset here !

Cult original headset with 2 top caps

BSD High-Riser Sealed Headset – Black

The BSD High-riser Sealed Headset is a top-of-the-line headset designed for serious riders. It can be used on most BMX bikes with a 1-1/8″ steerer tube. To install the headset, you’ll need to remove the old headset using a headset press tool. Once the old headset is removed, simply slide the new headset into place and press it in using the same tool. The sealed design of this headset helps to keep dirt and debris out, ensuring smooth operation even in challenging conditions.

Cheap headset available >> BSD High-Riser Sealed Headset here !

Bsd highriser sealed headset

Ritchey Road Comp Drop In Integrated Headset – 1-1/8″, IS42/28.6, IS42/30, Black

The Ritchey Road Comp Drop-In Integrated Headset is designed for road bikes with a 1-1/8″ steerer tube. It features a drop-in design, which means that the bearings are pre-installed in the cups, making installation easier. To install the headset, simply remove the old headset using a headset press tool, then insert the new headset cups into the head tube of your bike. Once the cups are in place, insert the fork into the cups and tighten the top cap to secure the headset.

For the price of $29.95 you can get the >> Ritchey Road Comp Drop In Integrated Headset here !

Ritchey road comp drop the local bike shop

Promax PI-2 Steel Sealed Bearing-Headset Black

The Promax PI-2 Steel Sealed Bearing-Headset is a durable and reliable headset that can be used on most BMX bikes with a 1-1/8″ steerer tube. Once the old headset is removed, simply slide the new headset into place and press it in using the same tool. It’s important to make sure the headset is properly aligned and tightened to ensure smooth operation.

Elegant headset for the mountain bikers >> Promax PI -2 available for $29.99 here !

Headsets 4

Black Eclat Wave Integrated Headset – 16mm Top Cap and Two 3mm Spacers

The Eclat Wave Integrated Headset is a sleek and stylish option that comes with a 16mm top cap and two 3mm spacers. It can be used on most BMX bikes with a 1-1/8″ steerer tube. To install the headset, you’ll need to remove the old headset using a headset press tool. Once the old headset is removed, simply slide the new headset into place and press it in using the same tool. The included spacers allow for some customization of the headset height.

Durable headset for mountain bikers >> Black Eclat Wave Integrated Headset available for $ 30.99 !

Eclat wave integrated the local bikeshop

The People Compact Headset – With 2x 3mm Spacers Black

The We The People Compact Headset is a high-quality headset with two 3mm spacers. It can be used on most BMX bikes with a 1-1/8″ steerer tube. The included spacers allow for some customization of the headset height.

Buy the compact headset >> The People Compact Headset for $33.99 !

We the people compact headset the local bike shop

Ciari Otto Integrated Headset – 1″ Crown Race, IS42 Upper and Lower, Black

The Ciari Otto Integrated Headset is a durable and reliable headset designed for use on race BMX bikes. It features a 1″ crown race and IS42 upper and lower bearings. It is intended for race bikes and may not be compatible with all BMX bikes.

Get the best integrated headset >> Ciari Otto Integrated Headset for $39 !

Ciari otto integrated the local bike shop

Ciari Otto Integrated 1″ Headset – Silver

The Ciari Otto Integrated 1″ Headset is a high-quality headset designed for race BMX bikes. It features a 1″ crown race and IS42 upper and lower bearings. This headset is designed for race bikes and may not be compatible with all BMX bikes. The silver colour adds a stylish touch to your bike’s look.

If you want a silver addition of headset you can >> Buy Ciari Otto Integrated 1″ Headset for $39!

Ciari otto integrated 1 headset the local bike shop

Pros & Cons of the Best Mountain Bike Headsets Under $50

When it comes to having the best biking experience, the appropriate gear may make a huge difference and how you feel when out on the road. The bike headset is one of the key components that can impact your ride, providing you with stability, precision, and control.

In this blog post, we’ll take a closer look at the 10 best headsets under $50 comparing each headset to help you make an informed decision.

Sunday Integrated Headset – 1-1/8″-15mm, Black, Conical – $21.99

Pros:

For those seeking an affordable, dependable headset, the Sunday Integrated Headset is a wonderful option. It has a conical shape and a 15mm stack height, which makes it easy to install on most bikes. The black colour gives it a sleek and modern look, and it’s made with high-quality materials that can withstand regular wear and tear.

Cons : Some users have complained that the bearings on this headset wear out quickly, necessitating more frequent maintenance.

Salt Plus Echo Integrated Headset – $23.99 – $44.99

Pros:

The Salt Plus Echo Integrated Headset is a versatile option that can work with a wide range of bikes. It has a low-profile design that looks sleek and modern, and it comes in a range of colours to suit your style. The sealed bearings are smooth and reliable, and the headset is easy to install and maintain.

Cons:

This headset’s higher end of the price range may not be suitable for those on a tight budget.

Cult Original Headset with 2 Top Caps – Black – $24.99

Pros:

The Cult Original Headset is an excellent option for those who want a high-quality headset that won’t break the bank. It comes with two top caps so that you can customize the look of your bike, and the black colour gives it a sleek and modern look. The sealed bearings are smooth and reliable, and the headset is easy to install and maintain.

Cons:

Some users have reported that the headset can be difficult to install.

BSD High-riser Sealed Headset – Black

Pros:

The BSD High-riser Sealed Headset is a reliable and durable option for those who want a headset that can handle rough terrain. The black colour looks sleek and modern, and the sealed bearings provide a smooth and reliable ride. It’s easy to install and maintain and comes at an affordable price point.

Cons:

The design may only be suitable for some bike styles.

Ritchey Road Comp Drop In Integrated Headset – 1-1/8″, IS42/28.6, IS42/30, Black

Pros:

The Ritchey Road Comp Drop-In Integrated Headset is a high-quality option for those who want a reliable and durable headset. It has a sleek and modern look, and the black colour is versatile and can work with various bikes. The sealed bearings provide a smooth and reliable ride, and the headset is easy to install and maintain.

Cons:

The price point may need to be lowered for those on a tight budget.

Promax PI-2 Steel Sealed Bearing-Headset Black

Pros:

The Promax PI-2 Steel Sealed Bearing-Headset is a reliable and durable option with an affordable price point. It has a sleek and modern look, and the black colour can work with various bikes. The sealed bearings provide a smooth and reliable ride, and the headset is easy to install and maintain.

Cons:

According to some users, the headset may be heavier than other alternatives.

Eclat Wave Integrated Headset

Pros:

The Eclat Wave Integrated Headset is a versatile option with a 16mm top cap and two 3mm spacers, allowing riders to customize their riding position for a more comfortable and efficient ride. The sealed cartridge bearings ensure smooth rotation and durability, and the 45-degree angle and conical shape provide a secure fit for the fork steerer tube. It has a modern appearance complements most bikes thanks to the anodized black finish.

Cons:

Some riders have reported that the top cap can be difficult to remove, which may make it challenging to maintain the headset. The 16mm top cap may also be too tall for some riders, which could limit the amount of steerer tube that can be used with the stem.

Additionally, at around $40, it is one of the more expensive headsets on this list.

People Compact Headset

Pros:

For those looking for a basic and dependable headset that won’t break the budget, the We The People Compact Headset is a fantastic choice. It comes with two 3mm spacers, allowing riders to adjust their riding position for maximum comfort. The sealed bearings ensure smooth rotation and durability, and the 45-degree angle and conical shape provide a secure fit for the fork steerer tube. A sleek black anodized finish and a price of around $20 make it affordable for most bikes. 

Cons:

Some riders have reported that the top cap can be difficult to remove, which may make it challenging to maintain the headset. Additionally, the headset may not be as durable as some of the more expensive options on this list, which could be a concern for riders who engage in heavy or aggressive riding. Finally, the headset may only fit some bikes. Therefore check its compatibility before making a purchase.

Ciari Otto Integrated Headset – Black

Pros:

The Ciari Otto Integrated Headset in black offers durability and reliability for any riding. It has a 1″ crown race and IS42 upper and lower bearings, ensuring a secure fit for the fork steerer tube. The sealed cartridge bearings provide a smooth rotation and durability, and the 45-degree angle and conical shape provide a snug fit. With its black anodized finish, it has a sleek, understated look, and the price point of around $25 makes it an affordable option for those on a budget.

Cons:

Some riders have reported that the top cap can be difficult to remove, which may make it challenging to maintain the headset. Additionally, the black anodized finish may show scratches or wear more quickly than some of the more expensive options on this list. Finally, the headset may only fit some bikes. Therefore, check the compatibility before making a purchase.

Ciari Otto Integrated 1″ Headset in Silver

Pros:

The Ciari Otto Integrated 1″ Headset in silver is a great option for those who want a durable and stylish headset that can handle any type of riding. It comes with a 1″ crown race and IS42 upper and lower bearings, which ensures a secure fit for the fork steerer tube. The sealed cartridge bearings provide a smooth rotation and durability, and the 45-degree angle and conical shape provide a snug fit. The silver anodized finish gives it an eye-catching look that will make any bike stand out.

Cons:

Some riders have reported that the top cap can be difficult to remove, which may make it challenging to maintain the headset. Additionally, the silver anodized finish may show scratches or wear more quickly than some of the more expensive options on this list. Finally, the headset bikes, so checking the compatibility before purchasing is essential.

These top ten selections under $50 are unquestionably worth considering if you’re searching for a bike headset that is affordable yet provides good performance and durability. If you want a classy one, we also have Hope Tech Headset. From the Sunday Integrated Headset with its unique conical design to the sleek and stylish Ciari Otto Integrated Headset in silver, each of these headsets offers a range of pros and cons to suit different riders’ needs. While many other headsets are available on the market, these are among the best you can buy without breaking the bank. If you are interested in any of these headsets, you can find them on our website or at your Local Bike Shop.

CategoriesBike Blog

5 Tips to Find Snagging Cheap Mountain Bikes

5 tips to find cheap mountain bike

Cheap mountain bikes for sale ! How do you find the best one.

Mountain biking is one of the most popular outdoor activities, but it can be expensive to get the right bike. For your ease, we’ve compiled a list of the cheapest MTB bikes on the market. We’ll cover all types of mountain bikes, from hard tails and full-suspension bikes to fat tire and electric bikes. We’ll also provide tips on how to save money when buying a mountain bike and where to find the best deals. If you’re here looking for affordable mountain bike purchase tips and tricks then, read on!

Introduction – What Makes a Good Mountain Bike and Why Do They Come at Different Prices?

Over the years, mountain biking has gained tremendous popularity as an exhilarating and adventurous sport. It requires a high-quality mountain bike that can handle the rugged terrain and provide a smooth ride. However, with so many types and prices of mountain bikes available in the market, it can be overwhelming to choose the perfect one that fits your needs and budget. This blog post will delve into the characteristics of a high-quality mountain bike and elucidate the reasons behind their varying price points.

Cheap mountain bikes hb 130 green for sale at the local bike shop

What Makes a Good Mountain Bike?

A good mountain bike is one that can handle the terrain you plan to ride on, fits you comfortably, and suits your riding style. Here, are some essential characteristics to consider when searching for a mountain bike:

Frame: The frame, it is the backbone of the mountain bike and must possess enough durability to endure the challenging terrain. Aluminum and carbon fiber frames are popular choices as they are durable and lightweight.

Suspension: Suspension helps absorb shocks and provides a smoother ride. There are two types of suspension systems: front suspension and full suspension. Front suspension only has suspension on the front fork, while full suspension has suspension on both the front and rear of the bike.

Wheel Size: The most common wheel sizes for mountain bikes are 26″, 27.5″, and 29″. Smaller wheels are more maneuverable, while larger wheels are better at rolling over obstacles.

Brakes: The brakes are a critical component of a mountain bike. Disc brakes are the most common type and provide better stopping power than rim brakes.

If you are searching for a good sturdy mountain bikes, you can explore HB Bikes in the Local Bike Shop.

Why Do Mountain Bikes Come at Different Prices?

Mountain bikes come in a wide range of prices depending on the frames on the features and components they offer. Here are some factors that affect the price of a mountain bike:

  • Frame Material: As mentioned earlier, the frame material plays a significant role in the price of a mountain bike. Carbon fiber frames are more expensive than aluminum frames.
  • Suspension: Full suspension bikes are generally more expensive than front suspension bikes.
  • Components: The quality and type of components on a bike, such as the brakes, gears, and wheels, can significantly affect the price.
  • Brand: High-end brands like Specialized or Trek typically offer more expensive bikes, while less-known brands may offer similar features at a lower price. Understanding the features of a quality mountain bike and comprehending the reasons behind their variable price range can assist you in making an informed decision when buying a mountain bike. Remember to consider the features and components that matter most to you and shop around for the best deals. With the right bike, you can experience the thrill and adventure of mountain biking to the fullest.

The Best Locations to Buy Cheap Mountain Bike

The choices for buying a mountain bike may appear limitless. Yet, procuring an inexpensive mountain bike of high quality need not be a daunting undertaking. There are numerous remarkable alternatives available for purchasing low-cost mountain bikes, be it at your neighborhood bike store or via online vendors. Mapping some of the best places to buy budget-friendly mountain bikes, here:

Your Local Bike Shop- THE LBS: One of the best places to start your search for a cheap mountain bike is at your local bike shop, where you can get range of QBP products and Hope Tech. These online store have knowledgeable staff who can provide expert advice on the best bike for your riding style and preferences.

Not only that, but when you buy from a local shop, you’re supporting a small business in your community.Local bike shops also have the advantage of providing personalized services that online retailers may not offer.

They can help you get the right size and fit for your bike and may even offer bike fitting services. Additionally, local bike shops often have access to exclusive deals and discounts on bikes and bike components.As the name suggests, they are a locally owned and operated bike shop with a passion for providing customers with the best products and services possible. 

Online Retailers: Online retailers are another excellent option for buying a cheap mountain bike. There are a plethora of online bike stores to choose from, so it’s essential to look for reputable sites with positive customer reviews and return policies.

Used Bike Marketplaces: Buying a used mountain bike can be a affordable purchase to get a high-quality bike at a fraction of the cost of a new one. While buying used may come with some risks, such as hidden damage or wear and tear, it can also be an excellent opportunity to snag a great deal on a quality bike. Some popular used bike marketplaces include Craigslist and Facebook Marketplace.Before making a purchase of a used bike, it is crucial to give it a full inspection and, if required, to bargain the price. It’s also important to make sure the bike is the right size and fit for your body.

Discount Retailers: Lastly, consider checking out discount bike stores like Walmart or Target. While their selection may be more limited, they often carry lower-priced mountain bikes that are great for beginners or casual riders. While these bikes may not have the same high-end components as more expensive bikes, they can still be a great option for those on a tight budget.

Finding cheap mountain bikes on a budget doesn’t have to be difficult. By considering these best locations to buy cheap mountain bikes, you’ll be able to find the perfect ride for your needs and budget. Whether you choose to buy at your local shop, browse other online stores, or check out discount retailers, you can rest assured that you’re getting a great deal on a high-quality mountain bike. Just remember to do your homework, shop around, and get a bike that is the proper size and fit for your frame.

Cheap mountain bike available at the local bike shop.

5 Tips For Buying a Cheap MTB Bike on A Budget

If you’re on a tight budget but still want to enjoy the thrill of mountain biking, you’re in luck! With these 5 tips, you can find a high-quality MTB bike that fits your budget.

Determine your needs and budget: Before you start shopping, consider what type of riding you’ll be doing and what features you need in a bike. This will prevent spending too much money. p. Set a budget and stick to it.

Shop at your local bike store- LBS:When it comes to buying a cheap MTB bike on a budget, shopping at a local bike store is an excellent place to start. Local bike stores offer a range of budget-friendly MTB bikes. Additionally, neighborhood bike shops provide tailored services, making them a handy and trustworthy choice for anyone looking to purchase a bike.

At The Local Bike Store website, we offer a variety of cheap mountain bikes at great prices. Shopping online with us allows you to compare prices and features of different bikes, making it easier to find the right bike for your needs and budget. One thing to be mindful of, while searching for a budget-friendly MTB bike, you may have to compromise on some features.

Although premium components can enhance your riding experience, they often come with a high price tag. Instead, prioritize a bike with dependable components that cater to your requirements. If you’re looking to purchase an inexpensive MTB bike while on a budget, consider exploring the marketplace of local bike stores.

Consider buying a used bike: Buying a used MTB bike can be a great way to save money. Check out secondhand off-road bikes for sale or buy used MTB bikes online. Just be sure to inspect the bike thoroughly and negotiate the price if necessary.

Look for budget-friendly brands: Many well-known MTB bike brands offer budget-friendly options that still provide great performance. Look for brands like Diamondback, Giant, and Trek.

Prioritize essential features:When shopping on a budget, it’s important to prioritize essential features like frame material, suspension, and brakes. Focus on finding a bike with a solid frame and reliable brakes, even if it means compromising on other features.

At The Local Bike Store, we offer a wide selection of budget MTB bikes that don’t compromise on quality. To locate the ideal bike for your spending limit and riding preferences, browse our online store.Purchasing a secondhand bike might help you save money when buying an MTB.

For individuals on a tight budget, used bikes are sometimes available for a small portion of the price of a new bike. It’s important to carefully check the bike before buying it, though.

Examine the vehicle for any indications of wear and tear, paying close attention to the structure, suspension, and drivetrain because these components cost the most to replace. Finally, it’s critical to keep an eye out for bargains and discounts while looking for a cheap MTB bike.

Cheap mountain bike hb 130 for sale at the local bike shop

What Kind of Components & Parts Should You Look for in Your MTB Bike?

Choosing the right components and parts for your mountain bike is essential for ensuring optimal performance and comfort while riding. In this guide, we’ll take a closer look at some of the key components and parts you should consider when purchasing an MTB bike.

Suspension: One of the most important components of an MTB bike is its suspension system. Suspension helps to absorb shocks and impacts, keeping the rider more comfortable and in better control. When choosing a suspension system, consider the type of riding you’ll be doing and your skill level. Full suspension bikes are great for more technical terrain and aggressive riding, while hardtail bikes are better for smoother trails.

Wheels and Tires: Your MTB bike’s wheels and tires play a big role in its overall performance. Look for wheels with durable rims and high-quality hubs for smooth, reliable performance. Tires should be chosen based on the type of terrain you’ll be riding on, with wider tires offering more traction and stability on rougher terrain.

Drivetrain: The drivetrain of your mountain bike is what powers your pedaling, so it’s important to choose one that is both durable and efficient. Look for high-quality chainrings, cassettes, and derailleurs that will stand up to tough terrain and provide smooth shifting.

Brakes: A good set of brakes is essential for keeping you safe while riding. Disc brakes, they the most common type of brakes found on MTB bikes, and they offer superior stopping power and control. Look for brakes with high-quality pads and rotors for optimal performance.

Handlebars and Grips: Your MTB bike’s handlebars and grips are what you’ll be holding onto while riding, so it’s important to choose ones that are comfortable and provide good grip. Look for handlebars that are the right width and shape for your riding style, and grips that are made from durable materials and provide good shock absorption.

Conclusion – Put Your New Knowledge About Cheap Mountain Bikes to the Test and Get Riding!

Now that you’ve learned about the best locations to buy cheap mountain bikes and how to choose the right components and parts for your bike, it’s time to put your new knowledge to the test and get riding!Remember, you don’t have to break the bank to enjoy the thrill of mountain biking. By shopping smart and taking advantage of the many affordable options available, you can find a high-quality mountain bike that fits your budget and riding style.Don’t forget to also prioritize safety when riding your new bike.

Always wear a helmet and appropriate gear, and familiarize yourself with proper riding techniques to prevent accidents and injuries.So what are you waiting for? Head to your local bike shop, check out online retailers, browse used bike marketplaces, and explore discount bike stores to find the perfect cheap mountain bike for you. Then hit the trails and enjoy the exhilarating experience of mountain biking!

6-tips-to-choose-the-right-saddle-for-mountain-bikeCategoriesBike

6 Tips on Choosing the Right Saddle for Mountain Bike

For every rider, their is a need of right saddle for mountain bike. Mountain bike saddles can be tricky to find – here are a few things you must do to simplify the process. In theory, you should be able to find the perfect saddle for your mountain bike much more straightforward than it is. You only need something that fits well, lasts a long time, and doesn’t cost much, right?

It might seem impossible to understand how such a simple process could get so complicated when walking into a bike shop or surfing the internet for ideas to find out the best saddle for mountain bike. The walls of large bike shops tend to have saddles hanging but with so much of options you get confused.

Half-saddles are sometimes needed; some are wide, narrow, flat, and curved, with slots so large that your hand can pass through them. Do you know what to do first?

You should consider your cycling frequency, type, experience, position on the bike, weight, hip width, and gender and your weight, hip width, and riding position. Every cyclist wants to ride comfortably, especially mountain bikers who ride frequently. Finding a mountain bike saddle tailored to your riding style can be a little confusing, especially with so many options available on the market.

If you stumble upon this article, you can say goodbye to your dilemma because we will provide you with brief information about best bike saddle for mountain bike and tips for to choose a saddle you love to ride.

Enjoy your read, and don’t miss a single point in this article!

Best high quality saddle for mountain bike riders available at the local bike shop
Perfect saddle for mountain bike available at the local bike shop

Mountain Bikes: What are they?

In the late 1900s and early 2000s, mountain biking was considered as an extreme sport. As a result of its enhanced durability and excellent performance over rough terrain, the bike then got designed to allow its rider to go off-road riding.

In the beginning, mountain bikes were made like ordinary road bikes, with a broader frame and fork to have wider tires. Mountain bikes thereafter evolved including the latest technology to provide riders with incredible, fun rides allowing them to excel their confidence on any trail they choose.

What are the types of saddle for mountain bikes?

A bike saddle comes in different types, we have listed few of the right saddle for the mountain bike:

Road Bike Saddle

Rather than distributing your weight evenly across the saddle, saddle for mountain bike allows you to shift your body weight forward into more aggressive positions. If you want to know the characteristics of the road bike saddle you can see them as; thinner, more rigid, lighter, and stiffer are the characteristics of road bike saddles.

There is usually a narrower and more streamlined saddle on a road bike. The system is designed to transfer power as efficiently as possible. Road bikes are typically composed of lightweight materials like carbon fibre since one of their characteristics is being fast and aerodynamic.

Ride friendly saddle for mountain bike rider available under budget at the local bike shop.
Deity component speedtrap AM Saddle available at the local bike shop

Mountain Bike Saddle

On a bumpy terrain, a mountain bike saddle provides comfort and ease. Usually, reinforced panels on mountain bike saddles protect them from wear and tear due to falls and extreme weather conditions.

Saddle for mountain bike typically reviews feature for pressure-relieving channels especially on the longer rides which adds flexible edges to reduce pressure and prevent soreness. Classic leather or faux finish can be used to cover and protect it from damage and crash.

Remember adding more padding won’t make any saddle for the mountain bike more comfortable. Although mountain bike saddles are unlikely to lack padding, professional saddles rarely have more than a few milimetres.

A comfort saddle for mountain bike comes with more weight. While taking a stroll on the market, you can come across two basic types of extra padding i.e. gel and foam padding.

Affordable saddle for mountain bike riders available at the local bike shop.
Prologo NDR CPC Saddle available at the local bike shop

Tips for Choosing the Perfect Saddle

After understanding the types of saddle for mountain bike, now here we share the tips in choosing the perfect saddle for mountain bike. Some people recommend mountain bike seat as the best match, but remember that everyone’s needs are different, and you need to read the following tips before making any decisions.

Choose the Right Shape Saddle

There are many saddles available on the market because every rider has different requirements for a comfortable saddle. And a typical women’s saddle is more comprehensive, designed to fit a female’s anatomy, making the riders get more comfortable for while enjoying the mountain bike ride.

Adjust the saddle height and position as needed

It is not enough to have a perfect saddle. To gain maximum comfort, you’ll need to ensure it is set at the right height.

If you want a bike saddle that fits you perfectly, consider buying from a shop that offers professional assistance. Apart from keeping your saddle horizontal, ensure that you are not pointing it too high or too low to avoid discomfort in some unwanted areas.

Choosing the riding position

You can find out how far you can reach with your hands by sitting on the ground and seeing how far you can get.

Flexibility is determined by how well you can come forward. As a result, saddles with rounded shapes are more suitable for riders who are less flexible in general.

You will find more benefits if you choose a slightly curved saddle if you can reach your toes in that sitting position on the ground, then yes go for it. Lastly, riders who get halfway are considered flexible, allowing a more stable position on the bike and providing more freedom to move.

Cut-outs, channels, and grooves

It is common for saddles to feature central channels or cut-outs that relieve pressure. By doing this, you’ll be reducing soft tissue pressure and enhancing blood circulation. Consider saddle as a main channel or cut-out if you are experiencing numbness while riding.

Are saddles with cut-outs still acceptable if you don’t experience numbness? Almost everyone does. The most important thing is to find what kind is more comfortable for you. A cut-out near the channel edge can cause pressure points for some people.

It’s a good idea to consider a saddle without a full-depth hole if your riding often takes place in bumpy conditions. Several saddles are explicitly designed for off-road use which have draining shelves to prevent the occurrence of bumpiness.

Price of the saddle

Do you have a budget? A saddle’s price is primarily determined by the materials used.

Usually, a carbon-fibre shells and rails cost more if you require a robust and lightweight design. If you are willing to purchase Deity component speed trap AM saddle, with the highest quality EVA foam, you must pay $67.99.

Conversely, entry-level saddles made from polymer shells with alloy rails can be reasonably priced, and the weight difference won’t make much difference to a whole bike.

Material of the saddle

Considering the saddle top-surface, material is another important factor. Durability and intended use are essential factors to consider before buying any saddle for mountain bike.

For an immediate attraction, we prefer, leather. Which is beautiful and malleable, but leather does not respond well. On the other hand, synthetic materials can be less breathable and more susceptible to deterioration in the weather. So find a good quality material saddle for the every day ride.

How to correctly measure the saddle for mountain bike?

You can measure a bike’s width with special tools in a bike shop, but you can easily calculate it at home if you don’t want to go there. 

A saddle’s width is easy to measure when shopping for one. Those are the distances between your pelvic protrusions.

Seats and saddles are available in various sizes and shapes to fit different riders – typically based on their sit bones.

It is also possible to use the width of your wrist to estimate your sit bone width. For the right measurement you can take support from the store keeper or use the basic measurement guide lines for the saddles.

What is the reason for your uncomfortable bike saddle?

The saddle of a bicycle is designed to support only a portion of the rider’s weight.  Your arms support some of your body weight when you lean on your handlebars and provide to your weight.

You can also support your weight with your legs if you pedal consistently. You’ll notice that your saddle feels less comfortable when you haven’t ridden your bike for a long time.

As your saddle wears and tears over time, it will further suffer a fair amount of wear and tear. As your saddle stiffens, it will no longer offer the same level of support as it did when you first bought it.

Finally, the saddle you used may not have been the right choice for you from the start. New bikes come with saddles that are fine for short rides but not suitable for long rides.

Regardless of the reason, if your saddle is uncomfortable, just change it instead of compromising on every ride.