Most riders perceive mountain biking techniques as a vast and highly complex area that can take years to master.
Urban streets’ beauty might not match typical mountain bike destinations, but the features you find on trails can be replicated just steps away from your home. Look at these ten bike skills you can start practising today, whether on your morning commute or in your driveway.
Why should you focus on mastering any mountain bike skills?
Skills can generally be defined as our ability to do something well, usually with desirable results. A person must practice, fail, adapt, and eventually become confident before they can master such skills. Don’t forget a healthy dose of humility as well.
In most cases, people don’t come into their talents naturally. Some people are drawn to highly skilled activities such as mountain biking because they enjoy learning and improving.
You will likely see some improvement from where you stand today if you reflect on your first few rides. Have you ever had scars that reminded you of specific experiences?
Our friend has professionally raced mountain bikes for over twenty years and just learned to operate a manual motorcycle.
His enthusiasm for this new trial skill is contagious, and he resents not learning it sooner. There are always areas of a rider’s skill where they could improve and practice, and confidence issues with some parts of their abilities.
See what you can practice and improve by looking at the skills below. It would be best if you devoted some time to sharpen your axe each ride or once a week.
Mountain biking success doesn’t come from speed and fitness alone. Furthermore, you must possess knowledge, experience, and technical riding abilities.
A significant part of off-road riding is carrying speed through technical sections, climbing steep switchbacks, and negotiating rocks and roots.
In the same way, good handlers can improve their aerobic fitness to become more competent riders. Consider these five things when riding your mountain bike to become a well-rounded rider.
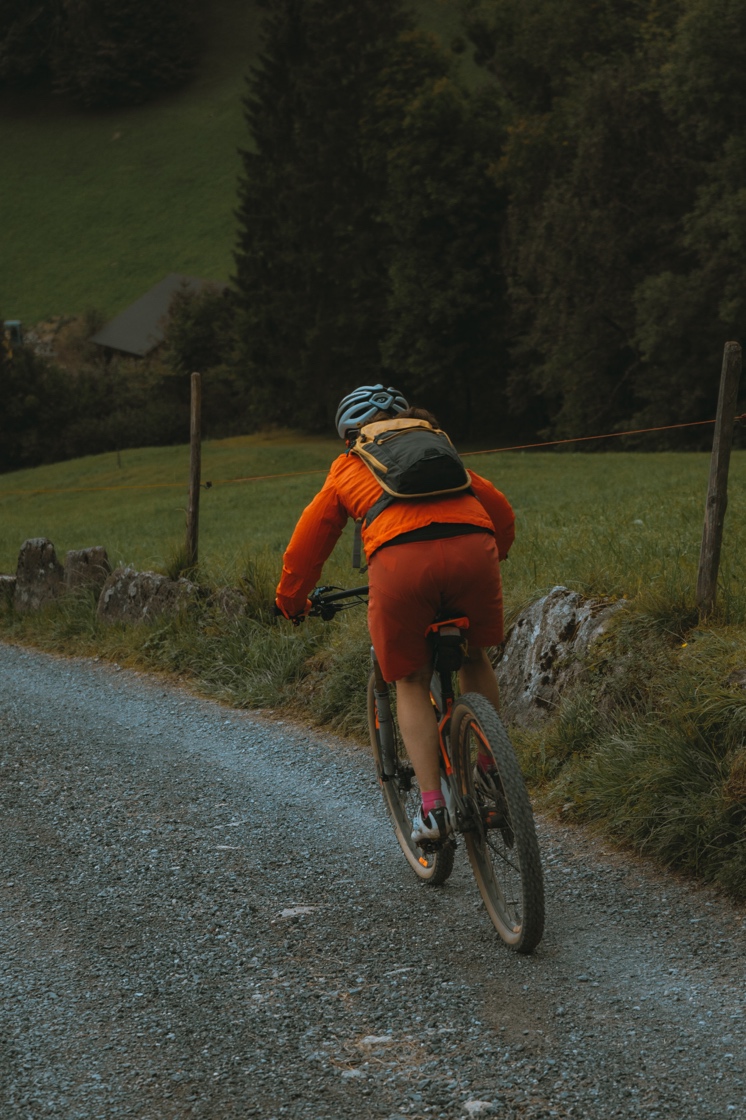
The body position – Explained in detail!
An essential technique to consider is how you position yourself on the bike. We want to be as prepared as possible to handle obstacles along the trail since it directly impacts how the cycle connects to the ground through the wheels.
The difference between a neutral and a ready body position is crucial.
The neutral position
The neutral position is best when riding non-technical trails. Then, you can shift into the ready position quickly for technical terrain, keeping you rolling along efficiently and comfortably. Neutral positions include:
Keep your eyes about 15 to 20 feet ahead; focus on where you want to go, not what you don’t want to go.
Equally weighted pedals
Elbows and knees bent slightly
When using rim brakes, you should use index fingers on the levers.
The ready position (known as the attack position)
A ready position (sometimes referred to as an attack position) is necessary when the trail gets steeper or rockier. Taking on technical sections of the course starts with the ready position. A ready position consists of:
- Equivalently weighted pedals
- Knees and elbows bending deeply (imagine holding chicken wings with your hands turned 90 degrees.)
- A rear end that is off the seat and hips that are shifted backwards
- You have nearly parallel ground and a flat back
- All brake levers must be operated with your index fingers (rim brakes often require two fingers)
- Keep an eye forward-looking about 15 to 20 feet ahead; keep your gaze forward instead of backwards
The braking – Every skill explained!
The skill is knowing how to apply brakes. Everyone knows how to brake. You just can’t brake whenever you want when riding off-road. Practice on a trail you are familiar with, so you can get used to your brakes.
The brakes appear simple: squeeze the levers, and the bike slows down. By learning to brake sufficiently, you can make yourself more comfortable and confident on a bike.
- Identify your front and rear brakes. The rear brake should skid if the bike is rolled in front of you. If the rear wheel stops (the rear wheel might even bounce up), the front brake should be pulled.
- Most of the stopping happens with the front brake, as shown here. Using both brakes simultaneously is recommended for a beginner. However, it is vital to avoid pulling on the front brake too hard, as it is the most powerful.
- Be gentle when applying brakes – avoid pulling them hard.
- It’s best to brake before technical sections of the trail and then to look for a suitable place to brake afterwards. Don’t brake on specialised areas of the track – go into these sections at the speed you want. You will gain more grip with a rolling wheel than with one that is braking!
How to Brake? Do you know it?
The brakes should be controlled and consistent. Your front brake mainly provides braking power, so you’ll fall over the bars if you grab a handful. Please do not slam the brakes hard; apply them gently, evenly, and in both directions.
Squeeze slowly and gently to prevent skidding.
Your hips must move back, your heels should be lowered, and your elbows and knees should be slightly bent while braking. The best way to stay in control on a bike is to place your body in this position, so you don’t lean forward too far.
Handlebar grips should be gripped with your middle and ring fingers if your mountain bike has disc brakes. While riding, you will be able to brake and control yourself effectively. The brake levers on rim brakes require greater force to engage, so try two fingers on them.
When to Brake? Do you know it?
Let your momentum carry you through a turn if you brake before you hit it. Then you can focus on your technique as you enter and exit the turn.
You can also use momentum to get over obstacles on the trail. Approaching obstacles can be very slow for beginners. Controlled momentum can help you navigate this tricky section.
The climbing: Skills are explained in detail!
Your weight is centred over the bike’s centre in the attack position, enhancing both front and rear wheel grip. As you climb, your body position must be adjusted to maintain weight.
In climbing:
Pedalling efficiently requires sitting in a position that maximizes efficiency. To reach full leg extension, you should have a little bend in your leg at the bottom of the pedal stroke. This way, your major leg muscles are used efficiently and powerfully while pedaling.
- Your weight should be over the front wheel of your bike as you climb on your bike to maintain grip.
- You don’t have to lean forward depending on how steep the slope is, but if you notice the front wheel lifting just a little, you are not leaning enough forward!
- Before you begin to climb, you should be in a lower gear.
- The more you pedal, the more important it is to keep your eyes on the road ahead!
In descending:
If you want to descend a hill, lower your seat two or three inches from the height you set at the beginning. A lower center gives you better control and more confidence during steep descents because your centre of gravity is lowered. The best seat height may require some experimentation.
The cornering: Skills are explained in detail!
It must be possible for everyone to turn a corner on a bike, right?! That’s not true. The bike technique is most challenging to master when it comes to cornering.
Almost all trailside dirt naps and crashes occur while turning, so this is a logical improvement area.
You can also shave seconds off your overall time by carrying more speed through turns when riding your bike. As soon as you feel yourself being pushed into a berm at high speed, an indescribable feeling of joy will immediately hook you on turning fast.
Looking ahead is critical! It would help if you remembered when cornering on your bike to look AHEAD – no matter how experienced you are. You don’t have much experience gaining this skill, but you don’t want to let it slide, making a big difference.
As you look around a corner, your head will turn, which will cause your shoulders to move as well. When combined with turning the bars, your bike will practically navigate corners. Trying to look around a hub for the first time can feel odd, but persevere.
Shifting technique: Skills explained in detail!
Getting your gears shifted adequately is important since mountain biking usually involves ups and downs. In addition to preventing damage to your bike (especially your chain, front cassette, and rear cogs), proper shifting habits also help you climb hills more efficiently.
Shift often:
Beginners need to practice shifting gears frequently. Eventually, you’ll be able to shift up or down intuitively without thinking about whether you’re shifting higher or lower.
Shift early:
Wait until the hill is already steep before shifting. Before hitting steep terrain, switch to the gear you’ll need. Maintaining a steady cycling cadence allows you to maximize your power. As a result, your chain will not be thrown off by awkward shifting under a load that would cause your gears to grind.
If you want to master more of the mountain bike skills, we will be further adding the intermediate-level skills!