Mountain Bike Chain Guide:
A Mountain bike chain is a roller chain that transfers power from the pedals to the drive-wheel of a bike, thus propelling it. It can vary in side plate, shape, sizing, and height. As there are numerous bike-chain manufacturers, varying brands of drive trains, and different numbers of gears on mountain bikes. The performance of the chain depends upon the brands and models. Likewise, the quality of steel used determines the quality of the chain. Better chains that are more durable and longer-lasting tend to have harder rivets. In the market, there is a huge number of mountain bike- chain manufacturers. Mostly, bike chains are made up of plain carbon or alloy steel, but some are nickel-plated to prevent rust, or simply for aesthetics.
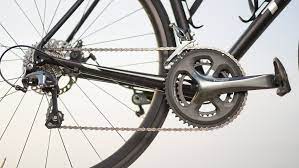
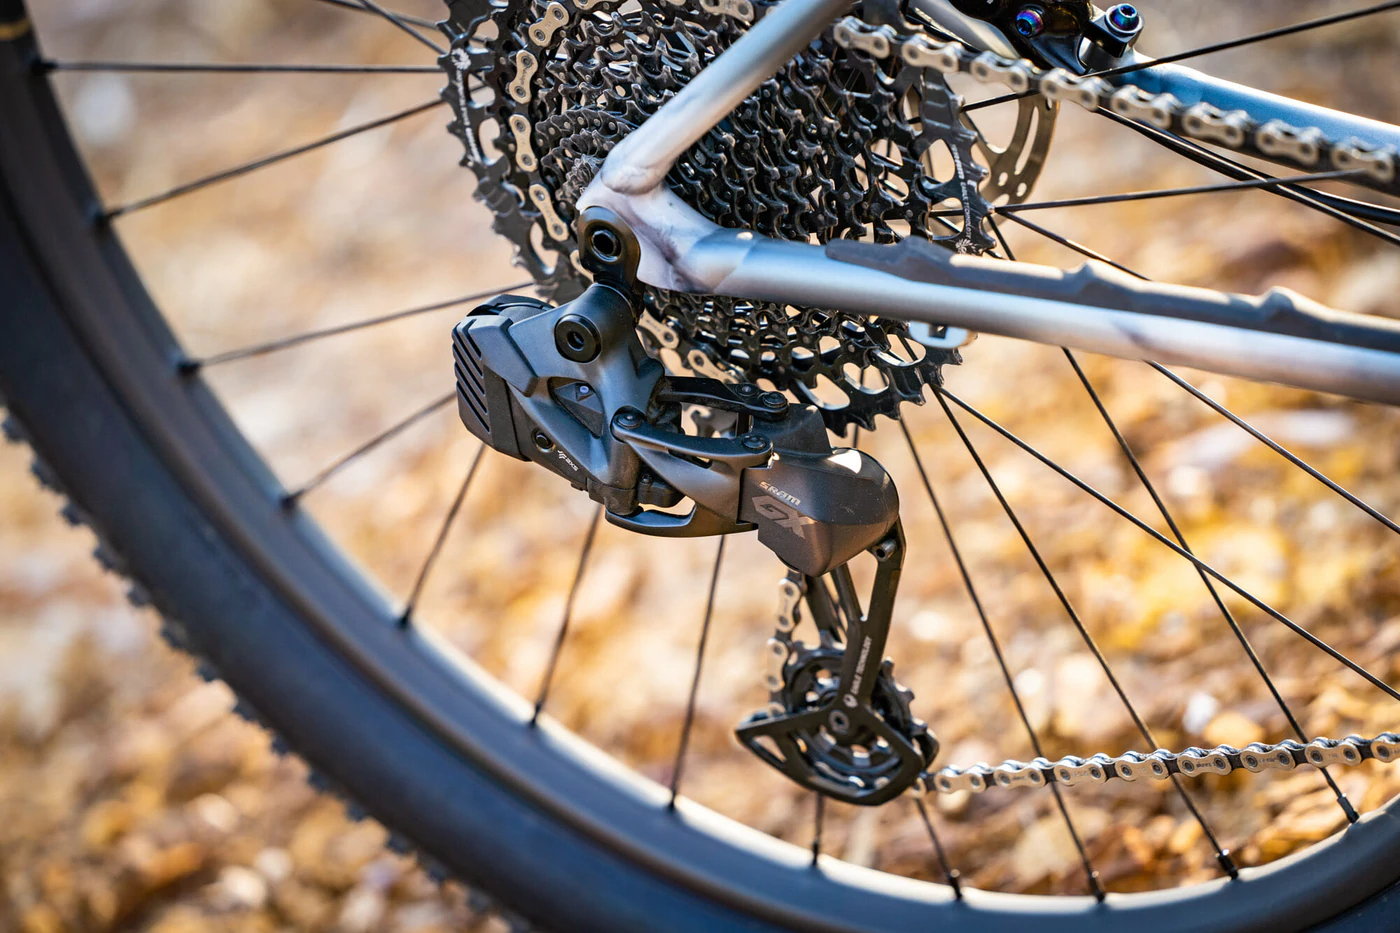
Figure Credit: trekbikes.com
Types of mountain bike chain
All the modern bike chains are made to the “one-half inch pitch” standard, meaning from rivet to rivet which is nominally 0.5 inches. The sprocket teeth are cut for this same one-half-inch standard to accept bike chains. However, this does not mean all makes and models of chains are interchangeable. In the market, there are so many companies that manufactured bike chains. Some major companies that make mountain bike chains are SRAM, Shimano, KMC, Wippermann, and SunRace. While talking about the MTB bike chain, they have three basic types of mountain bike chains: regular, hollow-pin, and half-link.
Among these regular type chains are the most common variety, which comes on almost every mountain bike. It also offers the same strength and efficiency as the other types. Whereas, the hollow pin chains are the lightest available type. With the help of hollow steel pins, you will be able to save weight without compromising functionality. And the last one is Half-link chains. They are mainly manufactured for single-speed applications. Talking about the structure they are quite different from traditional chains whereas all of the links are exactly the same size. The small end of one link fits into the larger end of another. These types of chains are used on single-speed bikes in order to achieve optimal chain tension. While selecting the chain make sure to choose the correct type of chain depending on the type of riding your bike is made for, and the number of gears it has.
1. One speed chains:
One Speed chains is a common chain and are most used in mountain bike. The name itself says one one-speed chain is designed to fit a bike with just one gear. While designing and manufacturing the maker uses one big sprocket in the front that is attached to the paddle and a smaller one attached to the hub of the rear wheel. Adding to the length of the chain, it is normally 9 millimeters from rivet to rivet and they are 3.3 millimeters in width. However, some one-speed chain has been designed to be used in more extreme conditions and can be wider than 3.3 millimeters. This chain reduces the friction that is produced between the chain and the sprockets during rough paddling..
2. Derailleur Chains (Multi-gear chains):
Compared to speed chains, Derailleur transmission allows the biker to shift from one gear to another according to the requirement of the ride. As it needs to shift from one gear to another there is very little spacing between the different gears and the chains for derailleur transmission are narrower compared to one-speed chains? The links of the Derailleur are much longer than the links of a single-speed chain. Each link is half an inch or around 12.7 mm in length and this length is standard in all derailleur chains.
As the majority of manufacturers make their transmission to fit this standard chain size. 12 gears mountain bike will have the narrowest chain of all at 5.3 mm. An 11 gears mountain bike has a chain width of 5.5 mm, 10 gears mountain bike will have a chain width of 6 mm. Meanwhile, a mountain bike with 9 gears will have a chain width of around 7 mm. Similarly, bikes with less than 8 gears will usually have a 7mm wide chain since there is not a lot of spacing between the gears below the 9-speed transmission.
While buying the chain choose the correct width chain for your mountain bike. Apart from that you also have to pay attention to the front sprocket that is attached to the paddle along with the rear cassette. As it will shift from one sprocket to the other in the front crankset when the gears are shifted, so the chain’s width should be according to the spacing between the sprockets at the front crankset to prevent the chain from getting stuck in the space between the sprockets.
Mountain bike chain sizes
Before diving into size let’s discuss Does bike chain size matters? How do I know what size chain to get? Yes, mountain bike chain comes in different size including 10 speed, 9 speed, 6/7/8 speed, and single-speed specific. As they are designed for different purposes and the size of their gears is also different to tackle the specific type of riding. The size of the chain of your mountain bike depends on the kind of riding it is designed to handle.
For example, if you have a mountain bike specifically designed for climbing then the size of its gears will be larger to make the climb easier. Likewise, if you have a downhill mountain bike its gears will be smaller to allow the rider to paddle faster when going downhill because a smaller gear can spin faster. Thus, the length of the chain plays a vital role while riding on a trail. It is also said that the smaller gears will be shorter than the ones with bigger gears. As the longer chain will increase the risk of chain dropping, while too short a chain puts too much stress on the drive train, or can damage it if it can be put and closed over the chain rings in the first place.
When should you replace a mountain bike chain?
As you amass miles on your bike’s drivetrain components (chain, crank, cassette, derailleurs) your chain starts to elongate & deteriorate. While riding the bike you are not only stretching the chain lengthwise but you are also flexing and wearing the chain’s side plates. As a result, the chain’s ability become wearer to shift as sharply as it once did as well as increases wear to your cassette, chainrings, and derailleur pulley wheels.
If your gears start slipping and jumping regularly, this could be a sign of a chain on its way out. As we already know that the bike’s drivetrain is made up of metal and this metal breaks down and wears with increased mileage. Compared to another new chain these worn chain increases the amount of wear and tear on the supplementary parts of the drivetrain. So like another part of the bike, the pieces of your drivetrain are meant to smoothly mesh together, once too much wear sets in it becomes much harder to impossible for this synergy to happen. If you want to have a smooth ride then replacing your chain more frequently you are maximizing the life of the drivetrain of your bike, saving you a bunch of money over time.
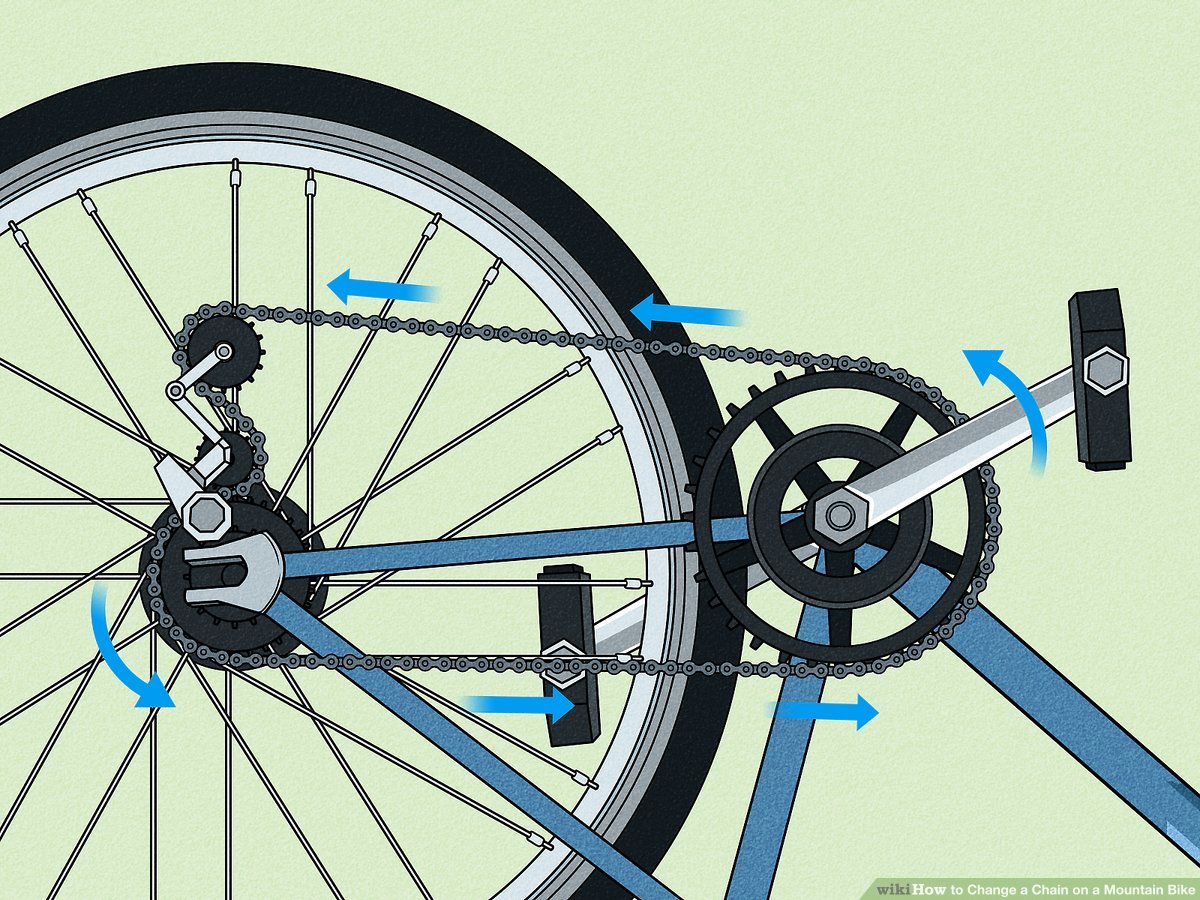
Figure Credit: wikihow.com
While changing the chain on your bike, compare the length of the new and old chain. While comparing make sure both of the chains match the rivets. In case you don’t have the original chain or it’s the wrong size, use the largest cog and chainrings to find the cutting point on the new chain. After that count the number of teeth in the chain ring and sprocket, as well as to measure the length of the chain stay, you can determine how long the chain should be. Here are some basic steps while changing the chain on your bike.
1. Threading the new chain
During the process of changing the bike chain, the first step is to focus on the smallest sprocket and chain ring. Then thread the new chain through the front derailleur and turn the cranks, leaving a few inches of chain hanging loose. As you thread the chain then loop it over the rear cassette and round the upper jockey wheel. Be careful what the loop must do before carefully threading it through the cage and around the lower wheel.
2. Size and cut your new chain
After checking the size, check for the new chain, and with the chain placed around the smallest sprocket and chain ring; pull both ends to meet below the chain stay. While choosing the new chain make sure to look for the longest possible length which still generates some movement in the derailleur arm. If you’re adding in a quick link, remember to remove one extra link to make space for a new link. Make sure you are left with two inner links, one at either end. When you have the right length, using the chain tool split the chain.
3. Insert the pin and connect the new chain
As you thread and cut your new chain next you have to do is locate the sharp end of the pin that came with your new chain. Then with the help of a hand slot together both ends of the chain and insert the connector links. In case you are not with a quick link, line both the inner and outer links and thrust the pointy end of the pin through the chain. While removing the wind through the rest of the pin and ensuring the pointy end of the pin is completely through the chain. Using a set of pliers, break off this part of the pin.
4. Maintaining a healthy bike chain
Everything needs to be clean and dry, which will long last your chain. So make sure that you have to do regular cleaning and lubing your bike chain, it is the best way to prolong its life. We stock a great range of bike maintenance products, including bike chain lube, bike grease, and brake oil to ensure all your bike’s moving parts are in tip-top condition. Cleaning the chain on your bike doesn’t take very long and is relatively inexpensive, but the impact it has on performance is huge. We recommend using both a chain cleaner and lubricant for the best results – both of which can be found at Halfords.
How much a mountain bike chain cost?
Mountain bike chains don’t last forever, and you’ll require to go to the local bike shop to acquire a fresh one. If you are curious about how much they cost then here we will help you. The average cost/price of an entry-level chain can start off around $15.00 with more expensive and higher performance chains ranging from $25.00 to $60.00 or more. The higher quality chains are thinner, the last longer, resist corrosion, and are lighter compared to other chains. They are generally more durable and increase shift quality. To replace the new chain the shop also costs you some money.
Generally, many shops charge you a price that ranges from $15 to $20 to install a chain or you can purchase a chain tool for $10 to $50 and learn to do it yourself. Yes having a chain tool in your toolbox is never a bad idea in any case. Professional cyclists need to have the best and most innovative equipment to compete, and so they’ll ride with the most expensive and best chains. For the rest of us, a reasonably priced chain will work just fine.
How many miles does a bike chain last?
The bike chain will last for different mileage for every rider. Thus, it is hard to say that a bike chain will last for X miles, because of the many factors that lead to chain wear. Many articles have mentioned that they advise replacing the chain anywhere from 750 miles to 2,000 miles to 5,000 miles. Adding to bike chain duration it depends upon the weather conditions, rider’s weight, trail, and many more.
Thus, checking the bike chain after the first 500 miles is a good step, and then every 250 miles afterward. To check you might need the tool it takes longer to get the tool than it does to check the chain’s wear. It is important to keep an eye on your chain because if a chain is too worn it can wear out the other parts of your bike.
How do you maintain your chain?
Every rider wants that their mountain bike chain lasts long. To last long, it needs proper maintenance in the first place. Aside from increased longevity, a clean, well-oiled chain can make a noticeable difference to drivetrain performance, resulting in quieter, smoother pedaling and gear shifts, and reduced friction. In the market, there are several chain-cleaning tools that help thoroughly clean mud, old oil, and grit from the chain.
It removes those muds by running them through a series of brushes and degreaser fluid. In case you are below budget for a specific cleaner, you can always use an old toothbrush and some basic degreaser to scrub the ingrained grime from the chain. Once your chain is clean and shiny, don’t forget to lube up. Likewise, the good chain oil is inexpensive and there are many options, including biodegradable green oils.

Figure Credit: cyclingtips.com