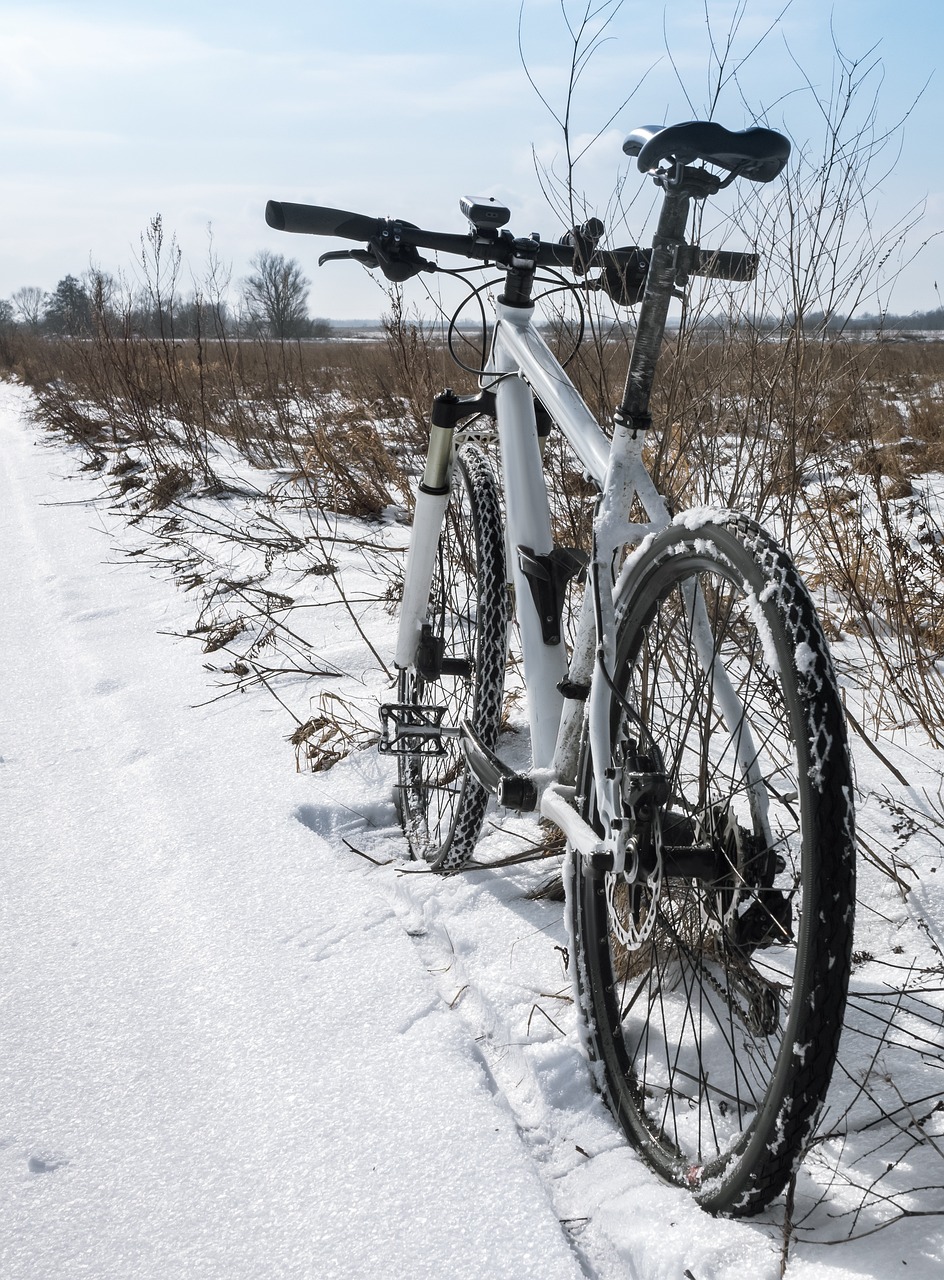
Tubeless Tyres for Cycle – Benefits, Installation, and Maintenance Guide – Understanding the Advantages of Tubeless Tyres
Cycling has come a long way in recent years, with advances in materials, aerodynamics, and tire technology revolutionizing the sport. One such innovation that has gained significant popularity among cyclists is tubeless tires. In this blog post, we will explore the advantages and benefits of tubeless tires, as well as discuss their role in shaping the future of cycling technology.
Advantages of Tubeless Tyres for Cyles
1) Reduced Risk of Punctures
One of the primary advantages of Tubeless Tyres for Cycle is their ability to significantly reduce the risk of punctures. Unlike traditional clincher tires that require an inner tube, tubeless tires are constructed with an airtight seal between the tire and the rim. This eliminates the possibility of pinch flats caused by pinching the tube against the rim during impact, resulting in a more reliable and puncture-resistant cycling experience.
2) Lower Rolling Resistance
Tubeless tires allow for lower rolling resistance, requiring less effort to maintain speed. The absence of an inner tube reduces friction between the tire and the tube, resulting in improved efficiency and enhanced performance. This advantage is particularly valuable for road cyclists and competitive riders who strive for maximum speed and efficiency.
3) Improved Traction and Control
Tubeless Tyres for Cycle allows better traction and control on a variety of surfaces and they can be operated at lower pressures . By allowing riders to customize tire pressure based on terrain and conditions, tubeless tires enhance grip and stability, especially when cornering, descending, or riding on uneven surfaces. This increased control contributes to a safer and more enjoyable riding experience.
4) Enhanced Comfort and Ride Quality
The absence of an inner tube in tubeless tyres for cycle allows for a more supple tire construction. This suppleness translates to increased comfort and improved ride quality, as the tires can absorb vibrations and road imperfections more effectively. The result is a smoother and more enjoyable cycling experience, reducing fatigue during long rides or challenging terrains.
Benefits of Tubeless Tyres for Cycle
Self-Sealing Technology
Tubeless tyres for cycle are equipped with a self-sealing technology that can seal punctures on the go. When a small puncture occurs, the sealant inside the tire fills the hole and creates an airtight seal, preventing air from escaping. This feature significantly reduces the chances of a flat tire, allowing cyclists to continue their rides without interruption. The self-sealing capability of tubeless tires provides added peace of mind, particularly when exploring remote or rugged terrains.
Weight Reduction
Tubeless tires typically weigh less than their traditional counterparts, thanks to the elimination of the inner tube. Reduced weight results in improved acceleration and maneuverability, making it easier for cyclists to climb hills or accelerate quickly. Lighter wheels can also contribute to a more responsive and agile ride, enhancing overall performance.
Versatility and Compatibility
Tubeless tire technology is available for a wide range of cycling disciplines, including road cycling, mountain biking, and gravel riding. With various tire widths and tread patterns to choose from, tubeless tires offer versatility to match different terrains and riding styles. Additionally, most modern rims are compatible with tubeless tires, making it easier for cyclists to transition to this technology without requiring extensive equipment upgrades.
The Future of Cycling Technology
Tubeless Tyres for Cycle represents just one aspect of the broader evolution of cycling technology. As the cycling industry continues to push boundaries, we can expect further advancements aimed at improving performance, safety, and rider experience. Innovations such as smart sensors embedded in tires, enhanced puncture-resistant materials, and even self-inflating tire systems may soon become a reality. With the constant pursuit of efficiency and innovation, the future of cycling technology is undoubtedly an exciting prospect.
The Process: How to Install Tubeless Tyres on Your Bicycle
Tubeless tyres for cycle offer numerous advantages to cyclists, from reduced puncture risk to improved traction and comfort. If you’re ready to upgrade your bike to tubeless tyres, it’s essential to understand the installation process. In this guide, we will walk you through a step-by-step process for installing tubeless tyres on your bicycle, along with the necessary tools needed for a successful installation.
Tools Needed for Tubeless Tyre Installation: Before you begin the installation process, gather the following tools:
Tubeless Tyres: Purchase tubeless-specific tyres designed to work without an inner tube. These tyres feature a bead and construction suitable for tubeless setups.
Tubeless Rim Tape: Use tubeless-specific rim tape to seal the spoke holes and create an airtight seal on the rim bed. The width of the tape should match the internal width of your rims.
Tubeless Valves: Install tubeless valves to create an airtight passage between the tyre and the outside air. These valves feature a removable core to facilitate the injection of sealant.
Sealant: Choose a tubeless sealant compatible with your tyres and riding conditions. The sealant helps seal punctures and prevents air leakage.
Floor Pump or Air Compressor: You’ll need a pump or air compressor capable of delivering a strong burst of air to seat the tyre bead onto the rim.
Tyre Levers: Use plastic or nylon tyre levers to ease the process of removing and installing the tyre.
Step-by-Step: Tubeless Tyres for Cycle Installation Process
1. Remove the old tyre and tube: Start by deflating the tyre and removing it from the rim using tyre levers. Remove the old inner tube as well.
2. Clean and inspect the rim: Thoroughly clean the rim bed using soap and water to remove any dirt or debris. Inspect the rim for any damage or sharp edges that could damage the tyre.
3. Apply the rim tape: Begin applying the tubeless rim tape to the rim bed, starting at the valve hole. Ensure the tape covers all the spoke holes, making a complete and airtight seal. Trim any excess tape if necessary.
4. Install the tubeless valve: Insert the tubeless valve, ensuring it is securely in place. Tighten the valve nut to secure it, but avoid over tightening.
5. Mount one side of the tyre: Start by mounting one side of the tyre onto the rim, starting opposite the valve. Use your hands to push the bead of the tyre onto the rim, working your way around.
6. Add sealant: Using the recommended amount of sealant, pour it into the tyre through the valve. Make sure the valve core is removed or unscrewed to allow the sealant to flow freely. Replace the valve core once the sealant is added.
7. Mount the other side of the tyre: Carefully mount the remaining side of the tyre onto the rim. Start opposite the valve and work your way around, using your hands to push the bead onto the rim. Avoid using tyre levers at this stage to prevent damaging the tyre or rim.
8. Inflate the tyre: Using a floor pump or air compressor, inflate the tyre to a higher pressure than usual. This helps seat the tyre bead onto the rim. If the tyre fails to seat, you can use a tyre lever to help, but exercise caution to avoid pinching or damaging the tyre.
9. Check for leaks: After the tyre is inflated, spin the wheel and listen for any leaks. Check for air bubbles around the rim or tyre. If leaks are detected, rotate the wheel to ensure the seal.

Maintenance Tips and Safety Tips: Tubeless Tyres for Cycle
Once you have successfully installed tubeless tyres on your bicycle, it’s important to maintain them properly to ensure long-lasting performance and safety. In this guide, we will provide you with essential maintenance tips to prevent punctures, check and maintain proper air pressure, and maximize the lifespan of your tubeless tyres.
1. Preventing Punctures
a. Sealant Check: Regularly inspect the sealant in your tubeless tyres. Over time, sealant can dry out or become less effective. Shake the wheel gently to redistribute the sealant and periodically add more as needed. Follow the manufacturer’s recommendations for sealant lifespan and replacement.
b. Tubeless-Specific Sealant: Use a sealant specifically designed for tubeless tyres. These sealants are formulated to quickly seal punctures and maintain the airtight integrity of the tyre. Check the sealant’s effectiveness by intentionally introducing small punctures and ensuring they seal properly.
c. Avoid Obstacles: When riding, be mindful of potential puncture-causing obstacles such as sharp rocks, glass, or thorns. Whenever possible, steer clear of these hazards or navigate around them carefully.
d. Tyre Pressure: Maintaining the recommended tyre pressure helps prevent pinch flats and reduces the risk of punctures. Keep your tyres inflated to the manufacturer’s recommended pressure range for optimal performance and puncture resistance.
2. Checking and Maintaining Proper Air Pressure
a. Regular Pressure Checks: Make it a habit to check your tyre pressure before every ride. Use a reliable pressure gauge to ensure accurate readings. Low pressure increases the risk of pinch flats, while excessive pressure can negatively impact grip and ride quality.
b. Adjust for Terrain and Riding Conditions: Consider adjusting your tyre pressure based on the terrain and riding conditions. Lower pressure provides better traction and control on rough or off-road surfaces, while higher pressure improves rolling efficiency on smooth pavement.
c. Be Mindful of Temperature Changes: Tyre pressure can be affected by temperature fluctuations. Check your tyre pressure more frequently during extreme weather conditions, as cold weather can cause pressure to drop, while heat can lead to increased pressure.
d. Carry a Pump or CO2 Inflator: Always carry a compact pump or CO2 inflator on your rides to adjust tyre pressure if needed. This is especially important for long rides or when riding in areas with limited access to air sources.
3. Regular Inspections and Maintenance
a. Visual Inspections: Before each ride, visually inspect your tubeless tyres for any signs of damage, cuts, or wear. Inspect the sidewalls, tread, and sealant to ensure everything is in good condition.
b. Cleanse and Wipe: Occasionally clean your tubeless tyres to remove debris, mud, or sealant buildup. Use a mild soap and water solution, along with a soft brush or cloth, to gently clean the tyres. Wipe them dry before reinstalling them on your bicycle.
c. Spoke Check: Periodically inspect the spokes on your wheels to ensure they are properly tensioned and secure. Loose or damaged spokes can lead to improper wheel alignment, affecting tyre performance.
d. Professional Check-ups: Consider taking your bicycle to a professional bike shop for periodic maintenance and check-ups. They can perform more in-depth inspections, truing of the wheels, and ensure that all components, including the tubeless system, are functioning optimally.
Regularly check and maintain proper air pressure, prevent punctures through sealant checks and careful riding, and conduct visual inspections and cleaning.

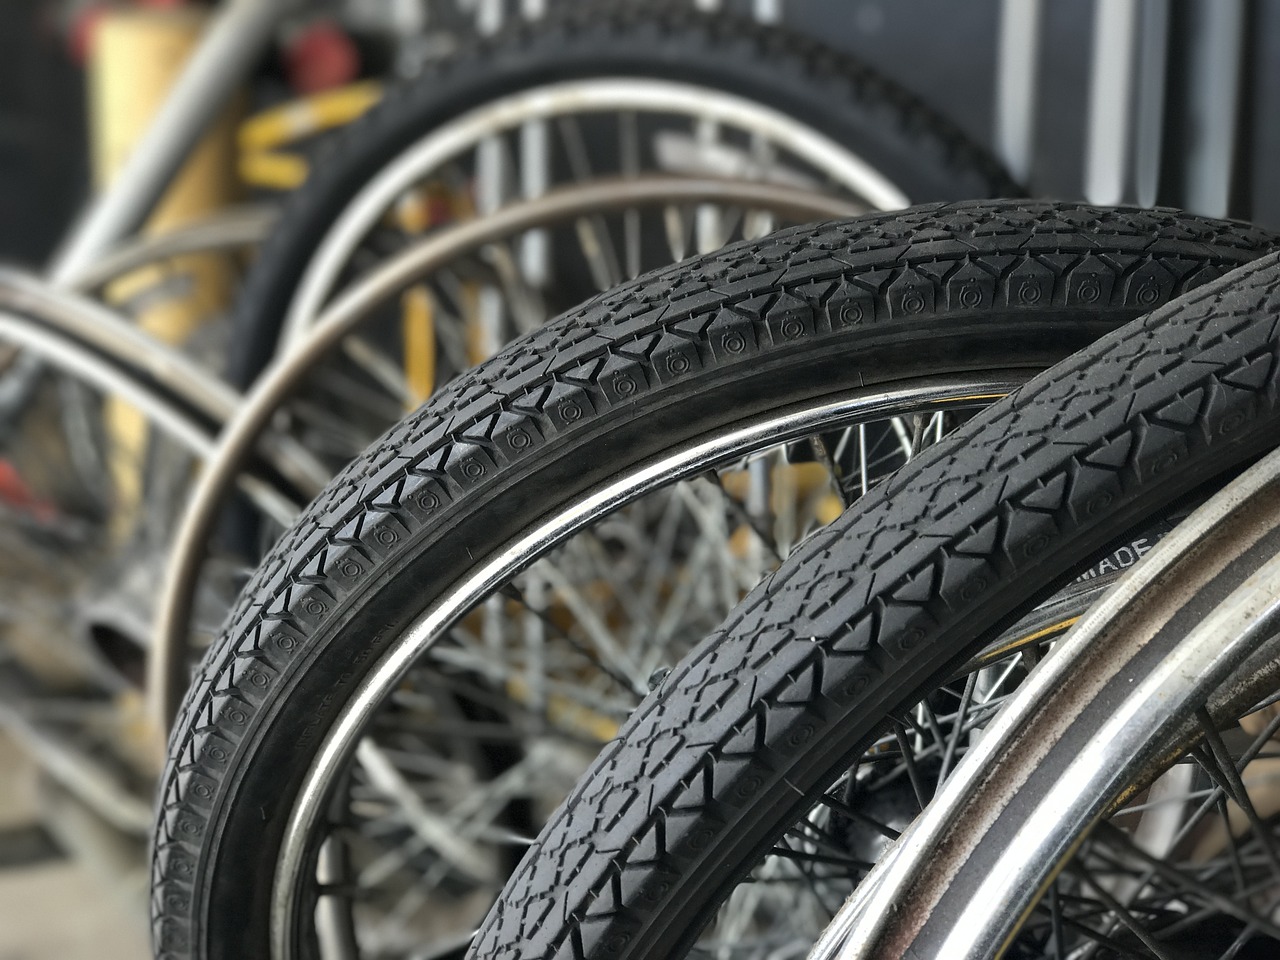
Tube vs. Tubeless: A Comparison to Help You Make an Informed Decision
When it comes to bicycle tyres, riders have a choice between traditional tube tyres and the newer tubeless technology. Both options have their own set of advantages and considerations. In this article, we will compare tube and tubeless tyres, highlighting the key differences and discussing the pros and cons of each.
Tube Tyres
Tube tyres have been the traditional choice for bicycles for many years. They consist of an outer tyre and an inner tube that holds the air pressure.
Pros of Tube Tyres
1. Cost: Tube tyres are generally less expensive than their tubeless counterparts, making them a more budget-friendly option.
2. Simplicity: Mounting a tube tyre is relatively straightforward, and repairing a puncture is usually a quick and simple process
3. Availability: Tube tires are widely accessible and work with a variety of bicycles and wheel rims.
Cons of Tube Tyres
1. Puncture Risk: Tube tyres are more prone to punctures, especially pinch flats caused by pinching the inner tube against the rim. This can be a concern, particularly when riding on rough or challenging terrains.
2. Higher Rolling Resistance: The inner tube creates additional friction, resulting in slightly higher rolling resistance. This can impact speed and efficiency, particularly for competitive riders.
Tubeless Tyres for Cycle
Tubeless tyres have gained popularity in recent years, offering several advantages over traditional tube tyres. They do not require an inner tube because the tyre and rim are air tightly sealed.
Tubeless tyres have gained popularity in recent years, offering several advantages over traditional tube tyres. They do not require an inner tube because the tyre and rim are air tightly sealed.
Pros of Tubeless Tyres
1. Reduced Puncture Risk: Tubeless tyres for cycle significantly reduce the risk of punctures, as there is no inner tube that can be pinched or punctured. The sealant inside the tyre can also seal small punctures on the go, allowing you to continue riding without interruption.
2. Lower Rolling Resistance: Without an inner tube, tubeless tyres for cycle have lower rolling resistance. This means less effort is required to maintain speed, leading to improved efficiency and better overall performance.
3. Improved Traction and Control: Tubeless tyres for cycle can be run at lower pressures, providing better traction and control. Lower pressures allow the tyre to conform to the terrain, enhancing grip and stability, especially on uneven surfaces or during cornering.
4. Enhanced Comfort: Tubeless tyres for cycle offer a more supple ride due to their construction, which absorbs road vibrations and impacts more effectively. This translates to increased comfort and reduced fatigue during long rides.

You can get this tubeless tyres for cycle rim at The Local Bike Shop for $115.00 ! Order ONLINE!
Cons of Tubeless Tyres for Cycle
1. Initial Setup Complexity: Mounting and sealing tubeless tyres can be more challenging and time-consuming compared to traditional tube tyres. It requires specific rim and tyre compatibility, as well as the use of sealant and tubeless-specific components.
2. Maintenance: Tubeless tyres require periodic inspection of the sealant and may need the addition of more sealant over time. The sealant can also dry out or become less effective and may need replacement.
3. Equipment and Compatibility: Transitioning to tubeless tyres may require purchasing new rims, tyres, and tubeless valves, adding to the initial investment. Not all rim and tyre combinations are compatible with tubeless setups, so it’s essential to check compatibility before making the switch.
Choosing between tube and tubeless tyres ultimately depends on your riding preferences, budget, and terrain. Tube tyres are cost-effective and easy to repair, but they come with a higher risk of punctures and slightly higher rolling resistance. On the other hand, tubeless tyres offer reduced puncture risk, lower rolling resistance, improved traction, and enhanced comfort, but they require a more involved initial setup and ongoing maintenance.
Issues with Tubeless Tyres for Cycle and How to Fix Them
Tubeless tyres offer numerous advantages to cyclists, but like any bicycle component, they can encounter issues from time to time. In this guide, we will discuss common problems with tubeless tyres and provide a troubleshooting guide to help you fix punctures or leaks and keep your tubeless system running smoothly.
1) Puncture or Leak
Issue: Punctures or leaks can occur when sharp objects penetrate the tyre or when the sealant fails to seal a puncture.
Solution:
Sealant Replenishment: If you experience a small puncture that the sealant has failed to seal, rotate the wheel to move the sealant around the puncture. This may be enough to seal the hole. If not, remove the valve core and add more sealant through the valve.
Plug or Patch: For larger punctures or cuts, use a tubeless tyre plug or patch kit. Insert the plug into the hole, ensuring it creates an airtight seal. If using a patch, clean the damaged area, apply the patch according to the manufacturer’s instructions, and ensure it adheres firmly.
Tire Boot: If you encounter a sidewall cut or tear, a temporary fix is to apply a tire boot to the inside of the tyre. Cut a piece of a tire boot (e.g., a section of an old tyre or a commercially available boot), and place it over the damaged area before remounting the tyre.
2) Difficulty Seating the Bead
Issue: The tyre bead refuses to seat properly onto the rim, making it difficult to inflate the tyre.
Solution:
Lubrication: Apply a small amount of soapy water or a tubeless-specific bead lubricant to the tyre bead and rim interface. This reduces friction and helps the tyre slide onto the rim more easily.
Compressed Air or Air Compressor: Use a high-volume floor pump or an air compressor to deliver a strong burst of air into the tyre. Be sure to monitor the pressure and release the air if the tyre fails to seat to avoid damaging the tyre or rim.
Bead Jack: If all else fails, a bead jack can assist in pushing the tyre bead onto the rim. This tool applies even pressure around the circumference of the tyre, helping to seat the bead.
3) Loss of Air Pressure
Issue: The tyre loses air pressure over time, affecting performance and ride quality.
Solution:
Check for Leaks: Inflate the tyre to the recommended pressure and inspect for any air bubbles or hissing sounds. Submerge the tyre in a bucket of water or use a spray bottle with soapy water to identify the location of the leak. Once found, mark the spot for repair.
Valve Check: Ensure the tubeless valve is securely tightened and the valve core is properly seated. If there is any air leakage around the valve, tighten it further or replace the valve if necessary.
Sealant Inspection: Check the sealant levels and condition. If the sealant is low or dried out, add fresh sealant following the manufacturer’s instructions. Shake the wheel to distribute the sealant evenly.
4) Rim Damage or Tape Failure
Issue: Rim damage or tape failure can lead to air leakage and affect the tubeless system’s performance.
Solution:
Rim Inspection: Thoroughly inspect the rim for any sharp edges, burrs, or damage that could compromise the seal. If necessary, file or smooth out any imperfections to create a better sealing surface.
Rim Tape Replacement: If the rim tape is damaged or fails to create an airtight seal, remove the old tape . Install new tubeless-specific rim tape, ensuring it covers the spoke holes and creates a secure seal.
With proper troubleshooting techniques, many common issues with tubeless tyres for cycle can be resolved effectively. By following the recommended solutions for punctures or leaks, difficulty seating the bead, air pressure loss, and rim damage, you can ensure your tubeless system performs optimally, providing a smooth and reliable riding experience. Remember to always carry a tube or tubeless repair kit on your rides for quick fixes and peace of mind.
Conclusion: Embracing the Future – Enjoy a Smoother Ride with Tubeless Tyres
Tubeless tyres for cycle have revolutionized the cycling industry, offering numerous advantages and an improved riding experience. By eliminating the inner tube and utilizing sealant to seal punctures, tubeless tyres provide increased puncture resistance, lower rolling resistance, improved traction, and enhanced comfort.
While there may be initial challenges in setting up and maintaining tubeless tyres for cycle, the benefits far outweigh the inconveniences. With proper troubleshooting techniques, you can easily overcome common issues such as punctures, difficulty seating the bead, air pressure loss, and rim damage.
By embracing tubeless technology, you can enjoy a smoother ride on various terrains, with reduced risk of punctures and enhanced control. Tubeless tyres for cycle offer the potential for faster speeds, improved efficiency, and a more enjoyable cycling experience overall.
As cycling technology continues to advance, tubeless tyres for cycle represent a significant step forward in tire performance and reliability. They have become the go-to choice for many cyclists, from recreational riders to professional athletes, and are likely to become even more prevalent in the future.
So, make the switch to tubeless tyres for cycle and embrace the future of cycling. Experience the benefits of increased durability, improved traction, and enhanced performance. With proper installation, maintenance, and troubleshooting, you’ll be well on your way to enjoying a smoother and more enjoyable ride with tubeless tyres.